






 Posts


After some disappointing attempts to recreate the Sun Moulin's Mochi bread/puff or whatever, I need to take my mind off it for a while to re-gain my sanity. I realised I forgot to document 2 of my ice cream recipes. Eheh.. too preoccupied.
Like all kids, my daughter loves ice cream and that motivated me to make them.. *Silence...* Okay, I confess, I love ice cream too, that's why I make them. :P
The basic recipe has been with me for quite a number of years but I have no intention of making because the freezer at my mom's is always FULL. Now, having my own place, my freezer too, is almost full, most of the time. I guess moms are the same when it comes to feeding their children. The whole fridge is full of food or ingredients to churn out a decent meal for kids.
I had 2 egg yolks left after baking Banana Chiffon Cake so I decided to make some ice cream for myself. My favourite flavour would be Rum and Raisins, so be it. *Hic..*
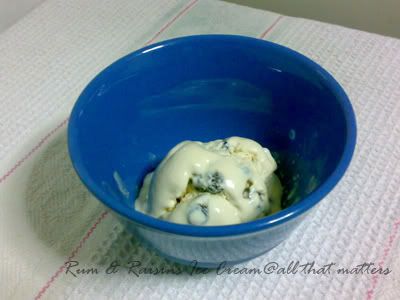
Ingredients
(A)
4 egg yolks
4 tbsp fine sugar
1 tsp cornflour
(B)
150ml UHT milk or fresh milk
150ml dairy whip cream
(C)
250ml non dairy whip cream
(D)
50g dark rum
80g raisins (soaked in rum overnight)
Method
1) In a mixing bowl, whip (C) till stiff peak, refrigerate for later use.
2) In a steel bowl, using a hand whisk, beat (A) till pale.
3) In a pot, bring (B) to a simmer and pour into (A) in a steady stream, whisking constantly.
4) Using double-boil method, whisking the mixture constantly and cook the custard till thicken.
5) Cool the custard by plunging the bowl over a cold water bath, whisk the custard. (I did this because I was impatient.)
6) Fold in whipped non dairy cream into the mixture, add rum, raisins and mix well.
7) Pour into a 1.5 litres clean plastic container and freeze for 5 to 6 hours.
8) Remove from freezer and whisk till smooth and creamy. Return to container and freeze overnight or till set.
*Note : I use double boil method because I was afraid I might ended up with scrambled eggs. This method is slower. To speed up, you can also use direct heat to cook the custard but you need use low heat.
**Note : You can also use blender for step (8), but add the raisins only after you blend the ice cream.
***Note : Although very tempting for alcoholics like me, do not attempt to add more rum than necessary. The ice cream will not set properly. I know, I tried it. But it's a great idea to drizzle more rum on it when you serve though. *grin*
Now, that wasn't that difficult, was it?? ^_^ Following the steps and using ingredients (A), (B) and (C), that will be your basic ice cream recipe. The rum will mask the eggy smell. When you are not using rum, you can add 1 tsp of vanilla essence or use 1 vanilla pod. I used non dairy whip cream instead; not only it is easier to whip than dairy whip cream, it is derived from vegetable fats. Trying to make it less sinful or am I deceiving myself?? Errr... *Ahem*.. I don't want to know.
Feeling a little guilty for indulging, I made this for my girl.
Variation : Strawberry and White choco Ice cream
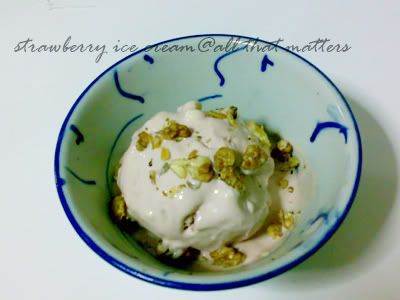
Insert 1/2 cup of strawberry puree into Ingredient (B) and reduce the milk to 100ml. Strawberries after cooking, will lose abit of its flavour, thus add 1 tsp of strawberry essence. Add in 80g of chopped white chocolate in Step (6). I was tempted to add some red colouring as the colour was quite pale, but it defit the whole idea/purpose of homemade ice cream, so I didn't.
I might experiment or recreate some other flavours in future. それじゃ~~
Like all kids, my daughter loves ice cream and that motivated me to make them.. *Silence...* Okay, I confess, I love ice cream too, that's why I make them. :P
The basic recipe has been with me for quite a number of years but I have no intention of making because the freezer at my mom's is always FULL. Now, having my own place, my freezer too, is almost full, most of the time. I guess moms are the same when it comes to feeding their children. The whole fridge is full of food or ingredients to churn out a decent meal for kids.
I had 2 egg yolks left after baking Banana Chiffon Cake so I decided to make some ice cream for myself. My favourite flavour would be Rum and Raisins, so be it. *Hic..*

Ingredients
(A)
4 egg yolks
4 tbsp fine sugar
1 tsp cornflour
(B)
150ml UHT milk or fresh milk
150ml dairy whip cream
(C)
250ml non dairy whip cream
(D)
50g dark rum
80g raisins (soaked in rum overnight)
Method
1) In a mixing bowl, whip (C) till stiff peak, refrigerate for later use.
2) In a steel bowl, using a hand whisk, beat (A) till pale.
3) In a pot, bring (B) to a simmer and pour into (A) in a steady stream, whisking constantly.
4) Using double-boil method, whisking the mixture constantly and cook the custard till thicken.
5) Cool the custard by plunging the bowl over a cold water bath, whisk the custard. (I did this because I was impatient.)
6) Fold in whipped non dairy cream into the mixture, add rum, raisins and mix well.
7) Pour into a 1.5 litres clean plastic container and freeze for 5 to 6 hours.
8) Remove from freezer and whisk till smooth and creamy. Return to container and freeze overnight or till set.
*Note : I use double boil method because I was afraid I might ended up with scrambled eggs. This method is slower. To speed up, you can also use direct heat to cook the custard but you need use low heat.
**Note : You can also use blender for step (8), but add the raisins only after you blend the ice cream.
***Note : Although very tempting for alcoholics like me, do not attempt to add more rum than necessary. The ice cream will not set properly. I know, I tried it. But it's a great idea to drizzle more rum on it when you serve though. *grin*
Now, that wasn't that difficult, was it?? ^_^ Following the steps and using ingredients (A), (B) and (C), that will be your basic ice cream recipe. The rum will mask the eggy smell. When you are not using rum, you can add 1 tsp of vanilla essence or use 1 vanilla pod. I used non dairy whip cream instead; not only it is easier to whip than dairy whip cream, it is derived from vegetable fats. Trying to make it less sinful or am I deceiving myself?? Errr... *Ahem*.. I don't want to know.
Feeling a little guilty for indulging, I made this for my girl.
Variation : Strawberry and White choco Ice cream

Insert 1/2 cup of strawberry puree into Ingredient (B) and reduce the milk to 100ml. Strawberries after cooking, will lose abit of its flavour, thus add 1 tsp of strawberry essence. Add in 80g of chopped white chocolate in Step (6). I was tempted to add some red colouring as the colour was quite pale, but it defit the whole idea/purpose of homemade ice cream, so I didn't.
I might experiment or recreate some other flavours in future. それじゃ~~


