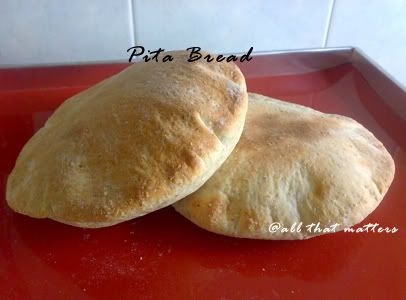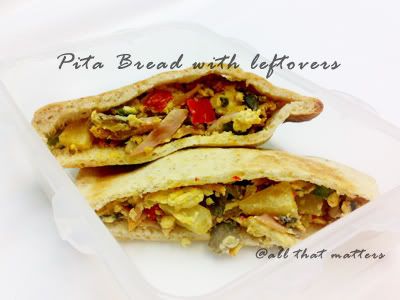
Pita bread is also known as '口袋面包'. According to Wikipedia, it has its origin from the Middle East and Mediterrenean. It is an interesting bread. When you cut it in half, it is hollow and you can put in your choice of stuffings. Good alternative for making sandwich. I used to wonder how they make these breads. So it is a good idea to attempt it when my mom went around searching for frozen pita bread. I volunteered to make some for her.
I did a 'Google' and arrived at the recipe from The Fresh Loaf. I would recommend this recipe to a first-time bread baker. It couldn't be simpler. The steps and explanations were clear. However, the ever-itchy-handed me, used bread flour and went to replace a cup of flour with wholemeal flour. I shouldn't have done that because I need to know the texture of the dough using the original recipe before doing any modification. The dough was too soft to handle, well, in my opinion. I had to add another cup of flour. This is what I did.
Pita Bread (makes 8)
Ingredients
3 Cups Bread Flour
1 Cup Wholemeal Flour
2 Tsp Instant Yeast
1-1/2 Tsp Salt
1 Tbsp Honey
2 Tbsp Olive Oil
1-1/2 Cup Water
Method
1) In a mixing bowl, mix all the dry ingrdients. Add in honey, olive oil and 1 cup of water.
2) Using a dough hook, knead the dough at low speed. Add the remaining water slowly, till it form a smooth dough, about 10 mins.
3) Roll the dough into a ball and place it in a bowl coated with oil. Cover the bowl with a cling wrap or damp cloth and leave aside to proof for 90 minutes or when it has doubled its size.
4) Divide the dough into 8 pieces and roll each piece into a ball. Leave aside to rest for 20 mins, covered with a damp cloth.
5) Preheat the oven to 220 deg,C. Line 2 baking trays with greaseproof paper (mine was 10 x 14 inch).
6) On a lightly floured surface, flour the top of the dough and rolling pin. Roll out the dough thinly into rounds.
7) Transfer the pitas onto the baking trays and pop them into the oven. Bake for 3 to 4 mins, longer if you want them browned and crisp. They will puff up very nicely like UFOs. Alternatively, you can cook them over the stove, something which I have not tried.
*Note : It is important to preheat the oven or there will be difficulty for the bread to puff up.
I did this for my lunchbox. Like I said before, it's a great way to make use of leftovers. Maybe you can even stuff '梅菜扣肉' (braised pork belly with preserved vegetables) for that Asian twist. Ahahaha~~ Hopefully, I will be making pita breads again soon. Having baked them brown, I feel that the texture was not satisfactory, probably overbaked them. Perhaps I should take them out of the oven once they puffed up nicely. Hmm...
じゃね~~
Super Easy, Super Moist Chocolate Cupcakes
5 years ago


No comments:
Post a Comment