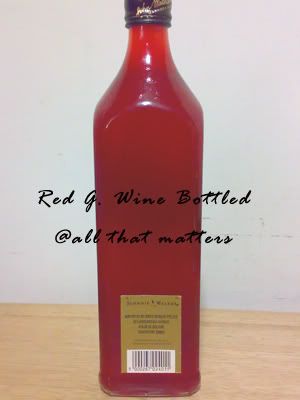
They look pretty, don't they? That is why I call them Red Gems. I hope I have captured the clarity/beauty of it before giving them or consuming them. I showed off my wine and wine lees to my aunts like a proud parent and they wanted to have some too. I promised them that I will make for them. So I used the remaining 1.5kg of glutinous rice that I have. This batch of Red Glutinous Rice Wine actually gave me a scare. I thought I had to throw away the entire batch away and start anew.
Ingredients
1.5 kg Glutinous Rice (糯米) – weighed before cooking
180g Red Yeast (红糟) – blend into fine powder
1-1/2 pc Wine Yeast (酒饼)– mash into fine powder
2 Tbsp Sugar (糖)– optional
For preparation and method, please refer to here. The only difference is that I did not mix the ingredients together. Instead, I tested out with the method stated here, by alternating layers of cooked rice, red yeast and wine yeast. I wrapped a potato masher with plastic bag to help me push down the rice. It is much, much easier! No more struggling with sticky gloves!
I find that the fermentation progress for layering method is slightly slower than the previous method. For my previous batch, by the end of day 1, some wine has already started to collect at the bottom. However, for this trial, even by Day 3, the wine collected was miserable. Probably less than 1 cm. I panicked for the first 2 days as I thought this batch would not make it. The only consolation I have is that it started to smell like wine and that there are no moulds in sight. By Day 4, everything started to accelerate from there, finally, to my relief.
I was able to see alot of active bubbles. A good sign to show that it is fermenting. As there are blotches of reds (red yeast) and whites (rice) all over the place, I discussed with my parents who discouraged me from stirring the mixture. Do not fix things that are not broken, they said.
Being the same old stubborn me decided to give it a stir to see if there is any difference. I did not stir the mixture on the 7th day for my first batch.
More even, don't you think? The rice sank to the bottom again, but it will separate itself again.
I decided to harvest it on Day 28, being a Saturday night. I can finish bottling by the next day. Some of the rice fell to the bottom again during transport.
Left this on the table overnight to let the residue settle.
This batch yielded about more than 2 litres of wine and 900g of wine lees (I mixed in more wine this time). All these will be given to my mom and aunts. I have reserved 1 bottle of wine and some wine lees for Yuri when we meet up. The taste of the wine is sweet and my mom commented that the wine lees are much more fragrant than those store-bought.
Before I harvested this batch, my friend M, messaged me to say that her confinement lady commented that the wine and wine lees I gave her was good! That, coming from a confinement lady, it must be good! (self brag) Ahahaha~~ Then her friend wanted some too. Looks like I have to make another batch again.
それじゃ~~
Monday, July 7, 2008
Red Glutinous Rice Wine II
Monday, June 23, 2008
Green Apple Wine

I took a 'romantic' picture again~~ 
After 2 disappointing failed attempts of making of Starfruit wine, I gave up and tried with Green apples instead. Actually, the starfruits were not on offer at the supermarket anymore. Green apples were selling on a discount instead. This trial resulted a stronger wine than the Grape wine. Although I have added 10% of sugar of the weight of the apples, the wine was not sweet. I guess for wine making, it would be better if you use fruits that are sour to balance out with the amount of sugar to be used.
I have learnt from my failure of the Starfruit wine. I tried to be smart and reduced the sugar. My parents complained that the Grape Wine was abit too sweet for them. In the end, I had mouldy fruits on top. In all, I threw away 3kg of starfruits. Such waste! I suffered a heartache from this batch particularly.
Spot the 6-sided fruit? I added lemon rind in both batches and they went mouldy by Day 4. They were fermenting well and smelled really nice and alcoholic. I could have scooped away the mouldy part and continued with the fermentation. But I was really afraid of poisoning lah~~
So after some struggle, I threw them away (*heartache~ heartache~).
For the Green Apple Wine, I used 2kg of fruit and 200g of sugar. I put 1 layer of sliced apples and 1 layer of sugar. I saved abit more sugar for sprinkling on the top. This part I did not do it for the starfruit batches as I overlooked the importance of it. To make the condition unsuitable for moulds to grow, I covered the apple slices on top with lots of sugar.
By Day 3, there will be more bubbles. I do find that it takes a longer time than the grapes. By Day 4, the apples will start to float on the wine (sorry, no pictures).
During harvest on the 8th day, I regretted 1 thing. I should have juiced the apples and thrown in the pulp instead of slicing it. I think the fermentation process will be faster and it will be easier to extract the wine during harvest. After squeezing the content, I only yielded about 700ml of wine. Much is trapped in the slices.
After settling, there will be a layer of sediments at the bottom. I left it in the fridge and it was still bubbling. A sign that fermentation is incomplete. However, I would suggest drinking at this stage, it tastes slightly gassy, which was quite good. Best drank chilled or with ice.
I would suggest drinking homemade fruit wines as soon as possible after harvesting. Leave as little space as possible in the container as when the wine comes into contact with air, it will turn into vinegar.
じゃね~~
Thursday, June 5, 2008
Red Glutinous Rice Wine

Red glutinous rice wine, or known as 红糟酒 , has its origin from China, 福州 , Fu Zhou (alternatively pronounced as Foo Chow or Hock Chew). From my understanding, it is mainly used in confinement meals (after delivering baby). Maybe it is used in other occasions too but since I do not have any friends from the dialect group, I am unable to verify. However, to me and my mom at least, you do not need any special occasions to enjoy good food! I have been wanting to make this wine for some time but I was not confident enough to do it. After successfully making my own fruit wine, I decided to embark on this experiment. Another factor that spurred me on is; my friend M is having a baby and is due this month.
After delivery of baby, the Chinese believes that the mother needs to recuperate and get back her health by eating norishing food and resting well. The confinement period can range from 30 days, 40 days or 3 months, depending on your lifestyle. From my personal experience, I was not allowed to eat certain food like yam, tapioca, sweet potatoes, mutton, prawns, etc., for 3 months. Cold drinks are not allowed. For 30 days, I was made to sit down when drinking fluid, I was not allowed to squat or bend down to carry heavy objects. I was also encouraged to lie down instead of sitting up for long period of time. The 'no-bathing' rule was ignored by me as I couldn't imagine myself stinking in my own sweat for 30 days. For food, it is believed that due to blood loss during childbirth, the body is 'cold' and thus need 'warm' elements like ginger and wine to 'warm' the body. So that's why alot of ginger is being used for confinement food. However, it should be warned that excessive ginger in the diet may also result in breastmilk jaundice (source : from a paedtrician). Taking large amount of wine is not advisable especially when you are breastfeeding.
Back to M, she has lent me her support and advice during a very difficult time. It is my little way of showing her my gratitude. I hope both she and her baby will be in good health. Can't wait to see her baby. I would like to share the method of making this wine with you. There were alot of myths about wine making but I have learnt from this site and Gina that they are unfounded. I would like to thank Gina for her guidance along the way. During wine making, the utmost important thing is hygiene. Just make sure everything you use is sterilised and clean. I have heard people citing bathing before making or you cannot make wine when it is 'That' time of the month (for the ladies). You must do it before sunrise or when there is no sun. You must do it alone. You cannot talk when making it. I rationalised them as hygiene and debunked some of the myths.
1) You have to wash your hands thoroughly, I washed mine up to the elbows as I have to reach inside the container during preparation.
2) I made this in the morning around 11 a.m. and the weather was rather warm.
3) Without having people around, you have no one to talk to. Unless you like to talk to yourself.
4) I did talk to my helper and Ah Girl.
The recipe is not mine can be found on the link above. Below are my personal notes and I have added sugar to the recipe. From what I learnt from fruit wine making, I applied here. Sugar is food for the yeast, it makes the yeast work harder. Thus for this batch, I am very happy that it yielded 1.4 litres of wine and 450g of wine lees (not entirely dry). Basically, the wine will be ready in 21 days. You can also harvest it after 30 days. I harvested the wine on the 24th day.
Red Glutinous Rice Wine (红糟酒)
Ingredients
1 kg Glutinous Rice (糯米) – weighed before cooking
120g Red Yeast (红糟) – blend into fine powder
1 pc Wine Yeast (酒饼)– mash into fine powder
1 Tbsp Sugar (糖)– optional
Method
1) Sterilise the glass bottle (I used 2 kg container) with hot water, overturn and leave to air dry for 2 days.
2) Cook glutinous rice in rice cooker with abit more water than usual. Leave to cool down completely. You can spread out on a tray to cool down faster but you need to cover it. I cooled the rice down in the rice pot overnight in my oven, covered it with an aluminum foil, leaving a gap.
3) Wash hand thoroughly up to your elbows. Make sure they are dry. Wear plastic gloves and mix cooked rice, red yeast, sugar and wine yeast together.
4) Transfer the mixture into the glass container, press it down as much as possible.
5) When done, cover the container with a clean piece of cloth, then close the lid but not too tight. Keep in a cool, dry and dark place (I covered the bottle with newspaper and black garbage bag).
6) Open the lid slightly to release gas on alternate days. Check if there is any mould (white, yellow, green, blue or even pink). If there is mould, you have to throw away and start again (might cause poisoning). After 1 day, you will see water vapour on the side of the container, bottom will start to collect wine. As it progress, the wine will be more but will stop at a certain level.
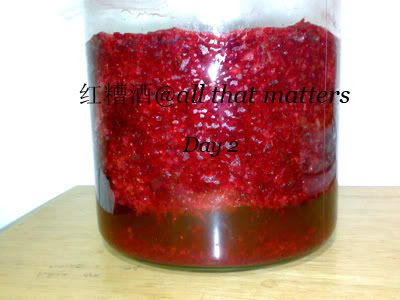
7) If there are no moulds, you can open it to give it a stir on the 7th day (remember to sterilize the ladle), or you can leave it for another 14 days or 23 days, until harvest to stir it. The mixture is quite liquidy. *Note : I forgot to stir on the 7th day, I stirred the mixture before harvest.*
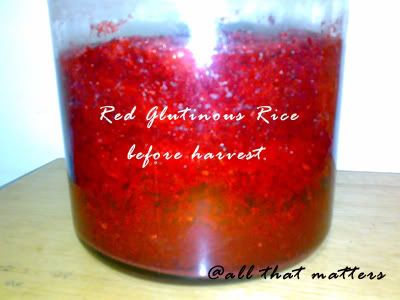
8) To harvest, use a piece of cheesecloth (baby cloth diaper – new of course) to collect the wine, tie the end with string, hang and let it drip. Collect the wine and let it settle for 1 day. The top will be clear, the bottom will have residue. Slowly pour the top portion into a clean glass bottle, or use a wine ladle and funnel to bottle it. Careful not to disturb the wine. The residue can be added to the wine residue collected on the cloth. *Note : Don't waste mah..*
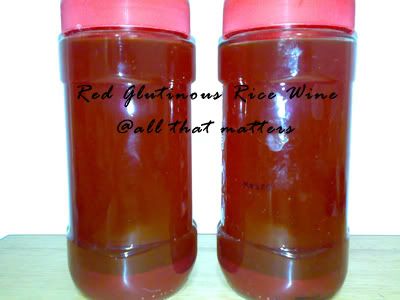
9) Collect the wine residue left in the cloth in a jar. Do not throw this away as you can use it to cook with chicken. This is the 红糟 or known as 酒糟 .
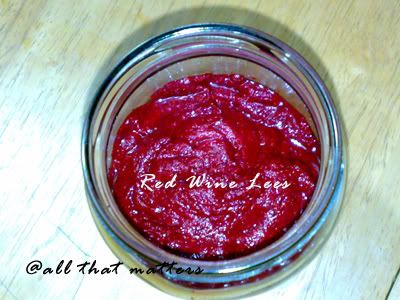
*Further notes : This is what Gina has shared with me. For commercial wine lees, they added salt for longer shelf life and to stop the fermentation. For homemade, you can leave the lees outside, it will still continue to ferment and excrete wine. For the wine, it will continue to age if you leave it outside, however, you have to keep in a cool place and for maximum of 3 months. Else it will become acidic and turn into vinegar. If it turns into vinegar, fret not and throw away not. You can make pickled ginger with it. However, if you are to add some wine lees into the wine, you can keep it out longer without spoilage. The wine will age and develop more flavour. Alternatively, just store the wine in the fridge to stop the fermentation.
I would like to highlight on the mould part. For me, once there is mould, it means something has gone bad, so I will throw away. Some arguments may say that there are good moulds present. While I do not deny that there are good moulds (like those on cheese) however, I am not a trained personnel to differentiate between good moulds and bad moulds. For safety sake, I would suggest throwing it out rather than risk food poisoning. In normal circumstance, if you did a good job on the hygiene part, mould shouldn't appear.
I hope you will find these information useful. And maybe try it out for your loved ones or beloved girl friends. I'm sure they will appreciate your effort.
それじゃ~~
PS : I'm starting another batch for my mom soon!
*Edit to add : My mom said that besides using the wine lees to stir-fry chicken, you can use it to stir-fry pork ribs or steam fish. There's another popular way of using it is cooking 红糟面线 (Mee Suah, also known as wheat flour vermicelli).
Thursday, May 8, 2008
Making Grape Wine

I love this picture most! *All pictures are taken with my humble handphone. I took these pictures at night without any natural light. Almost gave up as I could not capture the colour of the wine initially (fortunately, I didn't).
I am elated, so proud of myself.
I am like a Cheshire Cat, grinning ear to ear. Today, I am a happy person. I finally harvested my first batch of grape wine. KWF (thanks dear!) introduced me to this site by 周老师 , which is very comprehensive and detailed. I started this after my experiment on Sourdough. I did some research before embarking on this experiment (I will list them all for your further reading purposes) and am glad that everything went on smoothly.
It is rather simple actually, it is just a matter of patience and cleanliness. First, you have to ensure that the jars and utensils that you use are clean. Most importantly, scrub your hands and under your nails as well (I fall short of using disinfectant soap). I used boiling water to pour on the jars and poured away the water after it is cool to touch. I left them overturned to dry for 2 days before I used them. As for the grapes, I removed them from the stems and washed them. I laid them out to dry for a day. Discard those that are soggy, squashed or spoilt.
I used :
2.5kg of Ebony Grapes
250g of Fine White Sugar
Method :
1) Using your hand, crush the grapes on the jar. After a substantiate amount, sprinkle some sugar.
2) Crush grapes again and sprinkle sugar. Repeat the process until finish.
3) Seal the jar with cling wrap followed by the cover. Leave the container undisturbed in a cool, dry and dark place.
4) Fermentation will start and slowly dies off by the 7th day. However, mine took longer. It took 9 days. Once there are no new bubbles coming out, it is ready to harvest the wine. During fermentation, it is important that you resist the temptation of disturbing the content. You will need to open the cover slightly to release the gas on alternate days. You can smell it but nothing more. During this time, it is also important that you look out for moulds. If moulds appear, please discard the whole batch. It causes poisoning. But if you have diligently prepared and sterilised the jar, chances of moulds appearing are being reduced.


5) I used a cloth sieve to harvest the wine into 2 smaller jars. Mine yielded about 1.2 litres of grape wine. Keep refrigerated to 'age' the wine. Once the wine is settled and clear, bottle it up to about 80% of the container to minimise oxidation.
The top wine is clearer. The bottom wine will be slightly more murky as there are residue.
The following are pictures of the top wine. Very Clear, no residue.

For winos like me, the wine is on the sweet side and alcohol content isn't enough for kicks. I would prefer it to be abit drier. Perhaps I should have used 7% of sugar or no sugar instead. The grapes were rather sweet on its own already. I tasted the wine and find it quite smooth. I'll leave it in the fridge for it to develop and see how it goes. Hopefully, it won't turn into vinegar.
*Side note : IH asked why I crush the grapes by hand one by one (yes, I did that for 2.5kg of grapes, which was rather tiring). So I suggested to use my feet instead and he could have the whole harvest to himself. It's a pity that he declined.
For your further reading to understand how things work, alcohol content and bacteria and methanol poisoning. That is why I said cleanliness IS important!
http://www.home-winemaking.com/index.html
http://www.home-winemaking.com/winemaking-2a.html
http://www.madehow.com/Volume-7/Brandy.html
http://en.wikipedia.org/wiki/Moonshine
http://www.sentex.net/~bacchus/faq.html
http://www.bacteriamuseum.org/niches/features/winevinegar.shtml
それじゃ~~ *hic*