
That's Ah Boy's hand trying to grab the donuts. Must be pretty attractive to him. ^_^
Finally, I made these donuts. Ah Girl waited a good 6 months, 3 weeks and 1 day for me to make these donuts for her. It was the last thing I wanted to make for her before my water broke and had to rush to the hospital. You see, I picked up baking again when I was pregnant with Ah Boy. I thought it would be great idea to bond with Ah Girl while we 'play' in the kitchen. I know she loves donuts but I didn't want her to have too much of fried stuffs. So when I found the recipe here, I decided to bake some for her. Mainly to show her that I still love and care for her (avoid sibling rivalry and 1st born anxiety).
Ah Boy was not supposed to be due till another 3 weeks' time. While preparing the stuffs, I felt some wetness. Oh dear, I must have waited too long to go to the loo. So I went in to check. Uh oh, I was sort of leaking. Did my water broke? Not too sure. I had an induced birth when I had Ah Girl. So I told my helper, 'Never mind lah, little bit only. I bake very fast one. Also didn't feel any contractions.' She said, 'Ma'am!! Cannot bake already! Go bathe and change already! I go call Sir.' I was like, 'Tsk.. so gan cheong.. no pain what..' The contractions and pain started when I was in the bathroom. I was practically leaking all the way to my room (sorry if you find my description gross. :p). On my way to the hospital, the contractions were only 1 minute apart. So you can imagine, after I was being pushed into the delivery room, everything was 'chop chop', very fast. The epidural didn't even have enough time to take effect fully.
When I baked these on Sunday, Grace laughed remembering what happened. I thanked her for her wisdom. Ahahahah.. I might have ended up giving birth at home or the carpark if I went ahead with baking. Ah Girl, thank you for your patience. Here's the recipe which I modified slightly.
Baked Mini Donuts (yields 24 pieces)
Ingredients
240g Top Flour
70g sugar
1 tsp salt
2 tsp baking powder
180ml milk
1 egg
1 tbsp melted butter
1/2 tsp vanilla essence
Method
1) Mix flour, sugar, salt and baking powder in a bowl.
2) In another bowl, using a mixer, whisk egg till fluffy. Add butter and milk together.
3) Pour wet ingredients into flour mix. Stir to mix till it forms into a sticky batter.
4) Pour batter into donut tray (about half full).
5) Baked in the oven 180C for 10 to 12 mins.
6) Remove to cool before decorating.
*Notes : You will need to preheat the oven if you are using a conventional oven.
Ah Girl had lots of fun decorating them all. She was so proud of them, she asked me to pack some for my parents and sisters and kept pestering them to try. She makes a pretty good salesperson I think. Ahah.. I used the remaining chocolate and my new mould to make Doraemon in 3D for Ah Girl. I guess that makes her one very happy kid. :D
それじゃ~~
Monday, March 31, 2008
Baked Mini Donuts
Friday, March 28, 2008
Mochi Bread Trial
Earlier, I mentioned that I was doing some experiments, trying to replicate a particular mochi bread. The original bread might have been made using a pre-mix. A few of us who have participated in this experiment have yet to diagnose the composition of the pre-mix. These are the fruits of my labour. I have not perfected the recipe yet but there is at least some progress. I will not be doing this any time soon as I am busy with another project. I would like to put the recipes and notes down so that those who are interested can give it a try. However, be sure that I will be back to this to fine tune it. I just need a break away from this; it's no fun having to polish off most these mochi bread by yourself, no matter how nice/tasty they are. *Burp..* Ahahahah..
The above was my 4th trial. I liked the crispy texture but the shape is not quite like the original. Also, the interior is not chewy enough and is abit hollow. The picture of the original bread is posted on a fellow blogger's site. See here. I find it slightly too oily for my liking. Below are the ingredients and method. Those quantities in captions are what I would experiment with next time.
Ingredient
100g glutinous flour (mochiko flour)
40g cake flour (might use 20g or 30g)
30g sugar (40g should taste better)
1 tbsp soy flour (thinking of substituting with cheese powder here)
1 tbsp milk powder
40g unsalted butter (should reduce to 20g to 30g)
1/2 tsp salt
200g water
1 egg (beaten)
Method
1) Sieve glutinous flour, soy flour, milk powder and cake flour together.
2) In a saucepan, bring water to boil, add water and salt. Add in butter. Slowly sprinkle the flour mixture until well combined and form a dough.
3) Remove saucepan from heat and stir in beatened egg, a spoonful at a time.
4) Use a piping bag with plain nozzle (I cheated, I only used a sandwich bag, cut a hole and pipe), pipe out the batter.
5) Bake at 170 deg C for 30 mins (was thinking of reducing to 20 to 20 or 25 mins), reduced to 150 deg C and bake for another 10 mins with oven door slightly ajar.
*Note : Do not open the door during the 1st 30 minutes. I would also suggest sprinkling some sugar or cheese powder on these babies.
This was the 5th trial. A suggestion of using bread flour was made. However, it did not yield a crispy exterior. It's either this or due to the reduction of butter. Pardon for the picture as I took it quite late at night. I thought it looked good on my handphone then. Must be my blurry eyes. The tip was slightly burnt as I wasn't there watching the oven. This time, the interior is more chewy and filled up.
Ingredient
100g glutinous flour
20g bread flour
40g sugar
1 tbsp soy flour (thinking of substituting with cheese powder here)
1 tbsp milk powder
20g unsalted butter
1/2 tsp salt
100g water
Method
1) Sieve glutinous flour, soy flour, milk powder and cake flour together.
2) In a saucepan, bring water to boil, add water and salt. Add in butter. Slowly sprinkle the flour mixture until well combined and form a dough.
3) Remove saucepan from heat. Transfer the dough to a mixer. Using a dough hook, knead for 5 to 8 mins.
4) Use a piping bag with plain nozzle to pipe out the batter.
5) Bake at 170 deg C for 25 mins.
Thus, I conclude :
1) egg can be omitted as it causes a hollow interior and doesn't affect the shape of the bread much. However, for the next trial, I will reduce the egg, not totally omit it. I am not confident that the exclusion of the egg content does not affect the crispy texture.
2) Water content reduction is correct in order to get the chewy texture.
3) The choice of cake flour is right and could use a little more butter to crisp up the exterior. I think the butter also helps to achieve a more even browning.
4) I should also stick to the baking duration and method used in my 4th trial.
For those who are keen and have attempted it, please share your views and experience. Much appreciated. Lastly, I would like to thank Edith for opening this can of worms, ahahahah.. It's been tiring/frustrating, but it's been FUN!!
それじゃ~~
Orange Chiffon Cake
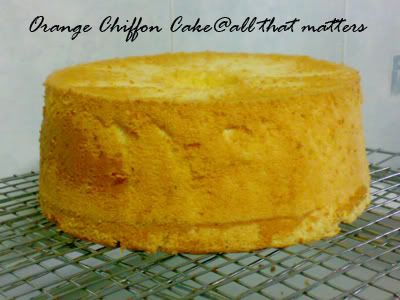
Made this Orange Chiffon Cake last week for my helper, Grace, to share with her sisters on her off day. It's one of the ways of showing my appreciation for her hard work. To be very honest, she's not the best helper. There are times when she slacks (don't we all?), there are some corners of the house unswept. She scratches and abuses my non-stick pan. She forgets to check the pockets and the whole load of clothes have 'snowflakes' on them. There are times when she's more blur than sotong and times when I nearly lost my temper and patience with her. However, she loves my children and takes care of them really well. Compared to the previous helpers I had, she's so much better.
Being a full time working mom is not easy. My work requires me to clock long hours and on some occasions, I have to go to work even on weekends or Public holidays. When I was single, I wouldn't mind and was quite used to it. But with children, I do feel guilty not spending time with them. It is not to say that it is alright for my colleague who is single, to work on weekends or Public holidays. That would be unfair to her too. My point is; Grace made it possible for me to go to work with a peace of mind, knowing that the children are in good hands. She will help me check on Ah Girl's behaviour and alert me if she gets out of hand. Under her care, Ah Boy did not experience any colic, which I was very grateful for. We will talk about our marital problems and share our sorrows. She's family. She made it possible for me to pursue my interest in cooking/baking. Besides, whenever I try out something new, she is more excited about the outcome than me.
Grace prefers anything that is citrusy to chocolate, thus she requested an orange or lemon cake. This cake was well received and gone within minutes (not sure if she exaggerated). It's a very simple cake, nothing special but I would like to share it with you.
Orange Chiffon Cake
Ingredients
(A)
4 egg yolks
30g castor sugar
1/4 tsp salt
40g corn oil
140g orange juice
Zest of 1 orange
(B)
120g Cake flour
1/2 tbsp Baking powder
*Sift 2x
(C)
5 egg whites
40g castor sugar
1/2 tsp Cream of Tartar
Method
1) In a bowl, using hand whisk, whisk yolks and sugar till sugar dissolves.
2) Add oil and salt, whisk and add orange juice and zest. Stir well.
3) Fold in sifted flour and mix well.
4) In another bowl, using an electric mixer, beat till the whites are frothy. Add in Cream of Tartar and beat till soft peaks.
5) Add in sugar gradually and beat till stiff peaks.
6) Fold in 1/3 of the whites into the yolk mixture using a rubber spatula till incorporated.
7) Pour the mixture to the remaining egg whites and fold in gently till incorporated.
8) Pour the batter into a 21cm chiffon tube pan. Bang the pan on the table to get rid of bubbles.
9) Oil a piece of aluminium foil and cover the pan loosely. Bake at 170 deg.C for 10mins.
10) Turn down the temperature to 160 deg.C and bake for 10mins. Lift up the foil to check the surface of cake, bake for another 10mins.
11) Insert a skewer to check if cake is done. Remove the foil and reduce the temperature to 150 deg.C and bake for a further 5 to 10mins to brown the surface.
12) Remove from the oven and invert the pan. Remove the cake from pan when it's completely cooled.
Happy baking~ それじゃ~~
Monday, March 24, 2008
A Moment to Remember


You two melt my heart every time I look at you.
I wrote this down so the both of you can remember this moment. In time to come, you may quarrel, you may be loggerheads or refused to talk to each other. Take time and look at these pictures and think of what I have to say to you.
Ah Boy, although 'Jie Jie' can be rough with you at times. She may have pinched you when my back is turned. She may have 'bullied' you or smacked your hands when you took her toys. But remember, 'Jie Jie' loves you even before you were born. She followed mommy to every visit to the doctor's. The first thing she wanted to do when you were finally out, was to bring you home. She cried when you couldn't because we had to stay in the hospital for another 2 days. She shared her toys with you, although not too often but she's learning. She misses you when she goes for her 'kai kai' without you. She will ask mommy to buy toys for you (and for her too). She likes to show you off to her friends and teachers. When you pulled her hair or scratched her, she cried but she didn't hit you back. She helped mommy bathe you, bring diapers, Drapolene, powder and stuffs. She sings you silly songs and entertain you with her funny dance. She loves you.
Ah Girl, although 'Di Di' accidently hits you when he flings his arms when he's excited, remember that you were like that too when you were a baby. 'Di Di' can't say sorry to you because he has not learnt how to speak yet. Forgive him when he pulls your hair or scratches you, he did it with no intention of inflicting hurt. 'Di Di' loves you. I'm not too sure if he heard your voice when he was in mommy's tummy but I know that he's aware of you. Whenever you go 'kai kai', he will look for you. He will shout to get your attention. He chuckles when he sees you. He's your most supportive audience; he laughs when you sing and dance to him. He knows how to 'sayang' you. He enjoys your company and will look for you when you are not in the same room with him. He turns towards you when he hears your voice. He loves you.
There will come a time when I pass on. The best asset I have for you, is each other. When mommy's gone, you'd only have each other to depend on. No matter how things turned out to be, you may even hate each other; stop and re-think. Think of how you started out, how you love each other. It is all that matters.
Sunday, March 23, 2008
Milo Chiffon Cake
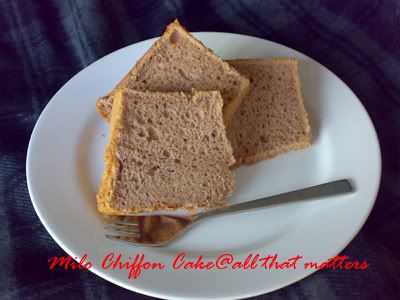
I baked this Milo Chiffon Cake on Good Friday at the request of my little picky eater. Usually, I don't have to go back to office on Saturdays but I had to. To compensate her for sacrificing her 'kai kai' time on Saturday, I decided to bake her a cake. I let her choose a flavour, she chose Milo. It wasn't that difficult to decide on which type of cake to bake. Her favourite so far is chiffon cake, and it's not too oily for her, chiffon it shall be! I fall back on my trusty chiffon cake recipe. I tasted the Milo to see if I need to make adjustment to the amount of sugar to be used. I have not been drinking Milo for a long time. It's not that sweet so I didn't make any changes to the recipe.
Along the way, after adding about 3 tablespoons of Milo to the milk, the colour was still quite pale. I decided to add 1/2 tablespoon of Cocoa powder. Guess I have to adjust the sugar to be used afterall. After baking, the taste of Milo wasn't that evident but Ah Girl liked it and requested me to make it some time soon. Thus, I'm in a dilemma. I wanted to scrap the idea of using Milo and use Cocoa powder instead in future. So how? Aiyah.. don't care, just write it down. Decide another time.
Milo Chiffon Cake
Ingredients
(A)
4 egg yolks
30g castor sugar
1/4 tsp salt
40g corn oil
130g UHT milk
3 tbsp Milo
1/2 tbsp Cocoa powder
(B)
120g Cake flour
1/2 tbsp Baking powder
*Sift 2x
(C)
5 egg whites
40g castor sugar
1/2 tsp Cream of Tartar
Method
1) In a bowl, using hand whisk, whisk yolks and sugar till sugar dissolves.
2) Add oil and salt, whisk and add milk, Milo and Cocoa powder. Stir well.
3) Fold in sifted flour and mix well.
4) In another bowl, using an electric mixer, beat till the whites are frothy. Add in Cream of Tartar and beat till soft peaks.
5) Add in sugar gradually and beat till stiff peaks.
6) Fold in 1/3 of the whites into the yolk mixture using a rubber spatula till incorporated.
7) Pour the mixture to the remaining egg whites and fold in gently till incorporated.
8) Pour the batter into a 21cm chiffon tube pan. Bang the pan on the table to get rid of bubbles.
9) Oil a piece of aluminium foil and cover the pan loosely. Bake at 170 deg.C for 10mins.
10) Turn down the temperature to 160 deg.C and bake for 10mins. Lift up the foil to check the surface of cake, bake for another 10mins.
11) Insert a skewer to check if cake is done. Remove the foil and reduce the temperature to 150 deg.C and bake for a further 5 to 10mins to brown the surface.
12) Remove from the oven and invert the pan. Remove the cake from pan when it's completely cooled.
*Note : Actually, I tried baking this at 180 deg.C throughout the first 30 minutes but it resulted in a cracked top. So I think I have to stick to the above regime.
Happy baking~ じゃね~
Mama Bread and Baby Bread
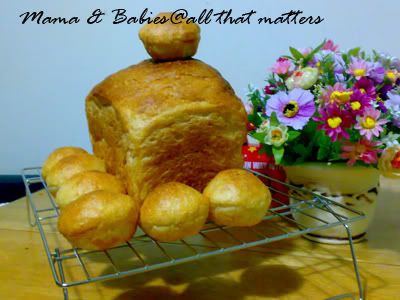
Where should I start? I have about 4 to 5 drafts, waiting for the literature before I can post them. Does this mean I have been churning out too many things in my kitchen. Having a hectic schedule and many crazy deadlines to meet didn't help. I still have a long line of Japanese Drama which I have yet to watch. Do I really have the time to blog? I don't know... 
That aside. I am not sure of you bakers out there but ever since I have been relatively successful with bread making; nothing riles me up than seeing a loaf of commercial bread at home. I mean, I don't mind buying those fancy bread from BreadTalk or Four Leaves occasionally, I am not THAT good yet. But a normal sandwich loaf? You got to be kidding me. I would always kick up a fuss when IH (abbrev. Idiot Husband) buys a Gardenia loaf. Why? My bread not up to standard? He needs his regualr dose of preservatives? Use money to buy one taste better? Besides, he never goes through the entire loaf. If the loaf is more than 3 days old, he refused to touch it. Such wasteful habit! 
I call me a tyrant, I don't care. I banned all bread buying activities; no more buying sandwich loaf. Besides the satisfaction I get from baking a good loaf of bread, I really want my kids to enjoy homemade bread. One without preservatives, stabilisers and what have you. I am also introducing Ah Girl to wholemeal bread by making baby bread for her. She enjoys them as she knows that it is exclusively made for her.
Ah Girl and Ah Boy, mommy loves you very much, you know that? I want you both to understand that these baby bread came from 1 dough, the Mama bread. Mama bread knows no preferences, no biases, no favouritisms because she knows that they are the same. Although you are individuals, but you are part of me and I am part of you. I love you.
Thursday, March 20, 2008
Bento Tips
Since I have been making bentos to bring to work, many friends have been asking how did I do it. To be honest, it is not as difficult as thought. You do not have to wake up that early. Instead, plan your menu the night before.
This is what I do. When I buy meat, I cut and marinate before I pack them into individual servings. On the night before, just thaw the portioned meat/fish in the fridge. Wash and cut the vegetables and set aside for use the next day. I still wake up for Ah Boy's night feed, so I will cook the rice, blurried eyes, at 4 a.m., then go back to bed. I will also use the rice cooker to steam the vegetables. That saves you one thing less to do later on. For those who are not breastfeeding, by any chance you have to wake up to take a leak; cook the rice.
Some of the dishes like stir-fry Hijiki (ひじきの炒め) seaweed and stir-fry Gobo (牛蒡のきんぴら) can be prepared and freezed for later use. They can be kept in the freezer for about 1 week. Like the vegetables, you can just dump these frozen stir-fries into the rice cooker to heat up. In the morning itself, just pan fry the meat/fish, scoop out the rice, vegetables, heat up whatever you need and assemble everything. I usually took about 10 to 15 minutes to dress up a bento. Easy, right?
Play around with food of different colours. This makes a simple, homecooked meal interesting. Recently, I paired up Sakura Denbu (pink) and Ume Shiso furikake (purple). The combo was surprisingly good! Look and taste-wise. Here's some bento I did for the past week.
がんばれ~~  You can do it!!
Wednesday, March 19, 2008
Pumpkin Bread

In the midst of some crazy deadlines to meet, I forgot to blog about this bread. Actually, I have been habouring this idea for sometime. My mom walked past BreadTalk AGAIN and bought this pumpkin bread, well, not my hideous version anyway. Since I was making pumpkin puree for Ah Boy on Sunday, I saved some to do a trial. Erm.. actually, I didn't have enough ice tray lah. I was left with 120g of the puree to be exact.
Using Florence's Golden Bread recipe as a guide, I omitted the egg and adjusted the water content in the recipe accordingly. I think what Florence provided was rather handy for my bread experiments. However, I was quite upset to know that she has taken it down because of the nasty remarks made by some inconsiderate individuals. I mean. what's wrong with these people? Here's someone sharing her experience out of kindness, making the path of learning easier for novice bakers. We should be appreciative. Sure, you are entitled to your views or even challenge the recipe but show some respect to that person. Be constructive instead of passing some snide remarks. Sure, you may be older and wiser or have tons of experience for all I care. But, don't forget; 一山还有一山高,学海无涯。 She has painstakingly experimented and written it down. It worked for her, so there must be some basis to what she wrote. Don't write it off just like that. You wanna tweak the recipe, fine. But give that lady some credit. WTF.. *Phew~~ 
Okay, I digress. Where were we? Oh ya.. I made some adjustment to the recipe. I used about 5, 50g of the dough to shape the above pumpkin bread. I think I cut the shape prematurely while shaping. I should have waited after 2nd proofing, then cut. The shape of the bread is kinda distorted after proofing. Anyway, could be that my shaping skills sucked. Alright, here's how I made them using Sponge Dough method. In all, it yielded 5 pcs of pumpkin bread and 1 smaller sweet bun loaf.
Ingredients (yields about 650 ~ 660g of dough)
Starter Dough
150g Bread Flour
100g Plain Flour
170g Water
1-1/4 tsp Instant Yeast
Main Dough
50g Bread Flour
4 tbsp Wholemeal
40g Water
40g Caster Sugar
1-1/2 tbsp Milk Powder
1-1/2 tbsp Soy Flour
1/4 tsp Salt
30g Corn Oil
Some flour to dust
Some butter to grease pan
Filling (yields about 80g of pumpkin paste)
120g Pumpkin Puree
2 tbsp Milk Powder
Some pumpkin kernels and some shredded pumpkin
Some milk for glazing
Method
1) Mix all ingredients for Starter Dough in a mixing bowl, use dough hook, using low speed, beat to form a dough. Increase to medium speed, beat dough till it doesn't stick to the side of the bowl and appears to be smooth. Roll the dough into a ball, cover the bowl with cling wrap, leave aside to proof for 90 minutes.
2) Meanwhile prepare the pumpkin paste. Heat up a frying pan using low heat, stir the puree and milk powder to a dry consistency. Be careful not to brown it. Cool and divide into 5 portions. Transfer to freezer.
3) After 90 minutes, transfer the Starter Dough to a bowl. In the mixing bowl, add all ingredients for Main dough, except salt and corn oil. Beat at medium speed, gradually add in Starter Dough in small batches to the Main dough until well corporated. Add in salt and corn oil slowly and beat to a smooth, elastic dough (Do the pinch test to check if it is ready).
4) Transfer the dough to a floured surface. Roll the dough into a ball and rest it for 10 minutes. The dough will be quite sticky; either dust with some flour or oil your hands. Weigh 5 pieces of dough in 50g. Roll the rest into a swiss roll and transfer into a greased loaf pan. Proof for 45 mins or till double in size.
5) Roll the 50g portion into long rectangular strips, wrap the pumpkin paste. Dab some water on 1 side of the dough and coil that side into a spiral and place on the greased pan. Leave to proof for 45 minutes or till double in size. Wet the tip of scissors with water and snip the outer part of the dough. Press down each petal slightly.
5) Apply some milk on the bread, Scatter some pumpkin kernels and shredded pumpkin on the flower-shaped bread. Bake them at 170 degree C for 15 minutes. Whereas, bake the loaf at 170 degree C for 30 minutes.
*Note : This is just a trial. Attempt at your own risk.  Do read carefully that the pumpkin paste is only enough to make 5 pcs of bread, it is not the entire recipe.
**Note : Texture of the bread is really soft due to the Sponge Dough method. You won't miss the egg. And the pumpkin filling needs some improvement. It was a little wet, maybe I should add some cake flour to it next time.
Happy baking! それじゃ~~
*An update : I baked these and the loaf on last Sunday night. I had the last slice this morning and the bread is still soft. I likee~~ XD
Monday, March 17, 2008
Those Bittersweet Memories

Some call it Coke Chicken. To me and M, it is known as Cola Chicken (コラチーキン). I received this particular Japanese cookbook from him. During weekends, I would go to his place. Either to clean the house together or cook for him. Mainly, to try out the recipes in the book. We felt like a married couple. One day, when he came home and I presented him with this dish from the book (with some of my tweaking).
Upon hearing what I added to this dish, he said, '冗談ですか, you're joking right?' For the first time, he refused to eat what I cooked. He jokingly remarked, it was 'Kuro (黑) Chiikin' not "Cora Chiikin'. It was when I pointed out the recipe to him and started to sulk, he relented. He loved it and had seconds. He suggested that should we get married, this will be on the family menu. It was not to be. Many years later, when I asked him if he had this dish again, he said, 'No, not for a long time. No one does it like you did...' It brought me to tears.
Last Saturday was the first time in so many years that I cooked this, Ah Girl loved it to bits. I was surprised that no matter how many years had passed, I could still recall the recipe and how I did it. It is that vivid, like it is being etched there. I guess I avoided this dish all these time as it would remind me of what I have missed and given up. What might have been. So Ah Girl, mommy wrote this recipe down for you. In a way, through food, mommy shares her memories with you. 
Cola Chicken
Ingredient
12 Chicken Drumlets
1/4 Large White Onion
8 to 10 no.s French Beans, cut (optional, I added this to 'liven up' the dish)
1 no.s Red Chilli, de-seeded and cut (optional, I added this to 'liven up' the dish)
2 tbsp Mirin
2 tbsp Sake
Juice of 2 small lime
Marinade
3/4 can of Coca Cola
1/2 tsp Salt
2 tsp Dark Soy Sauce
1 tbsp Light Soy Sauce
Some Salt to taste
Some Sugar to taste
Some Olive Oil
Some Corn Starch solution
Method
1) Marinate the chicken about 1 to 2 hour prior to cooking. Drain dry and set aside the marinade for later use.
2) Heat up some oil in a wok, fry the french bean and sprinkle some salt. Set aside when cooked or colour changed.
3) Add some oil to the wok, fry onions and the chicken till slightly cooked. Pour in the marinade and cook the chicken on high heat. Add in mirin and sake. Add in some sugar to adjust the taste if necessary. Bring to a simmer.
4) When the sauce starts to dry (not too dry though, the sauce is addictive), add in the corn starch solution, french bean and chilli. Drizzle some lime juice before serving with rice.
じゃね~ 
Saturday, March 15, 2008
Who Moved My Cheese... Bread?
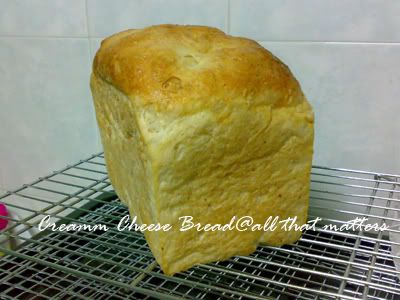
I know.. I know.. how come bread again ah?? Bread is a staple, cake's a treat. So, cake can take a backseat. Eheheh... This week alone, I baked 3 loaves of bread. I haven't had the time to blog this, Cream Cheese Bread. Got too excited and obsessed about the water roux bread. The original recipe was scouted by a fellow blogger KWF. Thanks for sharing yo~.
It is not as cheesy as what I would have loved it to be (yes, I heart cheese) but yields a really soft bread even without any bread improver. It should retain its softness for 3 days if it ever lasts that long. Mine was gone in less than 2 days, so I wouldn't know. It is THAT good and I only got to eat 2-1/2 slices of it. Pathetic. Hey, I baked it you know. Show me some respect mah.. Tsk.. -_- Anyway, do not take my word for it, try it. I made some slight adjustment as I do not use butter for my bread and I tried the Sponge Dough method for this bread.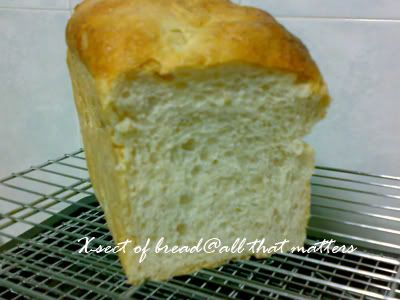
Cream Cheese Bread
Ingredients (yield about 550g of dough)
Starter Dough
180g Bread flour
120g Water
1 ¼ tsp Instant Yeast
Main Dough
70g Bread Flour
40g Water
1 tbsp Milk Powder
20g Sugar
50g Cream Cheese
¼ tsp salt
15g Corn Oil
Some flour to dust
Some butter to grease tin
Method
1) Mix all ingredients for Starter Dough in a mixing bowl, use dough hook, using low speed, beat to form a dough. Increase to medium speed, beat dough till it doesn't stick to the side of the bowl and appears to be smooth. Roll the dough into a ball, cover the bowl with cling wrap, leave aside to proof for 90 minutes.
2) After 90 minutes, transfer the Starter Dough to a bowl. In the mixing bowl, add all ingredients for Main dough, except salt and corn oil. Beat at medium speed, gradually add in Starter Dough in small batches to the Main dough until well corporated. Add in salt and corn oil slowly and beat to a smooth, elastic dough (Do the pinch test to check if it is ready).
3) Transfer the dough to a floured surface. Roll the dough into a ball and rest it for 10 minutes. Use a rolling pin, roll out the dough into a rectangle. Starting with the shorter end, roll up the dough swiss roll style. Place in the loaf tin to proof for 45 minutes or double in size.
4) Apply egg wash/milk and bake at 170 deg.C for 30 minutes.
Happy baking~ じゃね~
Friday, March 14, 2008
I Got It!! やったー!
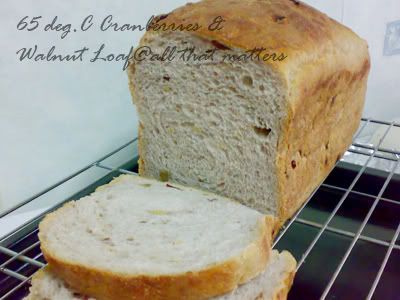
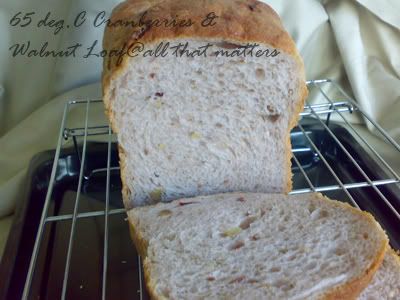
やったー!ばんざいー!\(^o^)/ I felt like mimicking the character in Heroes, Nakamura-san. *laughs* Eheheh... After exchanging views with Florence yesterday, she highlighted to me the possible cause of the wet dough. Corn Oil.
My mom's a bread lover, whenever she passes by a bakery shop, she has to pop in and buy something home. Since she has been unwell, she will still do that but it is to buy for the family. When I first started out baking bread, although I have reduced butter significantly, she will not have seconds knowing that there's butter in it. Call it paranoia but she's the one who is suffering when her system acts up, not me. Hence, imagine my joy when I managed to modify the bread recipe to using corn oil. I don't really want to use butter for bread anymore.
With the leftover starter, I experimented with the water roux bread again. The dough was rather sticky for my previous attempt. Might be the corn oil, might be because I didn't drain the raisins properly. So this time round, I reduced the corn oil to 1 tbsp. I promised I'll be good. To get to know the dough/bread better, don't add anything funny to the dough; no raisins, no nothing, just plain bread. Or so I thought.
This time round, the dough is perfect! It's smooth and not sticky, reached membrane stage in no time. Then it started to get boring... Hmm.. surely adding some dried cranberries won't hurt. So, in went the leftover cranberries (30g) from my Lemon Yoghurt Cranberries Chiffon cake. Found some walnuts in my pantry. Good! Idiot hubs hates walnuts and it's a dry ingredient. So, in went the walnuts (40g) too. As I knead the dough further, the dough gets this very nice, light pinkish tint. Unfortunately, it was not prominent after baking. The bread rose pretty well too. It smells great baking bread early in the morning. Maybe because :
Option 1 : You're hungry for breakfast.
Option 2 : Fresh made loaf always smells yummy.
Option 3 : You toil and sweat making it.
Option 4 : All of the above.
Anyhow, I am very satisfied with the result, the texture is better than the previous attempt. Thanks Florence for sharing the recipe and her expertise. My helper commented that the texture is like Gardenia bread. Tsk.. this is homemade lah.. don't compare with the commercial ones. I'll take it as a compliment. Wahahaha~~ I won't re-post the recipe but I'll make the adjustment in the respective page.
じゃね~ ばんざいー!\(^o^)/
Wednesday, March 12, 2008
Botak
Today, Ah boy became botak. I brought him to the salon to shave off his hair. I didn't shave off his hair when he was a month old. Some hair was irritating his ears and he kept scratching. Like '花脸猫'. Ah girl commented that he looked like the monk in the cartoon 'Shaolin Showdown'. How?? Looks like or not?? Ahahah... Actually, he resembles Ah girl when I shaved her hair when she was 6 months old.

Pictures taken by Ah girl with my handphone. Not bad hor. These days, kids are more tech savvy than adults. Scary.
Boy Boy~~ mummy loves you~~ don't grow up so fast can?? Still can't get enough of '抱抱' you~~ *muak muak muak* ^_^
Along came a..
..bread that distracted my attention from the experiment at hand. After looking at the 65 deg. C bread at Florence's Blog, I was mesmerised by its texture. I have always wanted to try out this water roux method but was not quite confident of getting the water roux starter right. Thanks to Florence, she put up the picture of the starter. Cleared my doubts about the starter. And thus, I present you this bread.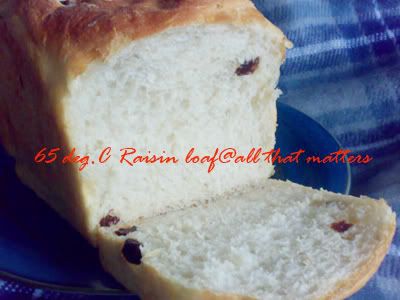
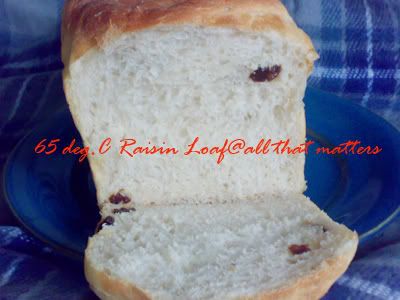
Basically, I used my Cucina mixer cum 'arm power' to knead the dough as I do not have a bread maker machine. I made some adjustments to the recipe as I do not have an electronic weighing scale. Initially, everything went well, the dough was smooth.. blah.. blah.. blah.. but it took like forever to get to the membrane stage. Alternating between the mixer and hand knead, it must have took me around an hour (maybe this will help me to tone up my flabby arms). Then came the scare; when I added the raisins, the dough no longer looked smooth and was abit sticky.
After 1st proving, the surface didn't look too good either, I mean not like my previous experience with Straight Dough method and Sponge Dough method. I roll the dough like swiss roll, put into the tin and waited for 2nd proving. It rised but not as tall as I expected. Too late to do anything now. Heck care, just chuck it into the oven and bake. Oops.. erm.. in my haste, I forgot about the egg wash. XD
Anyhow, the bread turned out to be soft and fluffy, I kept poking at it to ensure that it didn't lose its fluffiness. In fact, I did that again before I post this.
65 deg. C or Water Roux Raisin Loaf
For water roux starter : (1 part flour : 5 part water)
50g Bread flour
250ml Water
1) Mix flour and water till it is smooth in a steel bowl. Using double boil method, whisk the mixture constantly.
2) Keep stirring till you see streaks left by the whisk. Remove from heat and leave aside to cool to room temperature.
*Note : Refrigerate the leftover water roux starter and use within 3 days. Discard when the starter turned greyish.
**Note : I used double boil method as I was unsure of controlling direct heat.
For the main dough : (yields about 600g of dough before baking)
Ingredients
(A)
250g Bread flour
20g Sugar
1 tbsp Milk Powder
2 tsp Instant Yeast
(B)
80g Water Roux Starter
100ml Water
(C)
1 tbsp Corn Oil
1/4 tsp Salt
(D)
50g Raisin (soak in water to plump them up)
Method (Based on using Philip Cucina Mixer)
1) Mix (A) with spatula in the mixing bowl. Use dough hook for mixer. Turn on mixer (speed 1) and add in (B). Beat for about 5 mins at speed 3.
2) Rest the machine for 5 mins. Meantime, knead the dough by hand in the bowl (wear plastic gloves). Turn the machine (speed 3) on for about 3 minutes.
3) Rest machine again while you add corn oil. Use the spatula to incorporate most of the oil into the dough. Turn on the mixer (speed 3) and add salt. Beat for another 5 minutes.
4) Repeat step (2) until dough reaches membrane stage. Add in the raisins towards the end of kneading.
5) Cover the bowl with cling wrap and leave in a warm place for first proving for about an hour. Meantime, grease the loaf tin. To check if first proving is complete, put some flour on your finger and press into the dough. The hole should hold its shape.
6) Take out the dough and transfer to a slightly floured surface. Roll into a rectangle shape and roll up like a swiss roll, place into the loaf tin.
7) Let it rise for another hour. Apply egg wash or milk (I forgot). Bake at 170 degrees C for 25 to 30 minutes.
I wouldn't say I have achieved 100% success for this bread. I am still unfamiliar with the dough texture. And I read on the net that the starter is best used after 24 hours, I used it straight after cooling down. Now, I need someone to finish up the bread real quick so I can use up the leftover starter. :p
それじゃ~~
Monday, March 10, 2008
Lemon Yoghurt Cranberries Chiffon Cake
I'm pretty sure few can resist the citrusy smell of lemons. I know I can't. So when I saw those yellow little dears sitting there, beckoning to me, it's hard to say no. I have read reviews on infusing yoghurt in cakes, I wanted to try it out myself. I do not like dense cakes, so I thought I will try it out using a chiffon cake recipe. I think 1 particular thing about chiffon cake besides the common egg white and folding in problem; is that you have to find the balance of the ingredients. As the yoghurt I bought was rather thick, I used the lemon juice to adjust the consistency.
Along the way, I remembered how good it tasted when I mixed yoghurt with cereal and cranberry. So, in goes the cranberries too. Hence, in 1 cake, I infused 3 flavours which I adore. The kitchen smelled lovely during baking. Below is the result of my experiment. I am extremely fortunate to get this right for my 1st attempt.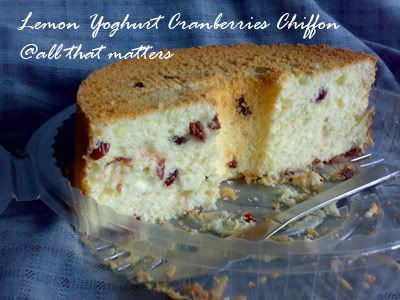
Here today.. Gone tomorrow.. 1 slice is never enough.. eheheh... *secretly happy with myself*
On the side note; it does get on my nerves when people asked the obvious. When idiot husband got a whiff of the cake when it was in the oven baking, he asked, 'Are you baking something?'. When I took the cake out, invert it to cool, he asked, 'You bake cake ah?'. Even as he sliced the cake to eat, he dared ask, 'You bake one huh?'. For the 1st 2 questions, he only suffered my silence, I refused to entertain any silly questions. It's the 3rd that blew my fuse, 'No! It just suddenly appeared in the kitchen!'. #%^&@?!! Anyways, here's the recipe.
Lemon Yoghurt Cranberries Chiffon Cake
Ingredients
(A)
4 egg yolks
40g castor sugar
1/4 tsp salt
40g corn oil
120g plain yoghurt
2 tbsp lemon juice
80g dried cranberries (I used Craisins, Ocean Spray)
zest of 1 lemon
(B)
120g Cake flour
1/2 tbsp Baking powder
*Sift 2x
(C)
5 egg whites
50g castor sugar
1/2 tsp Cream of Tartar
Method
1) In a bowl, using hand whisk, whisk yolks and sugar till sugar dissolves.
2) Add oil and salt, whisk and add yoghurt, lemon zest and lemon juice. Stir well.
3) Fold in sifted flour, cranberries and mix well.
4) In another bowl, using an electric mixer, beat till the whites are frothy. Add in Cream of Tartar and beat till soft peaks.
5) Add in sugar gradually and beat till stiff peaks.
6) Fold in 1/3 of the whites into the yolk mixture using a rubber spatula till incorporated.
7) Pour the mixture to the remaining egg whites and fold in gently till incorporated.
8) Pour the batter into a 21cm chiffon tube pan. Bang the pan on the table to get rid of bubbles.
9) Oil a piece of aluminium foil and cover the pan loosely. Bake at 170 deg.C for 10mins.
10) Turn down the temperature to 160 deg.C and bake for 10mins. Lift up the foil to check the surface of cake, bake for another 10mins.
11) Insert a skewer to check if cake is done. Remove the foil and reduce the temperature to 150 deg.C and bake for a further 5 to 10mins to brown the surface.
12) Remove from the oven and invert the pan. Remove the cake from pan when it's completely cooled.
*Note : For convention oven, preheat and bake at 170 to 180 deg.C for 40 to 45mins.
**Note : Goes very well with a cup of Earl Grey or English Breakfast Tea.
Do give it a try. I promise it won't disappoint. ^_^
Happy baking~ and may you be spared of silly questions.
それじゃ~~
Thursday, March 6, 2008
Ice Ice Baby...
Like all kids, my daughter loves ice cream and that motivated me to make them.. *Silence...* Okay, I confess, I love ice cream too, that's why I make them. :P
The basic recipe has been with me for quite a number of years but I have no intention of making because the freezer at my mom's is always FULL. Now, having my own place, my freezer too, is almost full, most of the time. I guess moms are the same when it comes to feeding their children. The whole fridge is full of food or ingredients to churn out a decent meal for kids.
I had 2 egg yolks left after baking Banana Chiffon Cake so I decided to make some ice cream for myself. My favourite flavour would be Rum and Raisins, so be it. *Hic..*
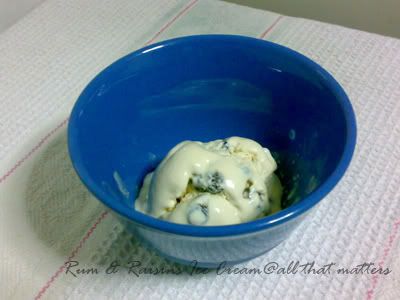
Ingredients
(A)
4 egg yolks
4 tbsp fine sugar
1 tsp cornflour
(B)
150ml UHT milk or fresh milk
150ml dairy whip cream
(C)
250ml non dairy whip cream
(D)
50g dark rum
80g raisins (soaked in rum overnight)
Method
1) In a mixing bowl, whip (C) till stiff peak, refrigerate for later use.
2) In a steel bowl, using a hand whisk, beat (A) till pale.
3) In a pot, bring (B) to a simmer and pour into (A) in a steady stream, whisking constantly.
4) Using double-boil method, whisking the mixture constantly and cook the custard till thicken.
5) Cool the custard by plunging the bowl over a cold water bath, whisk the custard. (I did this because I was impatient.)
6) Fold in whipped non dairy cream into the mixture, add rum, raisins and mix well.
7) Pour into a 1.5 litres clean plastic container and freeze for 5 to 6 hours.
8) Remove from freezer and whisk till smooth and creamy. Return to container and freeze overnight or till set.
*Note : I use double boil method because I was afraid I might ended up with scrambled eggs. This method is slower. To speed up, you can also use direct heat to cook the custard but you need use low heat.
**Note : You can also use blender for step (8), but add the raisins only after you blend the ice cream.
***Note : Although very tempting for alcoholics like me, do not attempt to add more rum than necessary. The ice cream will not set properly. I know, I tried it. But it's a great idea to drizzle more rum on it when you serve though. *grin*
Now, that wasn't that difficult, was it?? ^_^ Following the steps and using ingredients (A), (B) and (C), that will be your basic ice cream recipe. The rum will mask the eggy smell. When you are not using rum, you can add 1 tsp of vanilla essence or use 1 vanilla pod. I used non dairy whip cream instead; not only it is easier to whip than dairy whip cream, it is derived from vegetable fats. Trying to make it less sinful or am I deceiving myself?? Errr... *Ahem*.. I don't want to know.
Feeling a little guilty for indulging, I made this for my girl.
Variation : Strawberry and White choco Ice cream
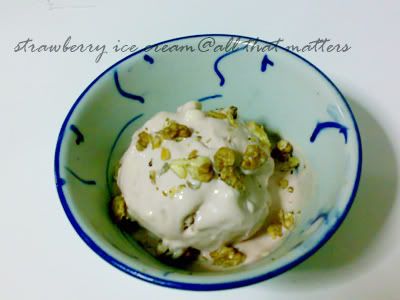
Insert 1/2 cup of strawberry puree into Ingredient (B) and reduce the milk to 100ml. Strawberries after cooking, will lose abit of its flavour, thus add 1 tsp of strawberry essence. Add in 80g of chopped white chocolate in Step (6). I was tempted to add some red colouring as the colour was quite pale, but it defit the whole idea/purpose of homemade ice cream, so I didn't.
I might experiment or recreate some other flavours in future. それじゃ~~
Tuesday, March 4, 2008
Mochi Bread.. か?
Last evening, had a small chat with Edith, she mentioned about a particular bread from Sun Moulin, Mochi Bread. She was kind enough to send me a recipe from a website which I can't access to. Later, I found out that the recipe can be found here too (search under page 2 of bread category).
Being curious about the bread, I embarked on an experiment last night. I haven't tasted this bread before (sua ku??) and I forgot to ask her the texture of the bread. Turned out that; Sun Moulin's Mochi bread is supposed to be crispy on the outside, soft and chewy on the inside. Okay, so I got the chewy part right. But what about the crispy part? Based on the recipe, it is using the 'Sponge Dough' method. It's supposed to give bread a more lasting fluffy texture, even more so than the usual 'Straight Dough' method. But crispy?? How ar?? Deep fry?? Edith said no. Wrap with puff/filo pastry?? Really no idea. Think I must go down to Sun Moulin to look for this bread. I catch no ball. Ahahaha..
Anyway, having said that, this recipe still works. The bread is fluffy and the mochi is chewy. I concocted the mochi part as the original recipe does not state how to go about it. This type of bread also suits my temperament as I cannot just sit down, do nothing and wait for the bread to prove. While waiting for the 1st proofing, you can prepare the mochi. This is how it looked like :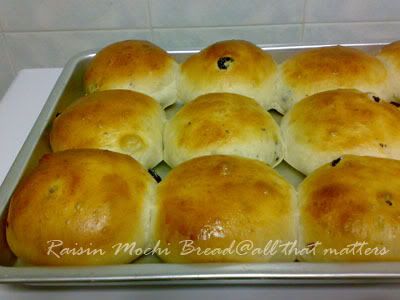

I halved the original recipe knowing that my mixer cannot handle the whole load. I made some adjustments and shaped the bread my way. I figured if I were to distribute out to the testers, it would be more convenient to make into individual portions.
Raisins Mochi Bread
Ingredients (yields about 650 ~ 660g of dough)
Starter Dough
250g Bread Flour
150g Water
2 tsp Instant Yeast
Main Dough
70g Bread Flour
40g Water
40g Caster Sugar
20g Egg (beaten and weighed, reserve the remaining for egg wash)
10g Milk Powder
3g Salt
40g Corn Oil
30g Raisins (soak in some water to plump them up)
Some flour to dust
Some butter to grease pan
Filling (yields about 230g ~ 240g of mochi)
80g Mochi Flour (Japanese Glutinous flour, I bought from Daiso)
150ml Water
2 tbsp Caster Sugar
2 tbsp Milk Powder
1 tsp Corn Oil
Some cornflour to dust
Method
1) Mix all ingredients for Starter Dough in a mixing bowl, use dough hook, using low speed, beat to form a dough. Increase to medium speed, beat dough till it doesn't stick to the side of the bowl and appears to be smooth. Roll the dough into a ball, cover the bowl with cling wrap, leave aside to proof for 90 minutes.
2) In a non-stick saucepan, add water and sugar. Add milk powder and mochi flour by batches till there are no lumps. Add in corn oil and heat up the mixture using low heat. Stir the mixture constantly till it forms a dough using a wooden spoon. Continue to stir till it reaches a QQ consistency. Turn off the heat and let it cool. When the mochi is warm to touch, wear a plastic glove, knead the mochi further. The mochi should be smooth and can be pulled for an arm's length without breaking. Portion the mochi into 12 portions and dust with cornflour, set aside.
3) After 90 minutes, transfer the Starter Dough to a bowl. In the mixing bowl, add all ingredients for Main dough, except salt and corn oil. Beat at medium speed, gradually add in Starter Dough in small batches to the Main dough until well corporated. Add in salt and corn oil slowly and beat to a smooth, elastic dough (Do the pinch test to check if it is ready). Add in the raisins towards the end of kneading.
4) Transfer the dough to a floured surface. Roll the dough into a ball and rest it for 10 minutes. The dough will be quite sticky; either dust with some flour or oil your hands. Divide into 12 portions. Wrap the mochi with the dough, place on the greased pan. Cover with damp cloth and proof for 45 minutes or till double in size.
5) Apply egg wash and bake them at 170 degree C for 15 minutes.
*Note : to make it more interesting, maybe you can wrap some peanuts with mochi, then it up wrap with the dough during shaping. By doing so, you will get 3 different textures in 1 bread.
Verdict : I like it but I feel that I can improve on the mochi. Maybe I should try using milk instead of water + milk powder. I should also increase the raisins to 50g. Still, I need to figure out how to achieve the crispy exterior. @_@
Wish me luck. それじゃ~~
*Update : Japanese Glutinous flour, a.k.a. Mochiko (もちこ), in my opinion is finer than the regular ones.
Monday, March 3, 2008
Rei's Limited Edition Bread
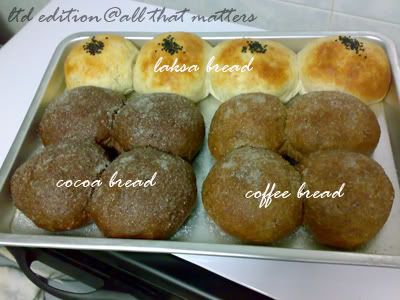
Hmm.. why do I name it so?? Coz everyone has different taste in the family and I can only make 12 portions of bread at a time. Thus, when I want to experiment with new flavours, I can only make 4 pieces of bread for each flavour.
I started out baking bread only last year. Along the way, I made super hard bread, yeasty bread and bread which refuses to rise. Not to forget that I even broke 1 dough hook. I am too lazy to use man-power a.k.a. my flabby arms, so I bought another mixer. I deviced a way so that I will not fry my mixer. Through lots of trial and error and feedbacks from various 'willing' testers, I modified the Basic Sweet Bun dough recipe by Alex Goh. It worked well for me and I hope it works for you too. For health reasons, I reduced the amount of sugar used. I have also replaced butter with corn oil. However, the texture is not being compromised. The bread is soft and fluffy.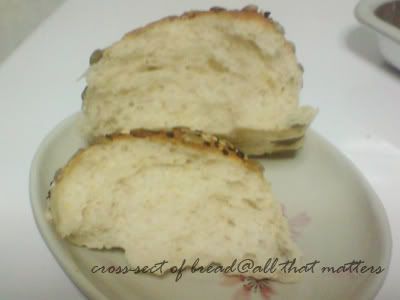
The following recipe is just a basic. You can add fillings, toppings, etc., to it. The possibilities are endless, just use your imagination.
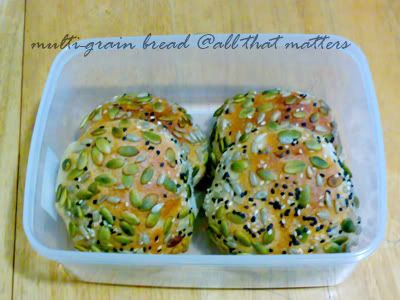
Without further ado, I present you my basic bread recipe.
Ingredients A
200g bread flour
100g plain flour
40g brown sugar
½ sachet instant yeast (1 sachet 11g)
1 tsp bread improver
1 tbsp milk powder
1 tbsp soy flour
4 tbsp wholemeal flour
Ingredients B
180ml chilled water
1 egg (lightly beaten add into water)
Ingredients C
50ml corn oil
1 pinch salt
Some butter to grease the pan
Some flour to dust
Method (Based on using Philip Cucina Mixer)
1) Mix (A) with spatula in the mixing bowl. Use dough hook for mixer. Turn on mixer (speed 1) and add in (B) gradually. Beat for about 5 mins at speed 3.
2) Rest the machine for 5 mins. Meantime, knead the dough in the bowl (wear plastic gloves). Turn the machine (speed 3) on for about 3 minutes.
3) Rest machine again while you add corn oil. Use the spatula to incorporate most of the oil into the dough (or else the oil will splatter when you turn on the mixer). Turn on the mixer (speed 3) and add salt. Beat for another 5 minutes.
4) Do stretch test by pinching the dough. It should be able to form a thin membrane before breaking.
5) Cover the bowl with cling wrap and leave in a warm place for first proving for about an hour. Meantime, grease the pan. To check if first proving is complete, put some flour on your finger and press into the dough. The hole should hold its shape.
6) Take out the dough and transfer to a slightly floured surface. The dough should weight about 650g. Divide into 12 portions, each estimated about 54~55g, shape into a ball, place onto the greased pan.
7) Let it rise for another hour. Apply egg wash or milk. Bake them at 170 degrees C for 15 minutes.
*Note : I am using a convection oven. For conventional oven, bake at 180 degrees C for 12 to 15 minutes. When you tap the bottom of the bread, it should sound hollow.
**For the above multi-grains, 50g of chopped walnuts is added to the dough. Dab surface of dough with water and roll that suface on the mixed seeds when shaping the dough.
Topping
5 tbsp pumpkin kernels
2 tbsp sunflower kernels
1 ½ tsp black sesame
1 ½ tsp white sesame
じゃね~ ^_^


