Ah Boy can sit up on his own and crawls about (actually he's sliding on his tummy) quite well. He is 8 months and 3 weeks now. He loves it when we sing for him. I think his favourite songs are '大苹果' and 'Ten Little Indians'. He'll laugh out loud whenever he hears them. He's making those 'boo-boo' sounds and been 'talking' quite abit. He likes to wave 'bye bye' and acknowledges his name with a 'nn'. I don't know why, but both of them like to lie their head down on my pillow. He misses Ah Girl when she's not around. He welcomes her with a big chuckle when she reaches home. Fortunately, I got the same treatment as well. Ahaha.. I can't wait for the day when he calls 'Ma Ma'. Ah Girl first word was 'Ma Ma'. Actually, I am teaching him everyday. Heheh..
In my opinion, Ah Girl plays rather rough. Not sure how to tell her to be more lady-like. But I know she loves her brother. Next time, when they quarrel, I'll show them this clip. Must love each other, okay? Looking at them, a part of me can't wait for them to grow up. Another part of me is afraid that they are growing up too fast. That I will not be able to hold them in my arms anymore. I guess all mummies feel that way sometimes. My dear children, please let me hold you tight for a while longer. Let me hold you every day. I love you.
Friday, May 30, 2008
Two At Play
Thursday, May 29, 2008
Blondies II
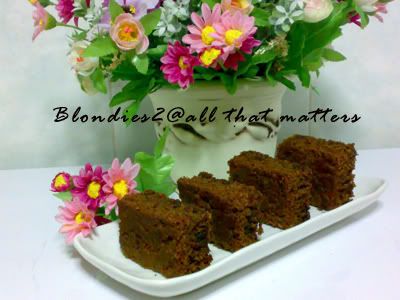
I am so into Blondies. Oh dear, this is not good. The bathroom scale is screaming, "Weight watch alert! Weight watch alert!" But did I take heed? Heck, let me finish up this load of Blondies first. Seriously, I need to distract myself from baking these real quick. Maybe it's just me, I find Blondies addictive. Maybe it's the taste/aroma of brown sugar. Or it could be the sugar high I get from these. Worse, blondies are so easy to bake!
I went on to experiment using white chocolate, using the previous recipe as a reference. It did yield a slighty chewy texture but I think I did not add enough of it. Well, the testers said they liked this version better. Me? I much prefer my first attempt as I did not have to melt the chocolate. The colour was more intense than my previous attempt even though I did not use any molasses this time. The mixture was slightly warmer as I did not wait for it to cool down before adding brown sugar. Perhaps this would explain why the colour was darker. My sis suggested using castor sugar instead, but that might affect the taste. Oopps.. does that give me an excuse to bake blondies again? Hiak~ Hiak~ Hiak~ 
Blondies
Ingredients
3 oz Butter
150g White Chocolate Couverture
*melt together using double boiler
1 Cup Brown Sugar, tighly packed
1/4 Tsp Salt
1 Tsp Vanilla Essence
2 Cup Plain Flour
2 Tsp Baking Powder
1/8 Tsp Baking Soda
*Sift together
2 egg, lightly beaten
60g Semi-Sweet Chocolate Chips (I used Hershey's)
Method
1) Grease a 10" x 10" pan.
2) In a bowl, whisk the melted butter and chocolate with sugar. Add salt and vanilla essence.
3) Add in flour mixture and stir well. Leave the mixture to cool down a little before adding the eggs and chocolate chip. Fold till incorporated.
4) Pour the batter in the prepared pan and use a spatuala to spread out evenly. Bake at 170 degree C. for 20 minutes or till the skewer comes out clean. Cut and serve when completely cooled.
*Note : This tme round, eggs were added last so as not to cook them when the butter and chocolate mixture is still hot.
Do give me a feedback if you have attempted to bake these. じゃね~
Wednesday, May 28, 2008
Counting My Blessings
I would like to thank Edith for this tag. She passed this to me when I was having a hard time at work. Frankly speaking, during that time, I was feeling so negative that even chocolates tasted extremely bitter (erm.. 70% Cocoa content) and desserts tasted sour (what do you expect from Lemon Sorbet?). Let alone, give thanks. I might as well do the other link, "Complain Complain Complain". Okay, now that I looked back, I was able to joke about it. But seriously, I was really very down at that point of time. It was friends like her, popping by at the right time to remind me that things will take a better turn, that the phase, no matter how long it takes; will pass.
I am grateful for friends, both online and offline, who stood by me and tolerated my whinings and negativity. Keeping me sane.
I am grateful for my children, who bring me endless joy and the will to go on. Even though, that may mean I have to make sacrifices but I have no regrets if they were for them.
I am grateful that I have parents and sisters who are supportive all these years.
Although I always complained about my job, I am grateful that I still have one and is able to put food on the table.
Lastly, I am grateful that my family lives in a place where there is no natural disaster. Looking at those suffering over at Sichuan and Myanmar, mine's just a little sorrow compared to theirs.
~Start Copy~
In order to be able to achieve and maintain happiness we need to, actively, be able to do two things:
Complain and then let go (Dump the baggage, the roadblocks to happiness.)
Openly Express Gratitude (The open expression of gratitude promotes happiness.)After all, everyone has something to be grateful for and/or something to complain about. If you would like to accept the challenge, please follow the appropriate link and do so: "Are You Grateful?", "Complain Complain Complain."
Contributors to "Are You Grateful?" & "Complain Complain Complain" are: 1-Attitude, the Ultimate Power 2-Max 3-DianaCA's Metamorphoses 4-Mental Poo 5-My Thoughts 6-Baba Doodlius 7-Wake Up America 8-Life is a Roller Coaster 9-Life and Me 10-pinay mommy's love blog 11-My Happiness Haven 12-And Life Goes On for a Filipino Mom 13-Blessed Sanctuary 14-Expressions And Thoughts 15-Memories by Jenn 16-Reminiscence of My Adventures 17-In the Life of Mne 18-Juliana's Lair 19-Pinay Wahm 20-Lucid Creativity 21-Winged Words 22-Irresistible Fascinations 23-A Little Time 24-See Me For What You Will 25-Greatest Reviews 26-ETC ATBP 27-Gandacious 28-We Are Family 29-Journey to this thing called LIFE 30-http://www.rajeshrana.net/ 31-http://www.rajeshrana.com/ 32-BaReFooTeD Me 33-Uncomplicated 34-Points of View 35-Pride & Prejudice 36-Colorful World 37-Nora's Notes 38-A Daily Walk With Bill & Gina 39-Strange but True 40-Everything Under The Sun ( Beth Rebokon ) 41-Kaleidoscope 42-Fil-Oz Blog 43-http://oscar-vg.blogspot.com/ 44-Comedy Plus 45-Blogging by Sandee 46-Soul Meets World 47-Mae's Memoirs 48-Beyond the Rave Reality 49-Amori, poesie, arte, chat by Hanna 50-Attached at the Hip 51-Carver's Sight or is that Site? 52-Empress Reviews 53-Simple Pleasures In My Heart 54-Lourdes' mia 55-A Grateful Heart 56-Majorsleepyhead 57-Scrappy n Happy in Ohio 58-CHOC MINT GIRL 59-Extraordinary Things 60-ZOOROPAZOO 61-BeNolSatuEm 62-As The World Turns 63-Your Caring Angels 64-Life Is Wonderful To Know Everyday 65-Sugar Magnolias 66-Little Peanut 67-Creative In Me 68-Me and Mine 69-Pea in a Pod 70-the diary of the Pink & Brown Wedding 71-good thoughts, good trades, good life 72-My Blog - all things me 73-Rainbows 74-Little Corner of Mine 75-Me, Myself and I 76-My Planet Purple 77-Amel's Realm 78-A Handful of Surprises 79-A Detour 80-Something Purple 81-Vanity Kit 82-Are You Grateful? 83-A Simple Life 84-BlogTips.Com 85-Balitang Kalye 86-Mariuca 87- Emila Yusof 88-A Total Blog 89-My Life in this Wonderful World 90-MommyAllehs 91-Things That Suck 92-A Mother's Stuff 93-Princess Vien 94-My Inner Thoughts Revealed 95-Roxiticus Desperate Housewives 96-Apples Of The Eyes 97-Nita's Random Thoughts 98-Nita's Corner 99-Thomas Digital Services 100-A Mother's Thoughts101-Meltwater. Torrents. Meanderings. Delta 102-My Perfect Escape 103-Vanidosa. Marie 104-Confessions of a Supermodel Wannabe 105-Lynda's Loft 106-Listening..Learning..Living 107-LadyJava's Lounge 108-The Painted Veil 109-Poeartica 110-Maryannaville 111-the life of a psychotic weirdo 112-CARPE DIEM 113-Turn-u-Off 114-asian mutt international 115-Petty Ramblings of a Petty Queen 116-LIFE IS A ROLLER COASTER 117-AZZY'S BLOG-A-ROONIE! 118-glad to be here 119-WilStop 120-Dare to Blog 121-WebGeek Journal 122-Foster Me Up 123-This is My Life 124-DaveylynneDR 125-Life Realities 126-aNgRiAniWorld Dot Com 127- All That Matters
~End Copy~  *Phew~~
I would like to pass this tag to :
Let's Get Wokking
Love In The Kitchen
Quick n' Easy Treats
Mimosa's Dairy
Small Small Baker
それじゃ~~
Miso Soup & Saba Shio-Yaki
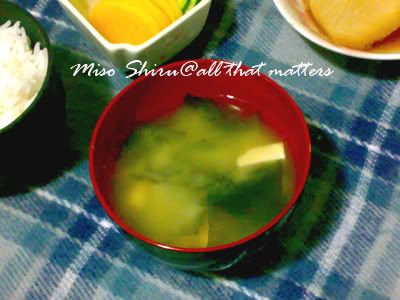
Miso soup or miso shiru (味噌汁) is one fundamental soup served in the Japanese restaurant. I don't know why it is usually served in a laquered bowl, even in a Japanese household. The correct way of drinking the soup is to drink from the bowl directly. Sip the soup, then eat the ingredients with chopsticks. I have seen people 'scooping' the soup and ingredients into their mouth, swallow the soup and then chew on the ingredients that they 'filtered'. That requires skills of some kind but that's not the way to do it.
There are 3 types of miso paste, Shiro Miso or White Miso (しろみそ), Aka Miso or Red Miso (赤みそ) and Kuro Miso or Black Miso (くろみそ). I usually use white miso or red miso for soup. I seldom come across black miso, or maybe I wasn't paying attention at the Supermarket. I have only encountered it at the Aji-tei Sabo restaurant. They used it to pair up with Tonkatsu (豚カツ) or deep-fried pork cutlet as a sauce. It is said that miso paste has health beneficial active ingredients in it, such as enzymes, anti-oxidants and vitamins. However, these will be 'killed' when you boil miso. So the way to go around this is to stir in the miso paste only after you remove the soup stock from the heat.
Miso soup (味噌汁)
Ingredients
600ml of 2nd Dashi Stock
1 tube of Silken Tofu, cubed (it is not a Typo, I used 1 tube, not tub. 250g)
small handful of Wakame Seaweed, cut into bite-size sections
3-1/2 Tbsp of White Miso Paste
Method
1) In a pan, bring the dashi stock to a boil, add in the tofu and wakame and reduce to a simmer.
2) Remove from heat and let the soup stand for a while before stirring in the miso paste.
*Note : I scooped the miso paste into a sieve and submerge it into the soup and stir. This will avoid clumps. You do not have to add salt as miso is already salty on its own.
**Note : I used Wakame that was preserved with sea salt and freezed, not those dried type. If you are using those dried type, you have to gauge the amount used as they will expand to about 3 times their size upon hydration. Also, for those dried type, when they starts to 'open' up, do not boil for too long or they will turn soggy.
***Note : You can use instant dashi granules if preferred. You can add other indredients such as mushrooms, prawns, slices of chicken/pork, scallions or onions, daikon, carrots, baby yams or potatoes. Do note however, do note attempt to add too many things in the soup. It should just consists 2 other ingredients that are of different colours and textures to give the soup some dimension.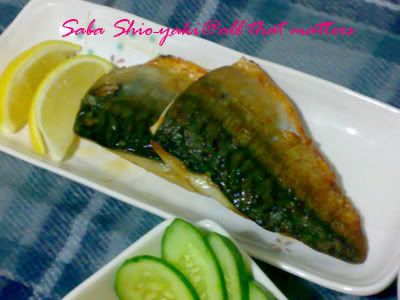
The reason I hyphenated these 2 words is because Shio (盐, salt) is a seasoning and Yaki (烧き, grill) is a method of cooking. Remember I said about simplicity in Japanese cooking? What can be simpler than grilling fish and seasoning it with just salt? There is no recipe for this as it is too simple. Ahah. Instead of grilling the fish, I actually pan-fried it and sprinkled abit of salt when it is about done. Saba, also known as mackerel is quite an oily fish. To take away the oily after-taste, serve it with a wedge of lemon and some grated daikon. I did not grate any daikon as I have already dumped in everything I have when I did the Daikon Ni.  I usually pan fry the skin side to a crisp first before I sprinkle the salt and turn the fillet over. Although it contains Omega-3 fatty acid, drain off the excess oil and serve hot with rice.
Happy cooking!~ それじゃ~~
Tuesday, May 27, 2008
Momoko

Isn't she beautiful? I adopted her when she was about 3 months old. I'm not sure about her parentage but I know her mommy is a Siamese-mix. So, that makes her a Siamese-mix-mix. Ahahah~ She is what my mom called 'long kang' cat (stray cat). Her coat does not have a very clean-cut, distinct colour theme, I named her 'Momoko' anyway, which means 'little peach'. I picked her out of a litter of six. I don't know why, but I think I picked her out because she did not have a very nice, long tail like her siblings. Her tail is stubby and curved like a hook.
Momoko was adopted when I had my own place. She was the 'Queen' of the house. She does not come to you when you call out her name. She only responded when she wanted to or when she was in the mood. Likewise during play time. It is like she owned you, not the other way round. Sometimes in the middle of stroking her, she would suddenly go crazy (kee siao, in hokkien), scratch or bite you. She chews the plastic bag at the waste paper bin to remind me to feed her on time. Things remained this way until I had Ah Girl. I stayed in the hospital for about 1 week and when I came home, she turned into a super 'manja' cat. Apparently, during my absence, she missed me and had been looking for me. She paced around the house restlessly and waited for me at the door. She also slept on my side of the bed. That said, once in a while, she will still ignore me.
*Bo-chap look.
Most of the time, she will follow me around in the house. When she is up to some mischief, like chewing plastic bags or scratch the sofa, she will make the dash when I called her name or when I brandish the cane (unless her claws got caught in the fabric, hahaha). She knows how to open the cupboard, which has a sliding door and hides there when I am angry or when I took out the cane. She is the one who kept my house lizard-free and insects-free (not including ants though). But I never knew that she is good with children too, given the fact that cats are independent and self-centred creatures. Although she was being 'de-throned' as the 'Queen' by 'Princess' Ah Girl, she likes to stay around with the children. Momoko would sit very close them so that she can be 'sayang' (pat), by them. Ah Boy loves having her around. Momoko will get restless when they cry.
I want to freeze this moment in time so that Ah Girl and Ah Boy will know that Momoko loves them too. Even when Momoko will no longer be with us in a few years' time.
Every day, she will wait for the children to go to bed and come to me with her constant meow meow meow, pestering me for her 'massage'. Momoko, although you are now 'de-throned' by the children, you still hold a special place in my heart. Love you and stop attacking my plastic bags!
じゃね~
Sunday, May 25, 2008
Blondies
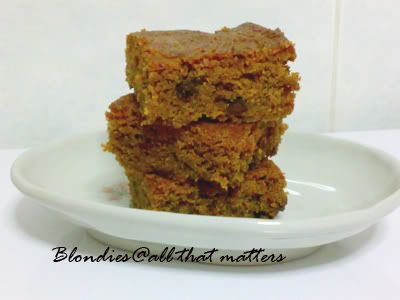
I have been wanting to make brownies for some time now. However, either I was having sore throat or Ah Girl was having cough. I guess the weather has not been good lately. It is getting humid and hot. You can still sweat buckets working around in the kitchen, even though I usually bake at night, when it is cooler. I tried to control Ah Girl's intake of 'heaty' food such as chocolate and chips. I have been searching for a brownie recipe or rather brownie-like recipe, without using obscene amount of chocolate. I chanced upon this recipe from Simply Recipes. Hence, I got to know the rightful name of this delicious dessert is 'Blondies'.
Although it is called 'Blondies', do not expect it to be pale coloured though. The recipe uses molasses that will colour this sweet treat brown. I actually told Ah Girl that it is a 'chocolate cake'. She ate them without any suspicion. Perhaps, she ate it because I added some chocolate chips in the end. This is an easy recipe. You will just need 1 bowl to mix everything in. I used 1.5 times of the recipe as I am using a 10" x 10" pan. I think I should have doubled the recipe and it would fit anyway. I made some changes along the way and below is my interpretation of Blondies.
Blondies
Ingredients
6 oz Butter, melted
1/2 cup Molasses, tightly packed
1/2 cup Brown Sugar, tighly packed
1/4 Tsp Salt
1-1/2 Tsp Vanilla Essence
1-1/2 cup Plain Flour
1-1/2 Tsp Baking Powder
1/8 Tsp Baking Soda
*Sift together
2 egg, lightly beaten
60g Semi-Sweet Chocolate Chips (I used Hershey's)
Method
1) Grease a 10" x 10" pan.
2) In a bowl, whisk the melted butter and sugar. Add salt and vanilla essence.
3) Add in flour mixture and stir well. Add the eggs and chocolate chip till incorporated.
4) Pour the batter in the prepared pan and use a spatuala to spread out evenly. Bake at 170 degree C. for 20 minutes or till the skewer comes out clean. Cut and serve when completely cooled.
*Note : Please refer to the original recipe in the above provided link. I am supposed to add 1-1/2 eggs but I did not bother to take out that 1/2 egg. Also, I totally forgot about the eggs until I have added the flour. Thus you see that eggs were added in rather late in the recipe.
** Note : The original recipe called for dark brown sugar, which is also known as molasses. I ran out of it and only had 1/2 cup worth of it left. That's why I substituted the other 1/2 cup with regular brown sugar. As usual, I reduced the amount of sugar used.
Taste-wise : This is really good! I love the taste of it. It is not too oily; you won't get greasy fingers after picking up a piece. It doesn't taste heavy, you can definitely eat more than one. Despite me adding the eggs last, the blondie did not turn out densed. It does not have the chewy texture though. I suspect it is either due to the lack of chocolates or I have reduced the sugar.
I asked my helper to give out some to her friends and regretted that decision. I regretted not packing some to work while I was uploading the picture of it. I was craving for it! When I returned home, I got only 2 pieces left! Next time I'll just hoard the whole tray to myself. Hah!
Happy baking~ じゃね~
Friday, May 23, 2008
Daikon Nimono
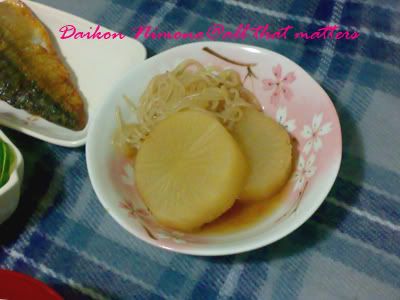
This is one of my favourite dish, Daikon Nimono (大根煮物). Simmered to perfection, the daikon simply melts in your mouth. I was taught to cook this dish using 1 part of soy sauce, 1 part of sugar, 1 part of sake. Along the way, I adjusted the recipe to suit those at home.
This is a rather versatile dish whereby you can add other ingredients to enhance its flavour or keep it simple by just using Daikon, a.k.a. radish. The daikon will draw flavours from dashi stock, other ingredients and soy sauce. In return it lends its own sweetness into soup. You can add carrot and onions or replace daikon with Japanese pumpkins. You can add chicken chunks (I prefer thigh) or beef (those thinly sliced for Shabu-shabu). I have not added pork before but I think that will do fine as well. You can add a whole lot of things more if it deems fit, but remember; less is more. If you add all the 杂七杂八 (杂吧啷, if there's such an expression), you'll end up with a dish that is very confused and no character.
Usually, the soup is not drank, which I find it wasteful. I like to add Shirataki (しらたき, konnyaku noodles, which translates to 'white waterfall') to absorb the soup's flavour. The beauty of using Shirataki, rather than Harusame (春雨, cellophane noodles, which translates to 'Spring rain') is that; they stay crunchy even when you cook/soak them over a long period of time. Aiyo~~ why do Japanese name their ingredients until so 诗情画意 (romantic)? I like~~ ahahah.. *dreamy*  Ah Girl loves the Shirataki. Who wouldn't? It has soaked up all the 'essence' (精华) of this dish. One more dish to add on to her menu.
Daikon Nimono 大根煮物
Ingredients
1 large Daikon
3 Tbsp Japanese soy sauce
3 Tbsp Sake
2 Tbsp Mirin
1 Tbsp Sugar
600ml 2nd Dashi stock
1 packet of Shirataki, drained
Method
1) Wash and peel daikon and cut into about 1 inch rounds.
2) In a pot, add in the dashi stock and the seasonings except sugar and mirin. Bring to a boil and add in the daikon slices. Once stock comes to a boil again, add sugar and Shirataki, lower the heat to a simmer. Skim off scums if necessary.
3) Simmer for about 30 minutes (add water if necessary), leaving lid slightly covered. Add in mirin and turn off the heat. Leave them aside, covered. Re-heat when you are ready to serve.
*Note : Prepare this ahead of time. You need time for the flavour to be soaked up by the Daikon and Shirataki. End product should not have alot of soup.
**Note : For information, Shirataki has zero calories and no carbohydrates. So those who are trying to lose weight can integrate this in their diet menu.
***Note : 1 thing I have learnt; if you are using konnyaku that comes in a block, use your hand to tear it into smaller pieces. Zero for presentation I would say, but I was told that it absorbs more flavour than those cut with knife.
Happy cooking!~ それじゃ~~
Wednesday, May 21, 2008
Chawanmushi
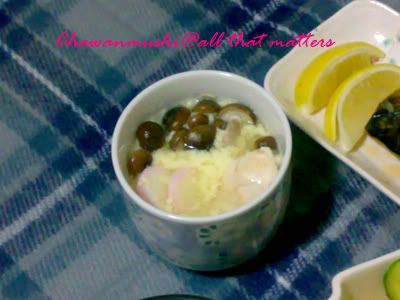
Pardon me if the picture looks abit erm.. unappetising. I think I added too much Shimeiji mushrooms, thus the top is abit watery and the egg custard sort of break up. This is another well-liked Japanese dish. Who doesn't like a smooth, melt-in-your-mouth egg custard that glides down your throat? During my stint as a waitress at a Japanese restaurant during my school days, this was and still is a very popular dish. Mommies will almost always order 1 for their children.
The art of Japanese cooking is not about using fancy ingredients like foie gras, truffle or wagyu, nor following tedious steps 1 to 15 or murdering torturing the same piece of meat over and over again. It's about simplicity. Using the simplest ingredient and make it shine through. It's about harmony and balance. Ingredients should compliment each other. Your pride. The way you present your food; a gastronomic and visual feast. And most importantly, the essence; your heart. It's how you do it and if you put in effort to do it. You might say, this is just an ordinary egg custard, what's the big deal? I'm sure most of those who have attempted to make Chawanmushi would agree with me if I answer, 'The simpler it is, the harder to master'. I remembered I had to eat loads of egg custards just to get the texture I like (read : no bubbles, no holes, not too watery, not too hard). Simple, you say? Try it!
Included this on last Saturday's menu because 1) Ah Girl loves it, 2) my friend, J, who is in Down Under asked me for the recipe. Actually, it's for her husband, so that he could cook her some. Lucky girl you!
Chawanmushi 茶碗蒸 し (serves 4)
Ingredients
Custard Base
3 Eggs
420ml Chicken Stock or 2nd Dashi Stock (recipe for Dashi Stock here)
1 Tsp Sake (can be omitted if preferred)
1 Tsp Sugar (can be omitted if preferred)
Some salt to taste
Toppings
Some Chicken Fillet (a few pieces for each serving will do, marinate with some salt and pepper for 1/2 hour prior)
Some Shimeiji Mushroom (or Shiitake Mushroom, sliced)
8 to 12 slices of Kamaboko (Japanese Fish Cake, can be omitted if preferred)
Method
1) In a bowl, beat the eggs lightly, not too hard, else there will be alot of bubbles. Pour in the stock and add in the seasonings, stir well.
2) Sieve the mixture (this will give the eggs a smoother texture) and pour into individual cups. Steam the eggs in low heat, leaving the lid slightly open. Should take about 10 to 15 mins to set at 80%. For visual effect, put in the chicken pieces, mushrooms and fish cake at this point. Steam for another 7 to 10 mins, depending on the heat control.
*Note : If you don't really care about presentation, just dump in all the toppings to the egg mixture and steam for 15 to 20 mins or until set. Besides those mentioned above, you can add prawns, ginko nuts, etc., to the custard.
**Note : If you are not adding any toppings, which is fine, increase the stock to 450ml. Reason : during steaming/cooking, the toppings will give out water. For Chawanmushi, rule of thumb is 1 egg : 150ml of liquid.
***Note : If you are using water instead of stock, add 2 tsp of light soy sauce to the mixture.
****Note : You can cover the cups with aluminium foil or cling wrap to avoid water droplets dripping onto the custard (read : smooth surface). However, I didn't do this but managed to achieve smooth tops before. If you have it, using a bamboo steamer also helps. But most importantly, the water in the steamer should not be boiling or you will get holes in your Chawanmushi. Therefore, must 看火,控制火候 (loosely translated : watch the temperature control).
Happy cooking!~ それじゃ~~
*Update : I forgot to add; if you are using dashi stock powder/granules, add about 1 tsp to the water.
Salmon Teriyaki

Teriyaki (照烧) sauce must have been most well-known Japanese foodstuff/brand name besides the usual sushi and miso soup. I have not known of anyone, children and adult alike, who dislike it. Let me know if you do know someone who hates it. The sauce is readily available at supermarkets but my rationale is that; nothing beats homemade. Making your own sauce, well, at least you know what goes in there. Most importantly, you make and use what you need. No expiry date to look out for; therefore, no wastage. Moreover, you are able to adjust the taste to your own liking. Some like it sweeter, some like it salty.
My girl has always loved salmon fish. All you need to do is pan fry the fillet and season it with some salt. She has simple taste, until I introduced her to Teriyaki sauce. She has been asking for it when she knows salmon's on her menu. Preparing this dish is easier than you think. You can always substitute salmon with chicken or beef.
Salmon Teriyaki
Ingredients
2 slices of Salmon Fillet (about 150g)
1 Tbsp Mirin
1 Tbsp Sake
1 Tbsp Sugar
1-1/2 Tbsp Japanese Soy Sauce (you can add up to 2 tbsp, depending on taste)
*I used the chinese soup spoon to measure the above.
Method (1)
1) Heat up a frying pan, pan fry the salmon fillet till cooked and slightly browned. Set aside.
2) Mix the seasoning in a bowl, make sure most of the sugar is dissolved. Heat up the pan, pour the mixture into pan. Turn off the flame when sauce starts to thicken. Drizzle on the salmon and serve.
Method (2)
1) Heat up a frying pan, pan fry the salmon fillet till cooked and slightly browned. Leave it in the pan.
2) Mix the seasoning in a bowl, make sure most of the sugar is dissolved. Pour the mixture into pan. Turn off the flame when sauce starts to thicken. Serve.
Method (3)
1) Mix the seasoning in a bowl, make sure most of the sugar is dissolved. Marinate the salmon in the sauce for 15 to 20 minutes.
2) Heat up a frying pan, pan fry the salmon fillet till cooked and slightly browned. Pour in the remaining marinade. Turn off the flame when sauce starts to thicken. Serve.
*Note : So far, I prefer to use Method (2) as it allows the salmon to absorb the sauce, making it more flavourful. You might say Method (3) would be even more so since you use the sauce to marinate it. However, while pan frying the salmon, the sauce on the salmon caramelised too soon and causes it to char. Unless you like char bits, you can try out Method (3).
**Note : If you want to substitute with chicken, you will have to marinate the chicen with some salt or soy sauce for 1 hour preferably. For beef, I would recommend using thin slices of meat. No need to marinate and just use stir-fry method will do the trick.
Happy cooking!~ それじゃ~~
Monday, May 19, 2008
Shouldn't Have Done This...
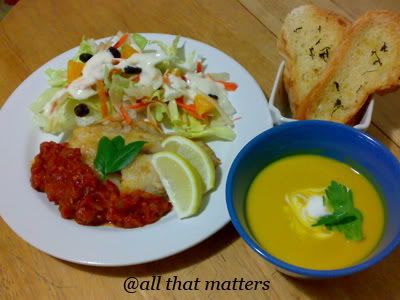
Yup! Shouldn't have cooked the above, Kinda regretted it halfway through cooking. It is a Public Holiday today and I should be resting. Why did I get myself into this? 吃饱太闲。-_- All these started because I had some leftover pumpkin and bought some real cheap Sutchi fillets at Giant Hypermart. I thought I saw it wrong when I spotted them going at S$1.89 for 480g pack. Didn't want to miss a good deal, I bought 2 packs. Not that I like catfish but more of a typical case of 'buy first, deal with it later'.
As I mentioned in my previous post, IH suggested Fish and Chips. Request denied. I might consider if he helped me out cleaning the kitchen or tend to the children while I am cooking. However, he never lift a finger except to eat, eat, eat. If I asked him to look after the kids, he'll be yelling for my attention every 5 minutes, or simply, pass the kids to my helper. So the 大老爷 will lie down to read newspaper. Yes, I employed the helper to help out, BUT the helper cannot do EVERYTHING! Though sometimes impulsively wanted to serve him some burnt/lousy food but that would backfire. I love good food and hate wastage. Thus for the time being, he will be spared.
I made some pumpkin puree and freeze them into cubes for Ah Boy on Sunday. I have introduced him solids for some time now. His appetite has been good. So far, I have introduced him to chinese spinach, carrots, pumpkin, potatoes, peas and sweet potatoes (which causes flatulence.. ahahah..). All painstakingly prepared and froze for later use. I bought about a quarter of the pumpkin from the wet market. After steaming half of it, I already have 2 ice trays filled up. I didn't quite like pumpkin stir-fried, so the only thing I could think of is pumpkin soup. To accompany pumpkin soup, I decided to cook something more westernised. Although the wet market does not open on Mondays, I just stocked up my fridge on Saturday. Thus finding the necessary ingredients wasn't difficult. Be forewarned, the total preparation time for the above is 5 hours, worse than preparing a Japanese meal (or could be that I am just a slow coach?). Recipe filed in the order of preparation.
Pumpkin Soup
Ingredients
400g Pumpkin, remove skin and seeds, cubed (estimated)
2 medium size Carrots, peeled and cut into chunks
1 large Onion, peeled and cut into quarters
2 stalks Leeks, cut into thick slices
3 stalks Celery, cut into thick slices
Some Olive Oil
800ml Chicken Stock
1/2 Cup Low Fat Evaporated Milk (I used this as I do not have cream)
Salt to taste
Some Sour Cream (for serving)
Method
1) Line a baking tray with aluminium foil. Spread the prepared vegetables out, except the celery. Drizzle some olive oil, toss slightly. Bake at 190 degree C. for 30 mins. Throw in the celery and bake for a further 20 minutes.
2) Leave it to cool. In a blender, add chicken stock and throw in all the vegetables (snip off those that are charred). Blend into a puree and strain with a sieve. Discard residue.
3) In a pot, stir in the evaporated milk and bring it to a boil. Add salt to taste and remove from heat. Serve with a swirl of sour cream. Garnish if desired.
*************************************************************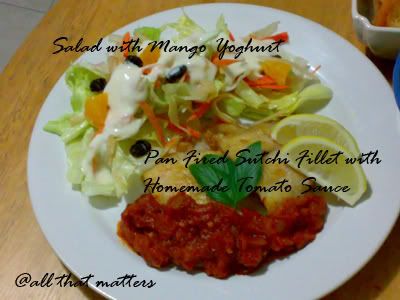
Homemade Tomato Sauce
Ingredients
400g of Fresh Tomatoes, de-seeded and chopped (about 5 medium size tomatoes)
1 Tsp Garlic, chopped
1 Onion, chopped finely
2 Tbsp Canned Tomato Paste
2 Tbsp Olive Oil
1/2 cup of Water
Some Fresh Basil, chopped (I used about 12 to 15 leaves)
Some Salt & Pepper to taste
Method
1) In a pan, add olive oil and fry garlic and onion till the onions soften. Add in the chopped tomatoes, water and tomato paste.
2) Let it simmer for 20 minutes till quite dry. Add salt and pepper to taste and stir in the basil leaves.
*************************************************************
Garlic Toast with Basil
Method
1) I used store bought French loaf, buttered them with unsalted butter. Sprinkled with crushed sea salt and chopped garlic. Toasted at 190 degree C for about 15 minutes. Top with chopped basil leaves and keep in the oven with the remaining heat. Serve when ready.
*************************************************************
Salad with Mango Yoghurt
Ingredients
1/2 head Iceberg Lettuce, cut
1 medium size carrot, shredded
1 Fuji Apple, peeled and shredded
2 Oranges, peeled and cut in to cubes (the oranges I used were rather small)
3 small tubs of Mango yoghurt (I used Yogplait, 125g each, bought on offer)
Some Raisins
Method
Toss all ingredients together and pour yoghurt over them.
*************************************************************
Lastly, dust the Sutchi fillet with corn flour. Heat up the frying pan, add some unsalted butter. Fry the fish till cooked and browned slightly. Sprinkle salt and pepper to taste. Serve with lemon wedges and tomato sauce. Garnish with basil leaves. Assemble them all together like the above picture.
A tedious but hearty meal. I was delighted with the pumpkin soup though it was the most time comsuming to prepare. Surprisingly, both the children like this soup too. Hmm... contemplating if I should add that to their menu in future as it hides vegetables such as leeks, celery and onions. As of now, I am left with 1 packet + 1 piece of fish fillet. I'd probably save myself of the above hassle. I'd pan fry it with some sambal next time. 
Happy cooking!~ それじゃ~~
Saturday, May 17, 2008
A Japanese Fare
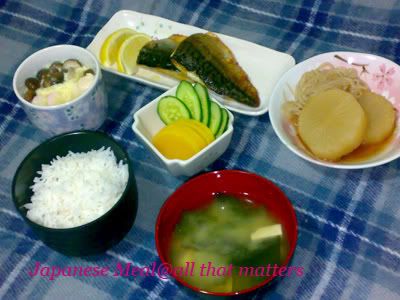
Let me introduce the menu for tonight. Starting from the left; Chawanmushi with Shimeiji mushrooms, chicken and kamaboko (Japanese fishcake). Saba Shio-yaki (grilled with salt). Daikon (radish) Nimono with Shirataki (konnyaku). Takuan pickles with Kyuri (Japanese cucumber). Miso soup with Wakame seaweed and Tofu. And of course, rice.
How much would you pay for the above? With some planning, one can easily cook up a Japanese fare (一汁三菜)at home; with a fraction of the restaurant's price. This is how a Japanese meal is being laid out on the table. The methods of food preparation are not repeated. Rice on your left, soup on your right. Pickles in the middle, grilled dish on the top left corner and a simmered dish on the top right corner. Erm.. okay, the chawamushi was something extra. And if the grilled fish has its head intact, it should be pointing to the left. Except for flounder, its head will be placed towards the right. Fish fillets with the belly-side placed towards your right hand.
I haven't been cooking of late, partly due to my work. If I do cook, it's usually for my lunch bento or easy 1 dish meal. Glad to say that some of the dreadful deadlines are finally over. Tonight, I found my groove back. IH had suggested Fish and Chips but I would rather have Japanese food instead. I'm not a big fan of deep fried food and I dislike the oily stench in the kitchen, on my clothes and hair after deep fat frying. Not forgetting the cleaning and mopping afterwards. I am quite glad that Ah Girl has accustomed to simple foodfare that are steamed, simmered, pan fried and soups. She almost never asked for deep fried food except when she wanted a KFC or McDonald's toy. Even so, her main target is the toy, you can forget about her finishing up the food.
When I laid out the food for her, she asked if what I cooked was Japanese cuisine. Yes dear, I will teach you how to cook it when you grow up. She particularly liked the Chawanmushi and the simmered Shirataki. I cooked Salmon Teriyaki specially for her.
She polished up everything on her plate and decided to become a Japanese if her salmon always taste this good. Ahahaha~ I think she really liked the Teriyaki sauce. Need to find some time to teach Grace, my helper how to cook this. I will post the recipes up later. Now that the children are asleep, I want to spend some time to catch up some Japanese Dorama. Need to get some tissues ready while I drool over Japanese hunks. 
じゃね~
Saturday, May 10, 2008
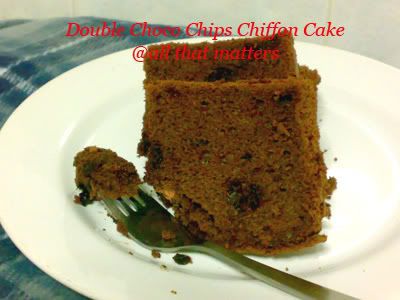
Double Chocolate Chips Chiffon Cake
I must apologise if you find my blog abit boring as I am always making chiffon cakes. Well, it's kinda addictive eating chiffon cakes actually. At least, my family thinks so. I like it that chiffon cakes aren't as oily and heavy as butter cakes. Previously, I have attempted a few mousse cakes before I started blogging. Though testers at home agreed that they were good, I had to finish most of the cakes all by myself. This is no good at all, especially when I am trying very hard to lose weight.
I baked this cake at the same time while waiting for my sourdough bread to proof. Knowing Ah Girl will not appreciate the bread, I didn't want her to feel left out. I had some chocolate chips which I wanted to clear off. This is the 2nd time I used Valrhona Cocoa Powder, the result is impressive. Everyone tasted it agreed that the chocolate taste is rich. No surprise here; I used my tried and tested chiffon cake recipe and modified accordingly. However, I have finished my stash of egg whites, so I only used 4 egg whites in this recipe. I am abit lazy and too tired to make ice cream tonight.
Double Chocolate Chips Chiffon Cake
Ingredients
(A)
4 egg yolks
40g castor sugar
1/4 tsp salt
40g corn oil
(B)
140g Warmed Fresh Milk (I used Meiji Low Fat Milk)
25g Cocoa Powder
*Mix well
(C)
120g Cake flour
1/2 tbsp Baking powder
1/8 tsp Baking Soda
*Sift 2x
(D)
4 egg whites
50g castor sugar
1/2 tsp Cream of Tartar
80g Chocolate Chips
Method
1) In a bowl, using hand whisk, whisk yolks and sugar till sugar dissolves.
2) Add oil and salt, whisk and add chocolate milk. Stir well.
3) Fold in sifted flour and mix well.
4) In another bowl, using an electric mixer, beat till the whites are frothy. Add in Cream of Tartar and beat till soft peaks.
5) Add in sugar gradually and beat till stiff peaks.
6) Fold in 1/3 of the whites into the yolk mixture using a rubber spatula till incorporated.
7) Pour the mixture and add chocolate chips to the remaining egg whites and fold in gently till incorporated.
8) Pour the batter into a 21cm chiffon tube pan. Bang the pan on the table to get rid of bubbles.
9) Oil a piece of aluminium foil and cover the pan loosely. Bake at 180 deg.C for 10mins.
10) Turn down the temperature to 170 deg.C and bake for 20mins.
11) Insert a skewer to check if cake is done. Remove the foil and reduce the temperature to 160 deg.C and bake for a further 5 to 10mins to brown the surface.
12) Remove from the oven and invert the pan. Remove the cake from pan when it's completely cooled.
*Note : I still prefer to use 4 yolks, 5 whites' recipe. Difference of 1 egg white is alot. The cake is slightly shorter than what I usually baked.
The cake was ready before dinner and Ah Girl was already waiting for me to cut it. She was pinching at the cake so I gave her a small slice before dinner. Shouldn't have done that. She had another slice after dinner and asked for a 3rd helping, which I stopped her. I suggested giving some away to my parents and brought her to the verge of tears. Like chocoholic mom, like chocoholic daughter. Ahahaha...
Besides baking bread and cake, I cooked dinner as well. I didn't plan the menu beforehand and bought aubergines and some char siew along the way. It was a fluke actually, the aubergine and char siew combo was quite good. A nice dish to go with rice. IH and helper had seconds. I didn't think much of it during cooking, so I didn't do a good job at cutting them up. Thus failed for presentation. Ahahaha.. Should you need the recipe, do drop me a note.
Happy baking/cooking~ それじゃ~~
Happy Mother's Day!

Happy Mother's Day mom! Many would bake or order a cake for moms on this special day. I made bread instead. Weird huh? My mom has cut down on cakes these couple of years. Expecially those that are frosted with cream, may it be buttercream or non dairy whip cream. You'll see her scraping the cream off. Forget about cheesecakes or mousse cakes. She is no longer keen on them. Or maybe she's just worried about her cholesterol intake.
Having tried my first attempt of the Sourdough bread, she was quite satisfied with the taste and texture. Therefore, I'm making her one for Mother's Day. With the heart-healthy flax seed, I hope she would like it. She gave me this bottle of preserved roselles she bought during her trip to Taiwan. It is kinda addictive to eat so I incorporated into the bread. It tastes tangy and not overly sweet. It gives the bread a nice aroma, which is better than cranberries. Besides using flax seed meal and preserved roselles, I also used pumpkin seeds and black sesame.
I took out the starter from the fridge and they are still alive despite being neglected. This picture is taken after 2nd feeding before baking.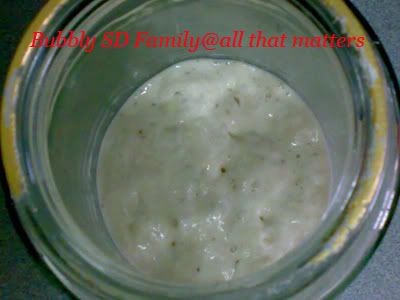
Beasties say : 'We are 1 happy, bubbly family.' ^_^
The whole process is slightly longer. I started making bread at 12.30p.m and ended at 7.30pm. This is not including feeding the starter the day before.
This time round however, I will not be able to share the recipe with you. I made a boo-boo with the sourdough starter. The recipe was given to me by Chips by the way. While digesting it, I forgot that the recipe was asking for 60% hydration for the starter. By the time I remembered, it was too late. I also forgot to add salt and some pecans which my mom like. Duh~ What was I thinking? (-_-||) So, till I get it 100% right and asked Chip's permission, I will then put the recipe up. I am experimenting with a new method to knead bread recommended by Chips though. Once successful, I'll share it here.
*To mom :
I know the pain my marriage has caused you. I understand that sometimes, when it gets so bad that you had to say things to hurt me; just to ease the pain. I am trying my best to make it up to you; in my little ways. Happy Mother's Day, and I love you.
Your unfilial daughter
Thursday, May 8, 2008
Making Grape Wine

I love this picture most! *All pictures are taken with my humble handphone. I took these pictures at night without any natural light. Almost gave up as I could not capture the colour of the wine initially (fortunately, I didn't).
I am elated, so proud of myself.  I am like a Cheshire Cat, grinning ear to ear. Today, I am a happy person. I finally harvested my first batch of grape wine. KWF (thanks dear!) introduced me to this site by 周老师 , which is very comprehensive and detailed. I started this after my experiment on Sourdough. I did some research before embarking on this experiment (I will list them all for your further reading purposes) and am glad that everything went on smoothly.
It is rather simple actually, it is just a matter of patience and cleanliness. First, you have to ensure that the jars and utensils that you use are clean. Most importantly, scrub your hands and under your nails as well (I fall short of using disinfectant soap). I used boiling water to pour on the jars and poured away the water after it is cool to touch. I left them overturned to dry for 2 days before I used them. As for the grapes, I removed them from the stems and washed them. I laid them out to dry for a day. Discard those that are soggy, squashed or spoilt.
I used :
2.5kg of Ebony Grapes
250g of Fine White Sugar
Method :
1) Using your hand, crush the grapes on the jar. After a substantiate amount, sprinkle some sugar.
2) Crush grapes again and sprinkle sugar. Repeat the process until finish.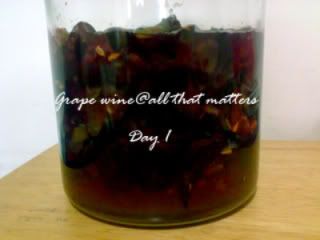
3) Seal the jar with cling wrap followed by the cover. Leave the container undisturbed in a cool, dry and dark place.
4) Fermentation will start and slowly dies off by the 7th day. However, mine took longer. It took 9 days. Once there are no new bubbles coming out, it is ready to harvest the wine. During fermentation, it is important that you resist the temptation of disturbing the content. You will need to open the cover slightly to release the gas on alternate days. You can smell it but nothing more. During this time, it is also important that you look out for moulds. If moulds appear, please discard the whole batch. It causes poisoning. But if you have diligently prepared and sterilised the jar, chances of moulds appearing are being reduced.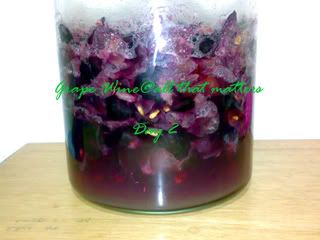
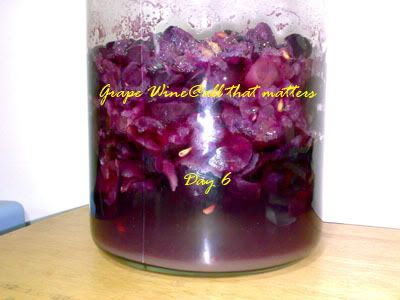

5) I used a cloth sieve to harvest the wine into 2 smaller jars. Mine yielded about 1.2 litres of grape wine. Keep refrigerated to 'age' the wine. Once the wine is settled and clear, bottle it up to about 80% of the container to minimise oxidation.
The top wine is clearer. The bottom wine will be slightly more murky as there are residue.
The following are pictures of the top wine. Very Clear, no residue.

For winos like me, the wine is on the sweet side and alcohol content isn't enough for kicks. I would prefer it to be abit drier. Perhaps I should have used 7% of sugar or no sugar instead. The grapes were rather sweet on its own already. I tasted the wine and find it quite smooth. I'll leave it in the fridge for it to develop and see how it goes. Hopefully, it won't turn into vinegar.
*Side note : IH asked why I crush the grapes by hand one by one (yes, I did that for 2.5kg of grapes, which was rather tiring). So I suggested to use my feet instead and he could have the whole harvest to himself. It's a pity that he declined.
For your further reading to understand how things work, alcohol content and bacteria and methanol poisoning. That is why I said cleanliness IS important!
http://www.home-winemaking.com/index.html
http://www.home-winemaking.com/winemaking-2a.html
http://www.madehow.com/Volume-7/Brandy.html
http://en.wikipedia.org/wiki/Moonshine
http://www.sentex.net/~bacchus/faq.html
http://www.bacteriamuseum.org/niches/features/winevinegar.shtml
それじゃ~~ *hic*
Monday, May 5, 2008
Marble Chiffon Cake
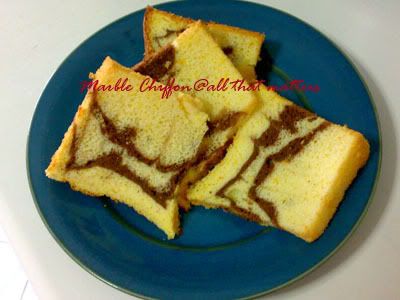
I have always wanted to attempt a marble chiffon cake. Although I have been rather successful with chiffon cakes (thanks mom!), I still have cold feet making a marble chiffon cake. I was afraid that I might deflate the cake if I meddle with the batter for too long. I don't know why I gave it a shot yesterday. Maybe I have lost my sanity and need to do something insane to prove it. 
Anyhow, it didn't turn out too well. The marbling effect is non existent. Now that I have attempted it, it is not as scary as I thought. Perhaps my next try would be better. I modified my Orange Chiffon Cake for this.
Marble Chiffon Cake (Orange and Chocolate Flavour)
Ingredients
(A)
4 Egg Yolks
40g Fine Sugar
1/4 Tsp Salt
40g Corn Oil
120g Orange Juice
Zest of 1 orange
(B)
20g Warmed Evaporated Milk
1 Tbsp Cocoa Powder
*Mix well
(C)
120g Cake flour
1/2 tbsp Baking powder
*Sift 2x
(D)
5 egg whites
40g castor sugar
1/2 tsp Cream of Tartar
Method
1) In a bowl, using hand whisk, whisk yolks and sugar till sugar dissolves.
2) Add oil and salt, whisk and add orange juice and zest. Stir well.
3) Fold in sifted flour and mix well.
4) In another bowl, using an electric mixer, beat till the whites are frothy. Add in Cream of Tartar and beat till soft peaks.
5) Add in sugar gradually and beat till stiff peaks.
6) Fold in 1/3 of the whites into the yolk mixture using a rubber spatula till incorporated.
7) Pour the mixture to the remaining egg whites and fold in gently till incorporated.
8) Take out 1/3 of the batter, add in mixture (B), mix well.
9) Spoon the orange batter, alternating chocolate batter into a 21cm chiffon tube pan. Use a chopstick to pull backward and forward through the mixture. Bang the pan on the table to get rid of bubbles.
10) Oil a piece of aluminium foil and cover the pan loosely. Bake at 170 deg.C for 10mins.
11) Turn down the temperature to 160 deg.C and bake for 10mins. Lift up the foil to check the surface of cake, bake for another 10mins.
12) Insert a skewer to check if cake is done. Remove the foil and reduce the temperature to 150 deg.C and bake for a further 5 to 10mins to brown the surface.
13) Remove from the oven and invert the pan. Remove the cake from pan when it's completely cooled.
Thus, at least I fulfilled my promise of baking a 'soft soft' cake for Ah Girl. She loves it and nothing makes me happier seeing her enjoying the cake.
それじゃ~~ Pardon me for the short post. I have to go back to work for now.
Saturday, May 3, 2008
Double Choc Chips Muffins
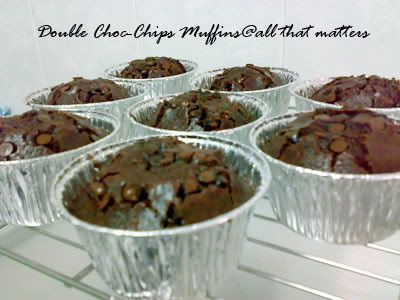
It has been a really hectic day yesterday. I tagged along Ah Girl's school excursion to the Underwater World in the morning. This shouldn't really be in my busy schedule and I was really contemplating to go to work instead. I had to work on weekends and public holiday as well. This is how tight and close the deadlines are. But I thought I really need a breather and since I have already paid for it, I might as well go. It is an opportunity for me to spend some quality time with Ah Girl too.
It was a right and wrong decision. The right decision because; I was able to see how Ah Girl interacted with her peers and teachers. At her age, it's 'monkey see monkey do'. I arrested some of the bad habits which she picked up at school and had a long talk about it before bedtime. Wrong decision because; while I was away, something cropped up at the production site yet and again. That really dampened my mood. The teachers must be wondering why I looked so sulky. When we returned, I rushed back to the office after a quick lunch. It must be punishment of some form that I 'abandoned' my work for a couple of hours. I was running around like a lunatic and the work doesn't seem to end. Yeah~ this Saturday and Sunday burnt again. I stole some time to blog this in the office. 
So much for my ranting. I was home rather late and after my long 'lecture' to Ah Girl, I didn't have time to bake. I promised her not to work this Saturday and Sunday and that I would bake her a chocolate chiffon cake for breakfast. Haiya~~ I broke my promise. This morning, I only had time for this quick fix. I hope she doesn't mind. The original recipe is found here. I made some adjustment as I didn't have molasses.
Double chocolate muffins (yield 9 pcs, depending on size of cups used)
Ingredients
220g Self Raising Flour
250ml UHT milk
140g Fine Sugar
100g Melted Butter
1 Egg (beaten)
1 Tsp Vanilla Essence
2 Tbsp Cocoa Powder (I used Valrhona)
80g Chocolate Chips
Extra chocolate chips for sprinkling (There is no such thing as chocolate overdose  )
)
Method
1) In a mixing bowl, add butter and cream with sugar with a whisk.
2) Add beaten egg and mix well.
3) Add flour and milk, vanilla essence, cocoa powder and chocolate chips. Do not over-mix.
4) Spoon mixture into aluminium cups to about 80% full.
5) Drop some chocolate chips on top.
6) Baked at 170 deg.C for 25 mins or till skewer comes clean.
*Note to self : If I were to make this again, I'd probably drop in some cut Mars bars Snickers bars or Maltesers to add some 'surprise' in the muffins for Ah Girl.
じゃね~
Thursday, May 1, 2008
Mango Pudding
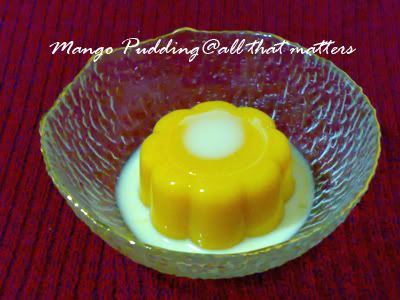
Last week, IH bought several huge mangoes. He is a big mango fan, while I am not. I prefer durians, which he dislikes. He told me that he was going to leave me 1 mango at my disposal, either for baking or whatever. Half suspecting that he was hinting me to make the mango mousse cake, which I made for his birthday last year (he was the guinea pig for my first attempt at the cake), I took my time.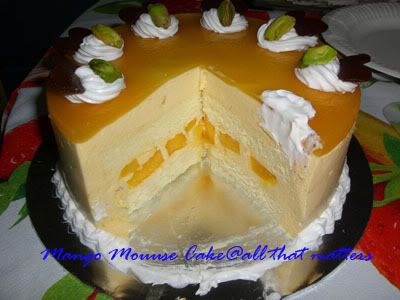
To be honest, I was not in any mood to bake. I procrastinated till the mango threatened to make its exit to the bin (okay, it didn't look like it's going to rot anytime soon when I cut it). So I made some mango pudding on Monday instead for Ah Girl, knowing that pudding is not IH's cup of tea (yes, I can be that mean). Ah Girl likes mango pudding with evaporated milk, like those sold at Crystal Jade Restaurant. However, she will have me pick out the mango cubes, leaving the pudding looking horrid. This recipe is shared by my aunt.
Mango Pudding
Ingredients (yields about 5 and 1/4 cups I bought from Cold Storage)
1-1/3 cup pureed fresh mango
1/3 cup evaporated milk
1/3 cup water
1/4 cup sugar
1 tbsp gelatin
fresh mango cubed (I omitted)
Method
1) Add gelatin and sugar to water and bring to boil.
2) Stir in the mango puree and evaporated milk, remove from heat.
3) Put in cubed mangoes into jelly cups and pour in the mango mixture.
4) Chill till set for at least 3 hours.
5) Drizzle evaporated milk and serve.
*Note : Might be able to fill up 6 cups if you add mango cubes.
**Note : Original recipe does not require to bring the mango mixture to boil. You just need to stir gelatin and sugar in hot water till they dissolve. However, it had to be eaten on the same day. It will start oxidising the next day. Still edible but the colour will turn ghastly. By heating up the mixture, it will stop the oxidation.
I was actually quite keen on making some durian pudding but I am living amongst durian-haters. Ah Girl didn't want to try durians, perhaps influenced by IH. My helper can't stand durians either, making me feeling like an outcast whenever I eat durians at home. So, my last bet is Ah Boy. Hopefully, he will grow up to enjoy durians like me. Hmm.. maybe I should start him young. Hiak~ Hiak~ Hiak~ 
*Update : About the above mango mousse cake, I remembered using Florence's recipe. For the top layer, I used gelatin to set the mango puree.
じゃね~


