
Ya... I've been slacking. Hee~~ managed to watch some J Dorama and was hooked on the hunks storyline hunks storyline. *Ahem~~ A couple of posts were sitting there waiting for the write up but I'll just leave them alone for the time being. I'll tell you why later. Anyhow, I was inspired by Cook Bake Legacy in her recent post of Baked Rice. It is a good way to use up leftovers, rice especially instead of the usual fried rice.
Why do I keep emphasising the use of leftovers? We live in a time where food is abundance but that is about to change. As some farmers see growing crops for biofuel is getting more lucrative, food crops are affected. The food prices are being pushed up, it is a world wide problem. Wasting food is not an option. We tend to buy/cook more than necessary. I remembered my mom telling this; finish your food (rice) else your future husband will be pock-marked. Hmm~~ maybe I didn't do as she said, that's why IH's face...
Okay, I digress. I am writing this down so Ah Girl will know, '谁知盘中餐,粒粒皆辛苦'. I will refrain from using this same scare tactics or something along the line however tempting. I have some salmon bellies and canned pineapples left in the fridge. Instead of using cream of XXX soup, I thought that some tomato sauce will take some of the fishy smell away. As the rice was abit dry, I added a layer of mushrooms on top to keep the rice moist. So this is my version of Baked Rice, using whatever I had on hand.
Baked Rice (Serves 4)
Ingredients
4 Eggs, lightly beaten
250g Salmon fillet
1 Tbsp Minced Garlic
1/4 Onion, chopped finely
4 bowls Cooked Rice
1 Cup Mixed Vegetables
150g Canned Pineapples, cubed
100g White Button Mushrooms, sliced
1/2 Can Tomato Puree (about 180g)
200g shredded Cheddar Cheese
Some Olive Oil
Salt to taste
Pepper to taste
Method
1) Heat up a wok, add oil and fry the eggs and scramble them into bite size. Remove from wok and set aside.
2) Pan fry the salmon till cooked, mash them up and set aside.
3) Heat up the wok, add oil and fry onions and garlic till fragrant. Add in mix vegetables and fry for about 1 minute. Add in the rice to stir fry and season to taste.
4) In a 8 x 8 inch aluminium cake tin, mix rice, salmon, eggs and pineapples together. Lay sliced button mushrooms on top and spread the tomato puree. Sprinkle cheese on top.
5) Bake the rice in a preheated oven at 180 deg.C for 20 mins or till the cheese melted and browned slightly.
*Note : Alternatively, you do not have to fry the rice, just mix it with the cooked ingredients and bake.
If you have not noticed, I usually do not put down the amount of seasonings required. This is because, I do not measure them. I also seldom weigh my ingredients as I usually cook according to feel and taste. As a result, some of my posts in the draft folder will suffer. Unlike baking, I don't record them down as I go along. So, either I try to recall what I did or they will get deleted in time. I think I need to get used to the habit of writing things down as this is one of the purpose of having this blog.
じゃね~~
Monday, July 28, 2008
Baked Rice
Tuesday, July 22, 2008
Hong Zao Chicken
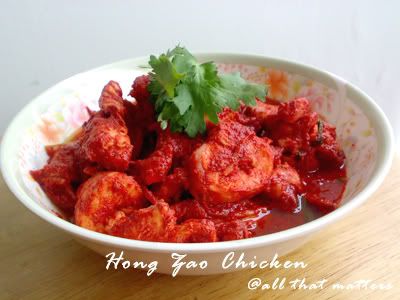
Finally. I was able to savour the fruit of my labour. I harvested my Red Glutinous Wine some time back. After distributing to family and friends, I stash some of it for myself (*sshhh~~). I needed to know if the wine is up to mark, To be honest, I did not have Hong Zao Chicken (红糟鸡) for both of my confinements. First of all, my helper does not know how to cook the dish. I am a Teochew and I seldom eat this dish. So I myself do not know how to cook it too. I wasn't very sure where to buy the wine lees too. Some of my friends discouraged me from taking too much alcohol during confinement since I was breastfeeding. Thus I did not have the chance to spike Ah Boy's milk to make him drunk sleep.
When I handed my friend, M, Ah Boy's first month cake, she treated me to a bowl of 红糟面线 (Mee Suah, also known as wheat flour vermicelli). Aiya, it was then that I realised what I have missed. That was why I started this journey of wine making so that she wouldn't miss out this dish for her confinement. According to the mommies of the new mommies, Hong Zao cleanses the womb (Oh dear, is it too late to spring clean mine?). It was also found that Hong Zao is able to bring down the bad cholesterol level (Wikipedia), improves blood circulation and may prevent coronary heart disease.
This is how I did my Hong Zao Chicken (红糟鸡). I had it with Mee Suah on last Saturday. I had the leftovers with rice for lunch. Yums!
Ingredients
1 Chicken, about 1.6kg, chop into small pieces (I removed skin and trimmed off fats)
1 section Ginger, peeled and julienned
3 generous Tbsp Red Wine Lees
2 Cups Red Glutinous Rice Wine
3 to 4 stalks Scallions, cut into lengths
2 to 3 stalks Cilantro, cut into lengths
Marinade
2 Tbsp Ginger Juice
3 Tbsp Red Glutinous Rice Wine
1/2 Tsp Salt
Some Sesame oil
Extras
Some Sesame oil for frying
Salt to taste
Sugar to taste
Red Glutinous Rice Wine to drizzle
Method
1) Place all the chicken pieces in a heat proof bowl, pour hot, boiling water over chicken, Drain, marinate and set aside for about 30 minutes.
2) Heat up a wok, add sesame oil and ginger. Fry till fragrant. Add in chicken pieces to fry.
3) Add in wine and wine lees, season to taste and stir thoroughly. Bring to a boil, cover and let it simmer for about 20 minutes.
4) Toss in the scallions and cilantro just before removing from heat. Drizzle some wine, garnish and serve.
Wine making is interesting and it has grown on me. Currently I am on another 2 batches of Red Glutinous Rice Wine. 1 for a mommy-to-be and another for M's friend. I am willing to make this wine for mommies-to-be for free (or those who like Hong Zao). All I am asking for is that they pay for the ingredients (which is dirt cheap), provide me with empty glass containers for the wine and lees they will be getting in 21 or 28 days. Maybe say a prayer or two for my children if they cared to; alright if they don't. Err.. no, I'm not a Christian or a Catholic, in case you're wondering... 
それじゃ~~
Monday, July 21, 2008
My Japanese Girl

Ah Girl's kindy celebrated Racial Harmony Day last Friday (the actual day is on 21 July). So instead of the regular 4 hour session, she only had to attend school for an hour. Maybe our government or school, thinks that the racial cohesion can be promoted within an hour. Talk about 速食文化. Anyhow, the children were supposed to dress in their ethnic traditional clothes. To be honest, Ah Girl is growing quite fast, Her traditional Chinese New Year Sam Foo has become three-quarter pants (I exaggerated, but you get the point). There is no way I am letting her wear that and I am not buying a new pair just for that purpose. So usually I will dress her in other countries' costumes (courtesy of my mom and sis). Last year, she was a Korean girl. Photos by the courtesy of anyhow point and shoot IH. His photography skills are worse than mine. And it shows. I have to edit the photos like crazy.
The reluctant model. Angle no good, 'kena' my bum.
Finally a smile. But angle also no good, 'kena' the head. 
This year she's a Japanese. My mom bought her this Yukata (浴衣) during her trip to Japan. Yukata, as suggested, is worn after baths. However, they are also worn during summer in Japan. I was told it costs 100 plus in Sing dollars. Should have gotten a cheaper variety. Look at the hem! She's going to outgrow it soon! (*faint + heartache). I must convince her to wear it more often. Ahahaha~~ I asked her to smile for the camera and she showed me this instead.
I warned her not to let her classmates pull and tug her clothes. Last year, her classmates (boys) pulled at her Hanbok till one of the buttons gave way. I was really upset (authentic from Korea and expensive!) but fortunately, the Hanbok was alright. This time, her classmates (boys again) pulled her obi. The bow I tied for her was gone when she returned from school. They are going to get it from me one of these days! She is just too friendly and so not like me when I was her age. Perhaps I should teach her what my parents taught me; if boys disturb you, hit back (wrong, I know  ). Throughout my school days, I earned myself the nickname, '恰查某' (in hokkien). Should I impart my 铁砂掌/Karate chop skills and Uppercut to her? Contemplating....
Sunday, July 20, 2008
Vanilla Yoghurt Cake

The title is right. These are actually cakes, just that I used my mini donut trays to bake them. It's an awful waste if you only confine the donut trays to baking, well, donuts. According to my calculations, the probability of baking donuts in my household is about 1%. Not that I dislike donuts but it is a hassle to prepare all the different toppings. Though deep fat fried donuts are less healthy than baked, if I have a donut craving, I prefer to buy them. Ah Girl loves it when I bake donuts, not that she eats them. She just enjoys decorating them. And she did a pretty good job too. This is an archive picture.
While I glazed the donuts, I gave her different sprinkles to keep her occupied. Not too bad a bonding activity. Hopefully, she would be interested in cooking and baking in future.
I baked the cakes in the first picture as Ah Girl's contribution to their Racial Harmony Day's party. I called that a party as there was no lessons on that day. I was given the letter from the teacher that school is only an hour and that it would be good if the parents contribute some snacks. Good, good. Now I have more little guinea pigs. Ahahah~~ It was rather late after tucking in Ah Boy to bed. I needed a simple recipe so I modified the Chocolate Yoghurt Cake and further reduced the sugar as I needed to glaze them. I multiplied the below recipe 2.5 times and yielded about 100pcs of cake. After glazing, decorating and packing, it was past 2.30 in the morning!
Vanilla Yoghurt Cake
Ingredients
(A)
120g Melted Butter, cooled
200g Plain Yoghurt (I used Marigold's)
2 Eggs
2 Tsp Vanilla Essence
Pinch of Salt
*Mix together
(B)
8 oz. Self Raising Flour
*Sift
(C)
55g Fine Sugar (suggest 100g for regular cake)
Method
1) In a mixing bowl, add in (B) and (C). Pour in (A) and stir briefly to wet the dry ingredients.
2) Using a mixer, mix for about 1 min till well combined.
3) Pour into lightly greased donut trays and bake at 170 deg. C for 10 to 15 mins or till the skewer comes clean.
4) Leave aside to cool for about 10 mins and remove from tray. Glaze with milk chocolate and sprinkles if desired.
*Note : I filled up a sandwich bag with the batter, cut a hole and piped the batter into the trays. It's easier this way.
I kept about 16 pieces at home and gave the rest to the school. I thought it was a pretty neat idea to bake the cakes in the shape of donuts. Makes great party/finger food. Dressed them up in chocolate and sprinkles, the kids love them! So did the teachers. Ah Girl told me some of her friends ate a few pieces in a row. So I asked her how many did she have. One. She ate only 1! And she refused to eat those at home. Aarrgghh~~  That's how I arrived at the figure of 1%.
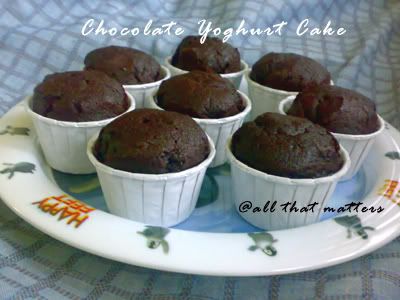
Chocolate Yoghurt Cake
One of the many challenges in motherhood is getting your kids to eat the food you cook or bake. I think I am quite an adventurous when it comes to food. I do like my experiments in the kitchen too. However, my dear Ah Girl is not adventurous at all! Is this what they call, '物极必反'? Once she has set her mind on something, she is unlikely to change. I would rate her daily menu as boring. Steamed egg custard, broccoli and carrots, fried udon/noodles, steamed fish, salmon with teriyaki sauce, egg drop soup with fish and veggies, egg omelette with long beans and repeat. I am glad that she does not like deep fried food but her menu... Not that I did not try to expand it.
Likewise for baked goods. She likes chiffon cakes and only in chocolate flavour. Another one would be Cornflakes Honey Joy which she can pop a few at 1 go. So far, all the chocolate cakes and cookies or rather most stuffs I have baked, were not enticing enough for her to take another bite. I have given my bakes to neighbours' kids and watch them gone in a flash. How come my 3 or 4 tiny cupcakes are still stuck in the airtight container?  Haiya~~ so demoralised... Okay, maybe she does not have a sweet tooth, but she does love ice creams and lollipops. It is hard to convince myself that she doesn't like sweet stuffs.
Previously, I baked some cakes and used paper cups meant for muffins. She said it was too big for her to finish. So this time round, I went down to the baking supply shop to get some smaller cups. Guess what, she told me that the cupcake was still too big and only managed to finish half of it. Whether if the cupcake too big; you be the judge. She would also complain that my cakes are too sweet; which is why she was unable to finish. But my dear girl, I have reduced the sugar alot, some tasters even complained that my cake recipes are not sweet enough! Haiya.. haiya... 
I spotted this recipe from Zu, 'Quick & Easy Treats' sometime ago but only tried it out last week. It is a fairly easy recipe to follow and yielded lovely texture. Thanks Zu for sha ring! Original recipe taken from 'Best Ever Chocolate Cakes & Slices' by Periplus. I made some modifications.
Chocolate Yoghurt Cake (yielded 28~29pcs, using mini cups of 38 x 28cm)
Ingredients
(A)
120g Melted Butter, cooled
200g Plain Yoghurt (I used Marigold's)
2 Eggs
1 Tsp Vanilla Essence
Pinch of Salt
*Mix together
(B)
6 oz. Self Raising Flour
50g Cocoa Powder
*Sift together
(C)
180g Brown Sugar
Method
1) In a mixing bowl, add in (B) and (C). Pour in (A) and stir briefly to wet the dry ingredients.
2) Using a mixer, mix for about 1 min till well combined.
3) Pour into individual cups and bake at 160 deg. C for 20 mins or till the skewer comes clean.
That's all for now. Going off to think of something again. 
Saturday, July 19, 2008
Pita Bread
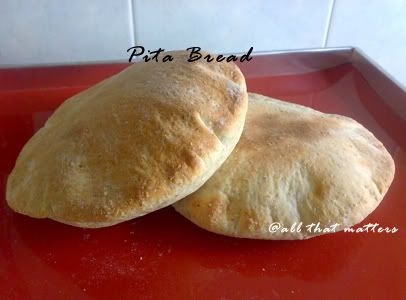
Pita bread is also known as '口袋面包'. According to Wikipedia, it has its origin from the Middle East and Mediterrenean. It is an interesting bread. When you cut it in half, it is hollow and you can put in your choice of stuffings. Good alternative for making sandwich. I used to wonder how they make these breads. So it is a good idea to attempt it when my mom went around searching for frozen pita bread. I volunteered to make some for her.
I did a 'Google' and arrived at the recipe from The Fresh Loaf. I would recommend this recipe to a first-time bread baker. It couldn't be simpler. The steps and explanations were clear. However, the ever-itchy-handed me, used bread flour and went to replace a cup of flour with wholemeal flour. I shouldn't have done that because I need to know the texture of the dough using the original recipe before doing any modification. The dough was too soft to handle, well, in my opinion. I had to add another cup of flour. This is what I did.
Pita Bread (makes 8)
Ingredients
3 Cups Bread Flour
1 Cup Wholemeal Flour
2 Tsp Instant Yeast
1-1/2 Tsp Salt
1 Tbsp Honey
2 Tbsp Olive Oil
1-1/2 Cup Water
Method
1) In a mixing bowl, mix all the dry ingrdients. Add in honey, olive oil and 1 cup of water.
2) Using a dough hook, knead the dough at low speed. Add the remaining water slowly, till it form a smooth dough, about 10 mins.
3) Roll the dough into a ball and place it in a bowl coated with oil. Cover the bowl with a cling wrap or damp cloth and leave aside to proof for 90 minutes or when it has doubled its size.
4) Divide the dough into 8 pieces and roll each piece into a ball. Leave aside to rest for 20 mins, covered with a damp cloth.
5) Preheat the oven to 220 deg,C. Line 2 baking trays with greaseproof paper (mine was 10 x 14 inch).
6) On a lightly floured surface, flour the top of the dough and rolling pin. Roll out the dough thinly into rounds.
7) Transfer the pitas onto the baking trays and pop them into the oven. Bake for 3 to 4 mins, longer if you want them browned and crisp. They will puff up very nicely like UFOs. Alternatively, you can cook them over the stove, something which I have not tried.
*Note : It is important to preheat the oven or there will be difficulty for the bread to puff up.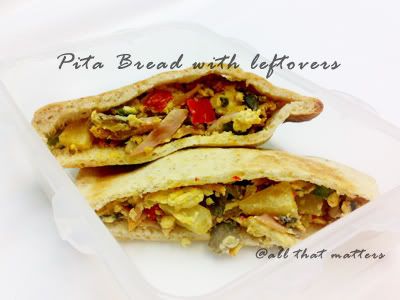
I did this for my lunchbox. Like I said before, it's a great way to make use of leftovers. Maybe you can even stuff '梅菜扣肉' (braised pork belly with preserved vegetables) for that Asian twist. Ahahaha~~ Hopefully, I will be making pita breads again soon. Having baked them brown, I feel that the texture was not satisfactory, probably overbaked them. Perhaps I should take them out of the oven once they puffed up nicely. Hmm...
じゃね~~
Wednesday, July 16, 2008
Homemade Pizza

Besides Japanese food, I enjoy Italian food too. I love cheese and associate cheese with Italian food, especially pizzas. Probably because when I was still at an impressionable age, I was sold by the Pizza Hut's advert. Hot, steamy, fresh pizzas with gooey, elastic pull of Mozzarealla cheese. Never mind my parents said that pizza cheese smelled like baby's vomit. Mozzarella, Cheddar, Edam, Parmesan, and Fetta are the few which I have tried and liked. I still have not pluck up enough courage to try blue cheese or goat cheese because I was told that they are rather pungent. And like Camembert and Brie, they contain the Penicillium strain of bacteria. I am allergic to Penicillin so I do not know if I should actually consume these cheeses. Maybe I should ask my doc.
Anyway, never thought that I would attempt making pizza myself. Probably because I am no longer attracted to Pizza Hut's pizzas. They looked good in the ad but what you get is hmm... The crust is usually thick unless you ask for thin crust. Having said that, I think I should not complain too much about the toppings. At least they have a wide variety of toppings. My sis went to Italy for holidays and discovered that when you order for a mushroom pizza, mushroom is all you going to get. There is no such thing called Hawaiian pizza. Perhaps Italians will shake their heads in disapproval when they see my pizza. Yes, I must admit, my pizza is terribly confused. But hey, since it is homemade, why stinge on the ingredients? At least my family preferred mine to storeboughts. Ahahah...
I made some salad to go along with the pizza too, Green apples, grapefruit, Butterhead lettuce and Lettuce Lollo Rossa are tossed together with some salt, juice of half a green lemon and 2 tubs of Meiji Yoghurt with Nata de Coco. I made 2 pizzas in 2, 10 inch by 14 inch rectangular trays, for this pig-out session. As this was my first attempt, I think the recipe I used was not meant for making thin crust pizza. However, I spreaded the dough rather thinly, so the end product wasn't thick. I made some pita bread for my mom too as she is not into cheese. I gave her some of the toppings to fill up the bread. I will put up the recipe for pita bread later. I do find them rather easy to make and rather similar to making the pizza crust. The recipe for the pizza crust is from Margaret Fulton's 'Book of Pasta & Pizzas'. Courtesy of my sis' stash of old recipe books given to me. I modified the recipe a little.
Homemade Pizza
Pizza Crust (yields 2 10 inch x 14 inch pizza)
Ingredients
4 Cups Bread Flour
1-1/2 Tsp Instant Yeast
1 Tsp Salt
1 Tbsp Honey
2 Tbsp Olive Oil
1-1/2 Cup Water
Toppings (as you like it)
1 Can Tomato Paste (Hunt's, 170g), dilute with some water
1 Can Pineapple Rings, cubed
1 Yellow Capsicium, cubed
1 Green Capsicium, cubed
1 Red Capsicium, cubed
200g Honey Baked Ham, remove rind and sliced
1 Chicken Breast, sliced and marinated with salt, pepper and cornstarch
1 Large Onion, sliced
300g White Button Mushrooms, sliced
500g Pizza Plus Cheese (a blend of Mozzarella, Cheddar and Parmesan) - I didn't use all
Some olive oil
Salt to taste
Method
1) In a mixer bowl, add flour, yeast and salt. Pour in honey, olive oil and water.
2) Using a dough hook, knead the dough on low speed for 10 mins. Lightly oil a bowl. Roll the dough into a ball and place in the bowl. Cover the bowl with cling wrap or damp towel and leave aside to rise for 1 hour or double its size.
3) While proofing, in a pan. drizzle some olive oil, stir fry the chicken slices. Remove from pan. set aside for later use. Heat up pan again. add oil and fry onions till slighlt browned. Add in mushroom , season to taste and fry till done. Set aside.
4) After proofing, transfer the dough onto a lightly floured surface. Kneads the dough for about a minute. Divide into 2 portion and roll into balls. Leave to rest for 10 minutes.
5) Lightly dust the tray with flour and roll out the dough. Spread out the dough evenly. Spread the tomato paste generously onto the dough. Pile the toppings, leaving cheese last.
6) Bake at 220 deg.C for 15 to 20 mins or till golden brown.
*Note : Cooking the chicken and mushroom first will prevent the dough from getting soggy. If you bake uncooked meat and mushrooms, they will sweat during baking.
**Note : You can use your own preferred toppings. I prepared more toppings as I need to leave some for pita breads.
Happy cooking! それじゃ~~
Tuesday, July 15, 2008
Lunch In A Box

Ya, I know, I have been slacking on Bento posts. Well, my bentos have not been exactly interesting. In fact, I feel that they are pale in comparison to Kyaraben bento. Same sentiments were shared by Bento Pet. It is not so much of disappointment that regular bento packers don't get the recognition, at least for me; I was afraid that I would embarass myself for posting uninteresting/sloppy-looking bentos.
I admit that breastfeeding has taken a toll on me. I have to wake up 2 or 3 times a night to feed Ah Boy. This naughty boy will feed and fall asleep, wake up again brawling for milk. I ended up dozing off with him. Morning is always a rush and I would just dump in all the ingredients and stir fry. Sometimes when I open my box, I would go, 'What the heck!'. Ahaha~ It's food anyway and I didn't get a tummyache. But blogging about it? No way!
Anyway, Bento Pet's post is a wake up call for me. I have got to put in more effort! No more excuses. The above was done in a hurry again but was somewhat more presentable. I made pizza and pita bread over the weekend. I had some capsiciums, pineapples, mushrooms and some shredded ham (actually, these are the rind part which I cut away) left in the fridge. I stir fry them together with eggs and filled them up into the pita bread. A good way to make use of leftovers.
Below are some bentos which I have made some time back but too lazy to put it up. They were in my draft box since May! 
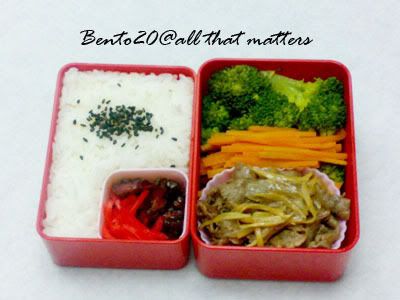
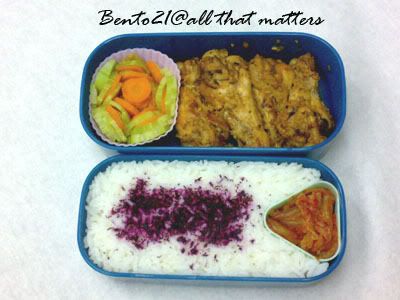
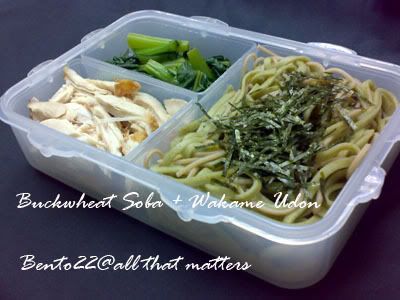
Another bento using leftovers again. The soba noodles and udon are insufficient for a meal, so I just dump them in together.
So if you have been packing bentos and been blogging about it, why not join in the fun? Join Bento Pet's Bento Competition! You might be the winner! Time for me to buck up too!
じゃね~~
Monday, July 14, 2008
Potato & Leek Soup
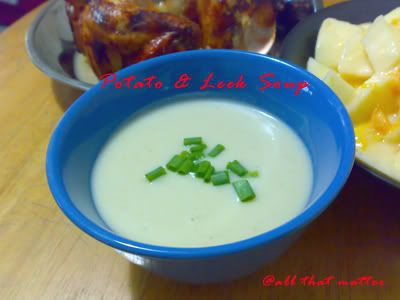
My sis passed me a couple of old recipe books the other day, which I think are more than 10 year old. These books have been lying around the house for quite some time and somehow, I took them for granted. Previously, I had no interest in venturing into western cuisine as I find them a tad too troublesome, too time consuming to prepare. After concocting Pumpkin Soup by fluke, I am hooked on soup.
I made Potato and Leek Soup last weekend to accompany roast chicken and salad. For a balanced meal, you need protein, carbo and fibre. The roast chicken was relatively simple. Just marinate the bird with salt and pepper the night before, stuff onions and green lemon in it. I trussed it, rubbed butter all over it and laid streaky bacon on its back to save me from having to baste the chicken. I roasted the chicken breast down so that the breast meat will not be dry. Bake for an hour at 190 deg.C. Nothing to 'Wow' about, still need some improvement. Peeled of some skin whille removing the charred bacon. The bacon kept the back moist and does wonders to the flavour. Perhaps I should wrap bacon all over the bird? Hmm..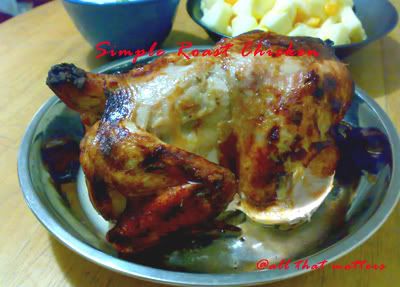
These days I have been making salads without mayonnaise or Thousand Island's sauce. I use yoghurt instead. I cut up some Fuji apples, oranges and mangoes, throw in a tub of Meiji Yoghurt with Aloe Vera bits. Toss with a pinch of salt and juice of half a green lemon, you get a nice salad (I was too lazy to go to supermarket to get greens). Again, nothing to 'Wow' about.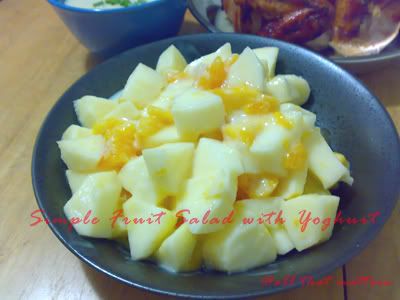
I picked out this soup recipe from 'Book of Family Meals' of Margaret Fulton. I find her instructions simple to follow. In a time where information and recipes are easily available online, I still love to hold a recipe book and go through it page by page. This book must be one of the earliest recipe books that we owned.
Potato & Leek Soup (serves 4)
Ingredients
60g Butter
4 Leeks, sliced
4 Potatoes, medium, sliced
1 litre Chicken Stock
1 Cup Thickened Cream
Salt to taste
Pepper to taste
chopped scallions for garnish (optional)
Method
1) Heat butter in a pot, add leeks and fry for about 10 mins or until softened. Add potatoes to stir fry a while.
2) Add in stock. Cover and simmer for about 30 minutes or until the vegetables are tender. Scoop out the potatoes and rub through a sieve. Use a blender to blend the leeks then pass through a sieve. Discard residue.
3) Combine the potatoes and soup mixture into a pot. Add cream and heat through. Do not allow to boil. Season to taste. Garnish if desired.
*Note : Original recipe calls for a pinch of nutmeg and chives for garnish (I didn't have). This soup can be served chilled too.
**Note : Do not use a blender to blend the potatoes though it is easier that way. The potatoes will become gooey (eew~).
IH asked why there was no bread to accompany this soup. Wah.. double dose on carbs, no wonder his waistline is expanding. Look who's calling fatty now? Did I mention that Ah Girl dislikes potatoes? The only potato product she consumed is potato chips, which I occasionally allowed. I thought I could fool her with this soup. I didn't think it tasted/smelled of potatoes at all. Somehow, she detected it and refused to take another spoon of it. Mission failed.
Wednesday, July 9, 2008
Chiffon Cake Tips and Trouble II
Pardon me for not putting this up sooner. I was caught up with other stuffs and could not collect my thoughts enough to do this. Appreciate your patience. In this post, I will be posting the problems faced in baking a chiffon cake and how things work. For the detailed step by step process, please refer to here.
Understanding chiffon cakes
First, I need to analyse my chiffon cake recipe for you to understand how I arrived to my calculations. Like some of you, I have encountered and baked, using some recipes which don't work. It is very frustrating testing out recipes which don't work and which were written half-heartedly or without checks. Thus, I worked out a simple formula that helped me determine if the recipe is worth the time and effort.
Take my usual 4 yolks, 5 whites recipe for example, the amount of flour used is 120g. The amount of liquid used, including oil is 180g. Therefore, the flour over liquid ratio is 120 : 180. That is 2 parts to 3 parts or 66.67%, if you prefer. The higher percentage you have, will result in a more stable cake but it will have a drier texture. If the flour versus liquid ratio is lower then 60%, say, 50%, the chances of the cake collapsing is high. Reason being; there is too much liquid in the cake and the structure is not strong enough to hold it. In this case, usually after removing from the pan, or after slicing the cake, the cake will start to shrink. A good chiffon cake, as my mom taught me, should be able to hold its shape after cutting. The cake will spring back after you press it.
Whisking Trouble
Still, things can go wrong even if you got the first part right. Remember to ensure that the bowl you are using to whisk the eggs white is clean and grease-free. Any traces of grease or egg yolks will hinder the proper whisking of egg whites. A common problem is whisking the egg whites to stiff peak. Either you underbeat it or overbeat it. Tricky? A little, but when you get the hang of it, it is easy. 90% of egg whites are made up of water, the rest are made up of protein, mineral and glucose (source : Wikipedia). When you whisk the egg whites, air is being introduced to it. Sugar is added to it to reinforce the structure of the egg white. That is why it appears to be white and fluffy. However, this structure does not hold well at soft peak. The egg whites tend to separate into protein and water. If you stop at this stage and start mixing with the yolk mixture, the egg whites will deflate easily. This will cause more moisture and resulting the cake to collapse.
If the egg whites are overbeaten, you will see it becoming foamy and some liquid collected at the bottom of the bowl. There is no way to salvage this. You have to discard and try again. The correct texture of the egg whites at stiff peak has a glossy look, it does not swirl about in the bowl. At this stage, the air incorporated, egg whites and sugar are most stable. That is why you can do this!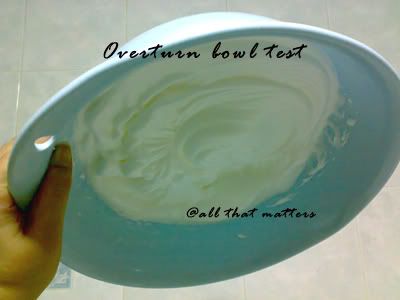
Do understand this state is short-lived though. You cannot let the egg whites sit around for a long period of time. They do not like to wait (like some men after marriage). That is also why all chiffon recipes wrote the preparation for the yolk batter first, whisking of egg whites, last. After whisking them to stiff peak, you have to fold the mixtures together immediately.
Mixing Trouble
In fact to me, I much prefer making a chiffon cake than making a traditional sponge cake. For traditional sponge cake, you have to whisk whole eggs till fluffy and then fold in the flour. If you are not careful, it is easy to deflate the eggs. However, some smart people have devised the 'egg separation method' for sponge cake. This method is almost the same as chiffon cakes except that they add in melted butter last. For chiffon cake, egg yolks, flour, liquid and oil are all added to 1 bowl. This in my opinion, has already minimised the chances of deflating the egg whites.
While the yolk batter is laden with flour and all, the egg whites are whisked till light and fluffy. If the whites are added directly to the yolk batter or vice versa, it will be difficult to incorporate as the density of the two are so different. This will call for more stirring, which you do not want, to mix the batter well. To lighten up the yolk batter, about 1/3 of the egg whites are added to it. 1/3 because, should you deflate this amount, you still have 2/3 of it to save the day. As mentioned earlier, egg whites do not like to sit around too long, nor do they like to be pushed around for too long. When folding egg whites, always be decisive, making swift but light strokes. You should be scooping the egg whites up and fold. Do not press.
Pan Trouble
Baking chiffon cakes does not necessarily need a chiffon tube pan. A normal round pan will work fine too. I have also tried baking them as cupcakes, which worked equally alright. However, perhaps, baking a chiffon cake in a tube is what makes it a chiffon cake. It is its signature. I have seen paper mould for chiffon cakes. It is interesting but I have yet to try them myself, thus unable to share the experience. My guess is that the temperature control would be slightly different from the aluminium pan.
By far, my personal preference would still be using an aluminium tube pan. I feel that the more you use the pan, the more seasoned it gets. This helps to ensure even browning at the sides and bottom. The only thing to note for pan is that it does not require any preparation. In other words, do not grease it, do not line it, do not grease and flour it. The hydration of the cake makes it difficult to hold its structure during baking. Thus it relies on 'clinging' onto the pan to achieve its height. If the pan is greased, the cake might not be able to rise properly and will slip off the pan when you overturn it for cooling. Your cake will start to deflate. I would advise against using a non-stick pan. As I have yet to venture into silicone bakewares, I do not know if it will work with pans made of silicone.
Here's a guide of choosing a chiffon pan size.
1 egg recipe : 14 cm mould
2 eggs recipe : 17cm mould
4 eggs recipe : 21cm mould
6 eggs recipe : 23cm mould
8 eggs recips : 25cm mould
Baking Trouble
All the chiffon cakes baked here in this blog is using my relatively new oven. The first cake that was baked in this oven is none other than a chiffon cake. I have been told that baking a chiffon cake in a convection oven with a fan that I cannot turn off is difficult. I acknowledge this. My oven browns to fast, that is why I need to tent it. Also, I need to position the cake on the low rack. In my previous recipes, I had to open the oven to check if the batter sticks to the aluminium foil. Lately, I really could not be bothered. I left the foil there and only removed it towards the last 10 minutes. This leaves the top slightly 'disturbed' but you are going to overturn the cake anyway! This way, the oven temperature is also more stable. Let's tackle some of the problems then.
1) If the cake slip off the pan after you overturn it, the sides and the bottom are unlikely to be browned. This means you have underbaked it. Do check the oven temperature or prolong the baking time to a further 10 minutes. If the top is already sufficiently browned, tent the cake.
2) If the cake slips off the pan but the sides are browned. Check the recipe's hydration ratio. If there are too much liquid in the cake, the cake will be too heavy. When you overturn it, it will be pulled down by its own weight (I have encountered this before!). After slipping off the pan, very soon, the cake will start collapsing and you will have pancake for breakfast, tea or supper.
3) If the cake caved in from the sides, there is a possibility that the egg whites are overbeaten.
4) If the cake's top (overturned, previously it was the bottom) is sunken in (like a small groove), the oven temperature is too high. If the oven temperature is too high, it will cause the cake to over-expand. So when the cake relaxes after cooling, it will cause this effect.
5) If the cake top splits, this is normal, don't fret.
6) If the oven temperature is too low, the cake will have problem rising, reaching its optimum peak. The cake will be heavy and not airy.
7) If the oven temperature is unstable, the cake will not rise properly and might collapse.
8) If the cake starts to deflate in the oven, this is due to the oven temperature. Either the temperature is too high; causing the cake to peak too fast too soon or the oven temperature is unstable.
9) Overturning the cake immediately is what most recipes call for. If you do not overturn it, the cake will collapse on its own weight when the cake structure is still unstable. However, if the temperature outside the oven is very low (cold draft), the cake will shrink very fast. I would suggest open the oven door slightly to circulate the air abit before taking the cake out.
10) If there are alot of big holes in the cake, air might have been trapped when you poured in the batter. Bang the tube pan on a flat surface to rectify this. If you did not fold the egg white properly, you will get uneven holes as well or you can see speckles of whites in the cake.
11) It is normal for chiffon cakes to lose its height after cooling. However, if it collapsed to half of its original height, check if the egg whites are beaten to stiff peaks or if you have deflated the egg whites during folding.
Removing and Storing Trouble
It is most frustrating when you baked a pretty chiffon cake and ended messing it up at the final stage. Use a sharp thin blade and run along the side of the pan. You need to use a thin blade because you need to run it along the tube as well to remove the cake properly. I did not do that in the past. After running the knife along the side and bottom, I just twist and yanked the cake out. I forgot that chiffon cakes are such delicate bakes, of course I ended up with a torn cake.
I would suggest eating chiffon cakes the next day after it is baked. The cake structure is more stable and the flavours are properly infused. For home baked chiffon cakes, especially when you are using my recipe, please note that it is best to be eaten within 3 days. I have reduced the sugar and oil in my recipe, therefore, the cake will not keep well. If you would like to store them in the refrigerator, you will have to wrap the slices up in sandwich bags and keep them in an airtight box. Leaving them open in the fridge will lose the moisture and the cake will absorb other smell in the fridge.
I hope I have covered most of the topics and they would be useful to deciper the problems you faced during baking chiffon cakes. The above mentioned are based on the best of my knowledge and understanding. I do not claim to know all and would be grateful if you could enlighten me if you have other tips or point out my mistakes.
じゃね~
Monday, July 7, 2008
Red Glutinous Rice Wine II

They look pretty, don't they? That is why I call them Red Gems. I hope I have captured the clarity/beauty of it before giving them or consuming them. I showed off my wine and wine lees to my aunts like a proud parent and they wanted to have some too. I promised them that I will make for them. So I used the remaining 1.5kg of glutinous rice that I have. This batch of Red Glutinous Rice Wine actually gave me a scare. I thought I had to throw away the entire batch away and start anew.
Ingredients
1.5 kg Glutinous Rice (糯米) – weighed before cooking
180g Red Yeast (红糟) – blend into fine powder
1-1/2 pc Wine Yeast (酒饼)– mash into fine powder
2 Tbsp Sugar (糖)– optional
For preparation and method, please refer to here. The only difference is that I did not mix the ingredients together. Instead, I tested out with the method stated here, by alternating layers of cooked rice, red yeast and wine yeast. I wrapped a potato masher with plastic bag to help me push down the rice. It is much, much easier! No more struggling with sticky gloves!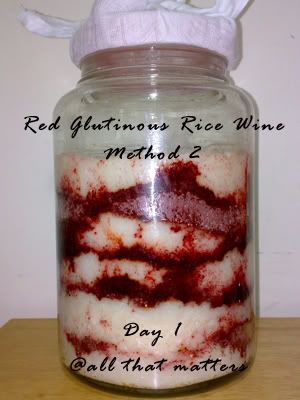
I find that the fermentation progress for layering method is slightly slower than the previous method. For my previous batch, by the end of day 1, some wine has already started to collect at the bottom. However, for this trial, even by Day 3, the wine collected was miserable. Probably less than 1 cm. I panicked for the first 2 days as I thought this batch would not make it. The only consolation I have is that it started to smell like wine and that there are no moulds in sight. By Day 4, everything started to accelerate from there, finally, to my relief.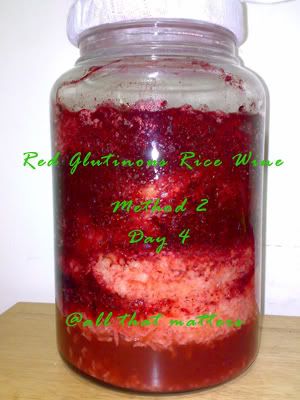
I was able to see alot of active bubbles. A good sign to show that it is fermenting. As there are blotches of reds (red yeast) and whites (rice) all over the place, I discussed with my parents who discouraged me from stirring the mixture. Do not fix things that are not broken, they said.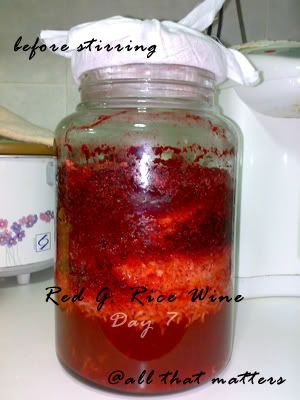
Being the same old stubborn me decided to give it a stir to see if there is any difference. I did not stir the mixture on the 7th day for my first batch.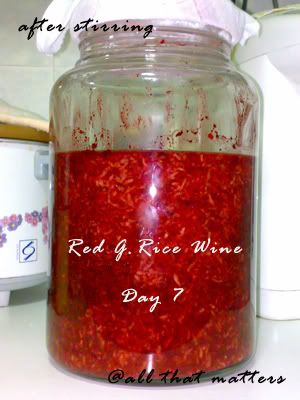
More even, don't you think? The rice sank to the bottom again, but it will separate itself again.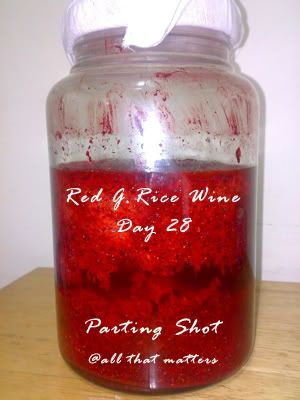
I decided to harvest it on Day 28, being a Saturday night. I can finish bottling by the next day. Some of the rice fell to the bottom again during transport.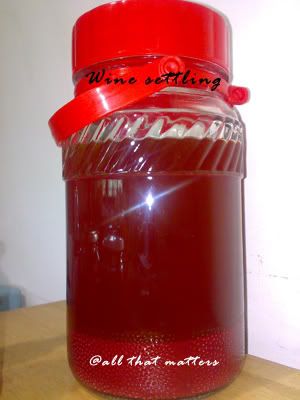
Left this on the table overnight to let the residue settle.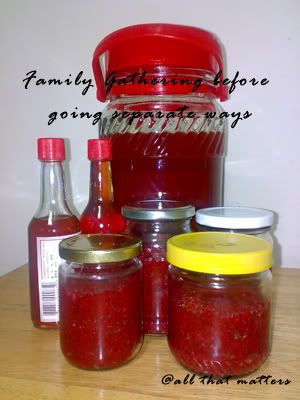
This batch yielded about more than 2 litres of wine and 900g of wine lees (I mixed in more wine this time). All these will be given to my mom and aunts. I have reserved 1 bottle of wine and some wine lees for Yuri when we meet up. The taste of the wine is sweet and my mom commented that the wine lees are much more fragrant than those store-bought.
Before I harvested this batch, my friend M, messaged me to say that her confinement lady commented that the wine and wine lees I gave her was good! That, coming from a confinement lady, it must be good! (self brag) Ahahaha~~ Then her friend wanted some too. Looks like I have to make another batch again.
それじゃ~~
Thursday, July 3, 2008
Ham, Spinach and Mushroom Quiche
I made 3 quiches in 2 days over the weekend. What prompted me to make these was the conversation with my friend L. L, can't cook to save her own life and readily admits it. Her idea of cooking is pouring hot water into cup noodles. Her reason being; there will always be foodcourts, hawker centres and home delivery service. Sometimes, she would just call me up to ask me if I know of the recipe for a particular dish. When I offered to give it to her, she would decline. Last week, I finally know why she likes to call me up.
L : Do you know how to make quiche?
R : Nope, never made it before.
L : How can you not know? (sounds upset)
R : Huh? Is there a problem not knowing?
L : You are my idol you know?! How come you don't know how to make quiche?
R : .... .... Eh.. Aunty... since when did I become your idol?
L : How come you don't know? (still harping)
R : I haven't tried.
L : Why you never try?
R : .... .... (felt like hanging up at this point) Okay, I'll go try over the weekend and REPORT to you!
L : You try already let me know! I will tell ABC and XYZ that you know how to make quiche too!
R : .... ....
My dear L, thank you for showing me off to your colleagues and friends. While I appreciate that but I am not a celebrity chef, you can stop doing that. Please idolise Jamie Oliver, Nigella Lawson and many others. Your friend, me, could not have known every single recipe or cooked everything under the sky. Ahahah~
Unknown to L, I have always love quiche but procrastinated making one myself. One thing that deterred me was making the shortcrust pastry. I really dislike rubbing-in method and would avoid it at all cost. The only time I made shortcrust pastry was when I had to make Pineapple Tarts, so that's about once a year for Chinese New Year. I have another secret; that is I do not know how to line the properly to form an even and thin crust. This is my first attempt. Salmon, Spinach and Mushroom Quiche. I did not have a quiche pan so I used a tart pan instead.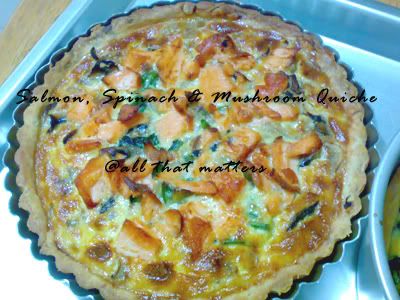
Cross-section of it. The crust is thick in my opinion. And I find that the tart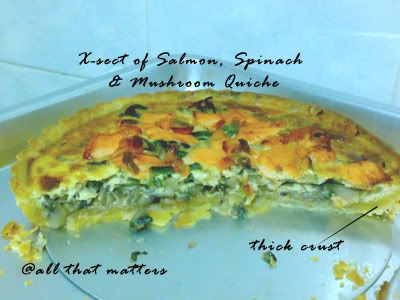
The next one, I attempted with a cake pan. It was worse! I thought it would be better is I have some depth but I had problem spreading the dough out properly. Actually, getting the rolled out dough into the cake pan was quite a task.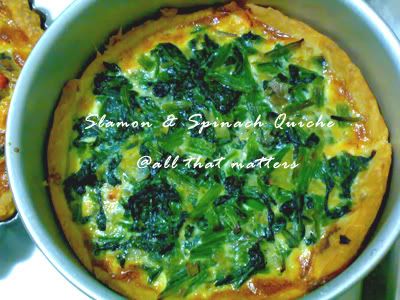
Look at the crust! Horrid!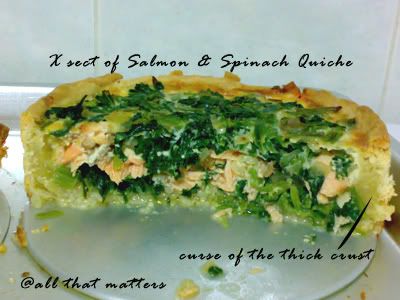
I would consider my first 2 quiches as a failure. Reasons being; Crust too thick, too much filling, too little egg custard.
My final attempt on Sunday.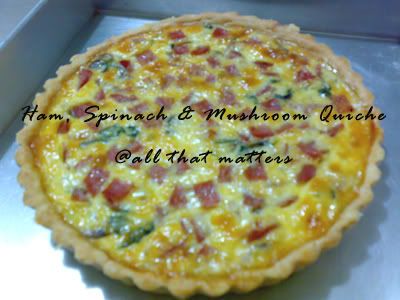
Crust still unsatisfactory.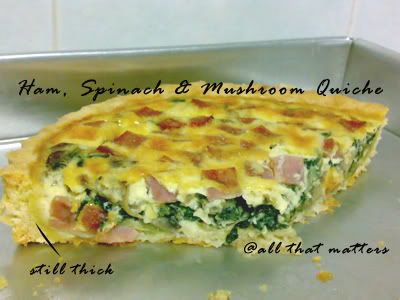
I still need to work on the lining of the crust but I would say the 3rd attempt was much better. I would prefer to use a deeper pan though to accomodate more egg custard. As IH did not want to have the quiche too rich, I did not add an extra yolk or any cheese to it. The recipe below is based on my trials. Thanks IH and helper for eating all the quiches I had made even though they are not up to mark.
Ham, Spinach and Mushroon Quiche
Shortcrust Pastry (makes 2 crusts, 8 inch tart pan)
Ingredients
300g Plain Flour, sifted
1/4 Tsp Salt
150g Chilled Butter, cubed
1 Egg Yolk
100ml Chilled Water
Method
1) In a bowl, add in flour, butter and salt. Use a pastry scraper to chop and combine the butter into flour until it resembles breadcrumbs.
2) Add in egg yolk and water, fold till it forms a dough. On a clean surface, knead the dough slightly.
3) Wrap with cling wrap and chill in the fridge for 30 minutes.
4) Roll out the dough on a slightly floured surface, roll out till it has even thickess. Transfer the dough onto the tart pan. Press the dough against the side of the pan and trim off the excess.
5) Poke some holes on the dough using a fork. Blind bake for 10 minutes at 210 deg.C.
*Note : The pastry can be prepared beforehand. 2 options : 1) Baked then freezed. 2) Freeze the extra dough for later use.
**Note : I used the pastry scraper to chop and fold the flour instead of using the usual rubbing-in method. Works too!
*************************************************************
Fillings (for 1 quiche)
Ingredients
80g Spinach, chopped
80g White Button Mushrooms, sliced
1/2 White Onion, sliced
Some oil for frying
Salt to taste
Sugar to taste
50g Honey Baked Ham, remove rind and cut
Method
1) In a pan, add oil and fry the onions till soft and slightly browned. Add in mushrooms and spinach. Season to taste and fry till vegetables are soft.
2) Leave aside to cool, squeeze off excess water.
3) Arrange the vegetables onto the crust and top with ham. Press the ingredients down slightly.
*************************************************************
Egg Custard (for 1 quiche)
Ingredients
90ml Full Cream Milk
90ml Thickened Cream
1 Egg
Salt to taste
Pepper to taste
Method
1) Add all ingredients into a measuring cup and season to taste.
2) Pour into the prepared crust and fill up as much as possible (usually up to 80% but no harm filling up to 90%).
3) Bake the quiche at 180 deg.C for 35 minutes or till the custard sets.
So you see my dear L, I really have nothing for you to idolise about. Thank you for overlooking my weaknesses. Most importantly, being there for me when I needed you. I am not one who take the initiative to make contact but you made the effort to keep our friendship going. 13 years is a long time but I am looking forward to more years to come.
それじゃ~~
Wednesday, July 2, 2008
Haircut & First Words

'Mom, you're pointing your handphone at me again...'
'Are you going to give me the rest of that biscuit when I'm done with this one?'
I brought the children for their haircut 2 weeks back, before the school re-opened. Ah Girl is used to the idea now, I should say she has been looking forward to her haircut. Probably because she can watch 'Barney' or "Hi Five' at Junior's League. I am glad that Ah Boy did not put up any struggle or cry when it was his turn. He stared at the hairdresser the whole time and I was distracting him with the video clip I put up here earlier. He only started to squirm in his seat towards the end. Probably sitting still for too long.
He is getting more and more active these days. Wanting to explore things around him, that includes tugging, pulling, scratching, stuffs like that. I don't why but he is deeply facsinated by the tissue box and he likes to tear up tissue paper. He will giggle when he got some of the tissue paper in his mouth. More giggling if you try to take them out of his mouth. He is eating and sleeping well. Staying true to his Chinese Zodiac sign, a little piggy. There will be some drama when he doesn't get his way. I have to constantly remind myself not to give in to tantrums. But on a whole, I am blessed with a cheerful, playful and healthy baby.
Ah Girl must be his best friend now. Although he pulls her hair sometimes, he will shower her with his kisses along with his drool. At 8 months plus, his first distinctive word is not 'Ma Ma' but 'ball ball' when I showed him some grapes. I was kinda sad because Ah Girl's first word was 'Ma Ma'. I then, drilled him with 'Ma Ma' whenever I had time. My strategy must have backfired. Instead, his next distinctive word is 'Deh Deh' (refering to Ah Girl) and followed by 'Ah Der' which means water or milk.  My dear boy, when are you going to call me 'Ma Ma' instead of 'Nn' (sounds like you are poo-ing, you know)? Haiya~
Tuesday, July 1, 2008
Ultimate Double Chocolate Cookies
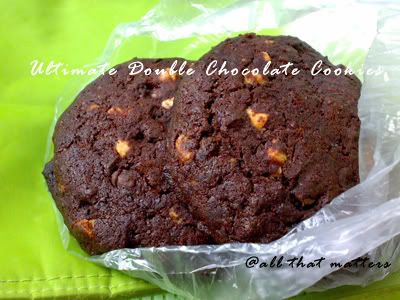
I dread taking pictures of chocolate bakes. Usually, I will end up with awful pictures, all in 1 dark mess. Worse when I had to take photographs of them under artificial lights as I usually bake at night. I took the picure above while I was on my way to work. I packed some of these cookies to work, so the the unglamourous sandwich bag. The background was a chiller bag to transport expressed breastmilk in. I was fiddling with my handphone and found this 'new' function which was there all along. Silly me, all the time, what I did was just point and shoot. These 3 elements came together and I got myself a very nice and clear shot. Of course, natural light helps heaps. Now I kinda regretted getting a 2nd hand camera for S$100 after taking this shot with my handphone. I have yet to get acquainted with it.
Back to cookies. I attempted a recipe at Sweet & Simple Bakes. It is a site set up by 2 passionate bakers who shared their knowledge in baking, techniques and recipes selflessly. Every month, eager bakers will submit their entries with the tried and tested recipes provided. I missed out on the first one and glad I participated this round. Kindly refer to the link above for the original recipe, as yours truly adjusted the amount of sugar used again. Also, I substituted half of the chocolate chips with white chocolate chips.
Ultimate Double Chocolate Cookies
Ingredients
250g Plain Flour
50g Cocoa Powder
1/2 Tsp Baking Soda
*Sift together
175g Butter
200g Brown Sugar
1 Tsp Vanilla Essence
2 Eggs, lightly beaten
150g Milk Chocolate Chips
150g White Chocolate Chips
Method
1) Line a baking tray with grease proof paper and preheat oven to 180 deg.C.
2) In a bowl, beat butter and sugar till light and fluffy. Add in egg slowly till well combined. Add vanilla essence and beat well.
3) Fold in the sifted flour and chocolate chips. Wrap the dough up with cling wrap and chill in the fridge for an hour (this helps especially in our warm climate).
4) Divide into 20 portions and roll into balls (I used ice cream scoop as suggested in the recipe). Leaving ample space in between dough and press down the dough slightly (wet your fingertips). Bake at 180 deg.C for 10 to 12 minutes. Leave the cookies to cool on tray for 2 minutes before removing to cooling grid.
This is a really simple and easy recipe to follow which yields great results! The cookies are not too oily. Rich chocolatey taste and great with a glass of cold milk. Ah Girl loves the cookie dough and helped herself to it while I was baking this. I had to stop her and remind her about the raw eggs. I will definitely bake these again but would prefer them in bite-size. I am looking forward to the next recipe from Sweet & Simple Bakes.
じゃね~~


