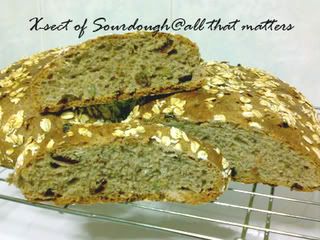
I haven't been baking/cooking regularly of late. Being bogged down by work and been rather negative these days. Fortunately, I have friends who cheered me on, online or off. Also, I have something on hand to keep my spirits up a little. Something which requires daily attention. I jumped start on cultivating wild yeast to make Sourdough. Hmm.. where do I actually start? Something caught my eye in the forum I frequent. Then Gina gave me some of her starter, which I killed along the way. Slowly, I was being introduced to this thing called 'Sourdough' by a fellow forumer, Chips, whom I can't thank enough of. The more I read about it, the more intrigued I become. Thus I started this journey. Be forewarned that this is a rather long post.
I used 20g of bread flour and 20g of water(de-chlorinated), mix well and left it for a day. This is what it looks like.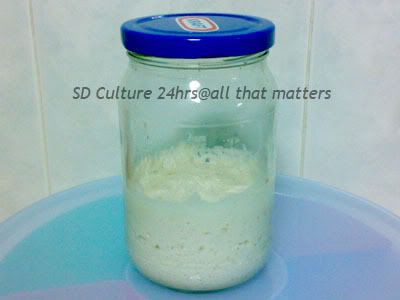
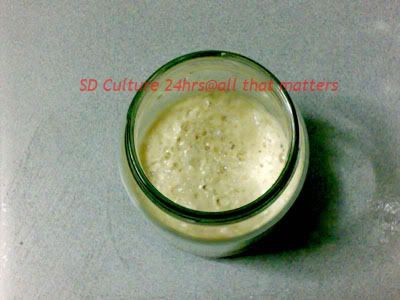
Sad to say, this batch got 'killed' by my helper. Can't really blame her enthusiasm, can I? She had been 'poking' the 'foaming organism' with chopsticks. Thinking that 'it' will behave and best remained at a safe level, instead of risking an 'eruption'. My starter turned pink, quite pretty really, but inedible. When the starter turns pink or have streaks of colours, both attractive or unattractive; it's a sign that it has moulds. Perhaps I shouldn't have thrown that batch away, might as well let it grow and see what happens. I started another batch, this time, with a taller container and asked my helper to stay off it.
I fed the starter according to instructions, for 7 days. It was rather tedious. For 7 days, you need to feed the starter, let it double, throw away some on the next day and feed again. I usually leave about 1 tablespoon of the starter and feed 10g of water and 10g flour to it. To understand why you need to do this, please read up this link. I'm just a lucky beginner. All I know, I learnt it from that site and from Chips (I do hope he/she has a blog which I can link up and give credit to). Anyhow, here's what it is supposed to look like on 6th and 7th day. The starter will have bubbles (carbon dioxide), just so you know that it is alive. It also has a faint alcohol smell. If it smell really bad, it's time to throw it out.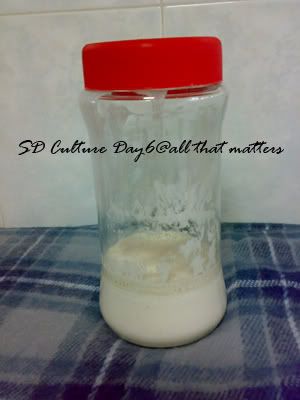
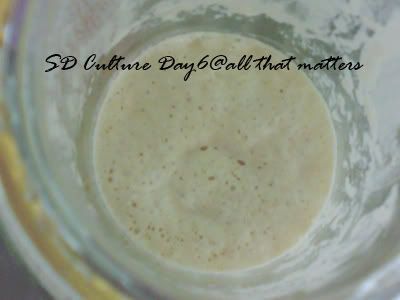
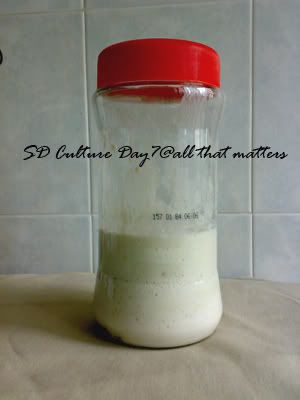
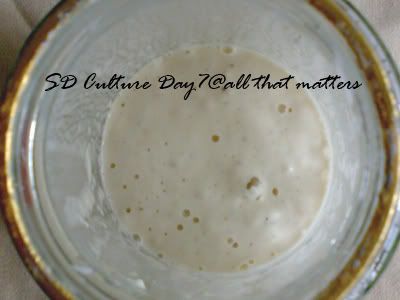
You need to clean the sides of the container, in case the moulds decide to grow there. After 7 days, I kept the starter in the fridge. I would need to feed the starter twice before I start baking. Thus, on Friday night, 10.30p.m., I took 10g of the starter, I added 20g of flour and 20g of water. Next morning, I fed the starter with 100g of water and 100g of flour. I started making bread at 2.30p.m. and ended at 8.30p.m. for my precious 2 loaves of bread. I got the recipe from here. I made this bread mainly for my mom coz flax seeds are supposed to be good for the heart. I reduced the recipe as I know that neither my mixer nor I, can handle the volume. Also, I do not have poppy seeds and my mom preferred pumkin seeds. Below is my version, it's my first attempt baking using cup measurement.
Flax Seed Bread (yields close to 1 kg of bread before baking)
Ingredients
1 Cup Sourdough Starter
2 Cup Bread Flour
1/2 Cup Wholemeal Flour
1/4 Cup Flax Seed Meal
55g Olive Oil
60g Honey
130g Water
1-1/2 Tsp Ground Cinnamon
1/4 Cup Pumpkin Seed
90g Dried Cranberries
1/4 Tsp Salt
Some rolled oats (optional)
Some flour to dust
Method
1) Toast the pumpkin seeds in the oven at 160 deg.C for 5 mins.
2) In a bowl, mix the starter, water, honey and oil together. Add in the flax seed meal, ground cinnamon, wholemeal flour and bread flour to form a dough.
3) On a floured surface, add in salt and knead the dough till smooth. Test if the dough reaches membrane stage. Add in the pumpkin seeds and cranberries at this stage and knead abit more till the ingredients are evenly distributed.
4) Cover the dough and leave it rise till doubled it size. Using a rolling pin to even out the dough, weigh, divide and shape into 2 loaves. Sprinkle some water on the surface of dough and coat it with rolled oats.
5) Sprinkle some flour and rolled oats on the baking tray and transfer the loaves onto the tray. Leave them to prove till they double in size. Bake in lower rack at 165 deg.C for 40 mins or they sound hollow when you tap them.
Before baking, waiting for 2nd proving.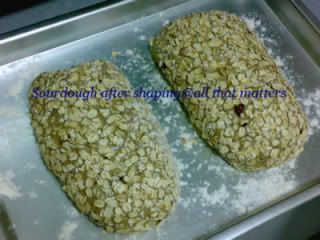
After baking.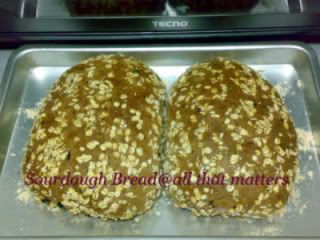
I didn't want to grease the baking trays so I used rolled oats and flour instead. The bread didn't stick to the tray at all. Mom's verdict : She loves it! It's flavourful, no yeasty smell. It's healthy by her standards. I love the crust and the chewy texture. So what happened to the leftover starter? Chips taught me this ratio, 15g starter : 30g water : 50g flour. Stored it in the fridge so I do not have to feed it that often. I was thinking of feeding it once a month.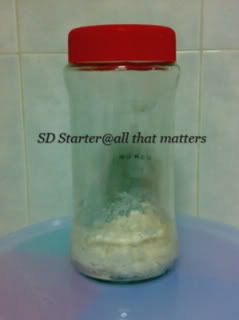
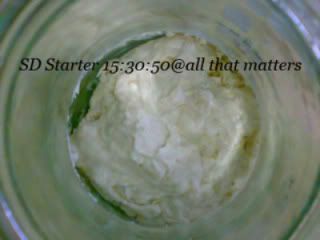
Till then, I'll find some other sourdough recipes to try out.
*Side Note : I noticed Photobucket auto-sized my pictures. Does anyone know how to remedy this? I tried resizing it but resulted slightly 'blurred' pic. Please... my pics are already blur.. I don't need this. 
それじゃ~~
Wednesday, April 30, 2008
Sourdough Bread
Wednesday, April 23, 2008
Grumbling Baby
抱抱~~ 抱抱啦~~ Complain for so long already.. why mommy never 抱抱?
Okay, okay... mommy 抱抱啦~ *muak muak muak*
No matter how stressed and depressed I am right now, looking at you and 'Jie Jie' give me the strength to carry on. A reminder that you need me, to carry on.
Monday, April 21, 2008
Japanese Cheesecake
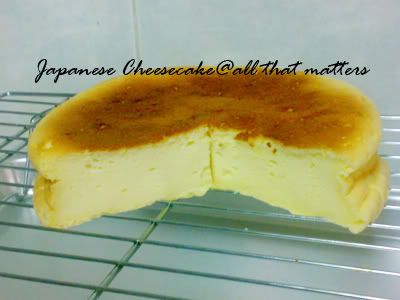
A fellow blogger once said, when you feel down, your bakes sink with you. Couldn't agree more. The cake rose close to 3 inches in the oven and ended up standing at 1.8 inches (I know, I measured). Shrunk at the sides too, totally unacceptable.  Been caught up with work lately and have not been in the best of mood. I found out that if you feel really down, no amount of chocolate you consume can alleviate your mood. Probably just leads you to nose bleeds. I had to go back to the office last Saturday and Sunday. Was planning to participate a blog event but couldn't find time and didn't have the heart to do it. At this point of time, work schedule remains sh*tty, nothing seems to be moving.
  I tried hard not to let work affect my time with the children but clocking 10 hours each day doesn't help. Everday, I wake up with the children, go to work. Come home, play with them for about 15 mins to half an hour, it's time to tuck them to bed. Making matter worse, I worked weekends for 2 weeks in a row. Does Ah Boy see me as a walking pacifier/milk dispenser? Does Ah Girl feel that I'm just a bedtime playmate?
I am kind of feeling burnt out. Maybe, I am getting in age. Maybe my priorities have changed. I have always envied stay-at-home moms. They can be with the kids all the time. I miss my kids when I am at work. But then, knowing my temperament, I would be tearing my hair out if I were to be a stay-at-home mom. Should I then, be grateful that the circumstances don't allow me to stay home? Speaking of temperament, I did the unthinkable on Saturday night. I feel ashamed to be even talking about it. I smacked Ah Girl's mouth for crying and it was not even her fault.
Came back home with a headache and hardly had a wink after nursing Ah Boy. Ah Girl woke up suddenly, still dreaming I guess, started wailing for no reason. She was crying so hard that she coughed. Past experience was that; she would cry and cough till she vomit. Instead of consoling her, calming her down, I got really angry and irritated that her cries woke Ah Boy up. Yes, I was worried that she would vomit on the bed and the cleaning involved if she did. Cleaning up = less sleep. When she didn't stop, I smacked her mouth, which resulted more wailings. That finally got IH out of his vegetative state in front of the TV. I left IH to comfort Ah Girl while I pat Ah Boy to sleep. I'm a terrible mother and felt even more guilty in the morning. Ah Girl couldn't recall the incident and kissed me 'Good-bye' when I went out for work.  I'm so sorry baby. What was I thinking? Why did I raise my hand to hit her? As much as I try not to let work affect me, I feel that I am fighting a losing battle. I have been losing sleep for a couple of nights over nearing deadlines. Something triggers off and I just snapped.
  I need a break soon, seriously. I do apologise if you do find my post abit too windy and kinda deviated from the title. Let's get down to business then.
To atone myself, despite being tired after work, I decided to bake Ah Girl's favourite cheesecake. You should see her eat this cake (not this one  ) , gone in lightning speed (okay, I exaggerated). No fork for her, no ma'am. She will use her hand, thank you very much. I'm trying out a recipe from here. Made some adjustments as I do not have a digital scale.
Japanese Cheesecake
Ingredients
180g Cream Cheese
100g Fresh Milk
30g Butter
3 Egg Yolks
30g Cake Flour
10g Corn Flour
2 Tsp Lemon Juice
a pinch of Salt
3 Egg Whites
80g Sugar
1/4 Tsp Cream Of Tartar
Method
1) Lightly grease and line a 7 inch round cake pan. Prepare hot water and oven for Bain-Marie (water bath).
2)In a bowl, melt cream cheese and butter using double boil method. Add milk. Leave aside to cool for later use.
3) Sift in cake flour and cornflour. Add egg yolks, lemon juice and salt. Mix till incorporated.
4) In another clean bowl, using a mixer, whisk the egg whites till foamy. Gradually add in sugar and whisk to soft peaks. Add in cream of tartar and whisk till stiff peak.
5) Fold in the egg whites till well corporated. Pour into the lined cake pan. Bang the cake pan on the table. Bake in Bain-Marie at 170 deg.C for 15 mins, cover the top with aluminium foil. Lower the temperature to 160 deg.C, bake for 60 mins. Uncover the foil and brown the top for 10 mins.
6) When the cake is done, open the oven door and leave the cake in the oven for 10 minutes (started to deflate here). Remove from oven and let the cake cool in the pan for 10 mins before removing to a rack.
*Note : Remember to add hot water to the water bath if it starts to dry up. The top of my cake is rather flat but tiny 'craters' are formed due to bubbles. Guess I should have bang the pan harder next time.
Something must have gone wrong somewhere resulting the above cake. Perhaps it's time to get a digital scale? I am rather sure I did not overfold the egg whites. All in all, the cake is still edible. Soft, moist and smooth. Though it collapsed but it's not hard but there is much room for improvement. How do I make it more fluffy? I'll leave that till later. Now I've got to go back to work.
それじゃ~~
Wednesday, April 16, 2008
Hummingbird Cake
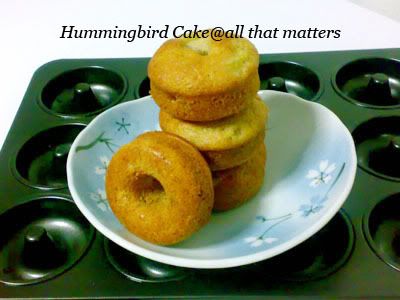
Nope, not donuts again, though Ah Girl would love it if they were. These are 'Hummingbird cakes'. I realised that when my mom told me that some bakes she bought from her usual trips to the bakery taste good, I am tempted to make or replicate a healthier version for her. Being more health conscious due to her discomfort, food/bread and cakes out there are deemed to be too salty/sweet/oily for her. One day, she asked me to try out this cake she bought from a bakery at Takashimaya. She liked the taste and asked me to try to decipher the ingredients used. Knowing the name, I cheated and 'Googled' it. I found the recipe documented at this site.
I put off baking this cake till tonight. These 2 weeks have been trying, work load and deadlines are driving me nuts. I'm so stressed up that I have this nagging headache for 3 days. I needed something to take my mind off work for a while, to get a moment of sanity. Last Sunday, my mom bought Hummingbird cake again (I'm beginning to love the name), she even gave me her stash of pecans (squirrel or what? Ahahah..). Thus, I have no reason not to try out the recipe for her.
Keeping her preferences in mind, I reduced the amount of sugar and oil used in the original recipe. I used only 1/3 of the recipe as the full recipe yields too big a portion for us. I used my method to mix the cake since my mom prefers a lighter cake. Also, I did not make the frosting. For those who are interested in the original recipe and method used, please click on the site linked above.
Let's decipher this Hummingbird Cake.
Ingredients (yields 24 mini cakes)
140g Cake Flour
2 tsp Baking Powder
1/8 tsp Baking Soda
1/2 tsp Ground Cinnamon
*Sift together 2x
1 Egg
70g Fine Sugar
1/2 tsp Vanilla Essence
1/8 tsp Salt
40g Corn Oil
130g Mashed Bananas
80g Crushed Canned Pineapples (I cut them up instead)
20g Pineapple Syrup (from can)
50g Pecans (toasted and chopped)
Method
1) In a bowl, using a mixer, whisk egg till pale and fluffy. Add sugar gradually and whisk till thick. Add in vanilla essence and salt. Add oil gradually and whisk till incorporated.
2) Add in mashed bananas, pineapples, syrup and pecans to the egg batter. Fold in the flour till well combined. Scoop the batter into 2 mini donut trays, about 80% full.
3) Bake at 170 deg.C for 15 minutes or till skewer comes clean.
*Note : I used the donuts trays as I didn't want to confine the trays to just bake donuts. Also, the ones bought at Takashimaya are baked using small bundt tins. However, my bakes are smaller than the ones sold.
**Note : I would probably double the recipe and bake with a 7 inch round tin next time round if mom's review is good.
This is how it looks inside. Spongy and soft. Springs right back when pressed.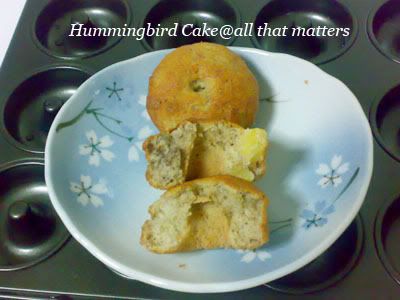
I don't know about you, but I can't resist doing this when I have round objects on hand. :D
Something I like about this cake/recipe is that it uses pecans instead of the usual pairing of walnuts and bananas. Sometimes, walnuts have this slight bitter aftertaste due to the skin. Using pecans do not have this problem at all. Do give this cake a try. It's absolutely lovely! Oopps.. self brag again.. ahahah...
Hopefully, by end of this week, I still have my sanity...それじゃ~~
*After note : Still need to adjust the amount of sugar. The bananas I bought were very sweet. I remembered to try out the pineapples and syrup but forgot to taste the bananas before I baked. Tsk...
Thursday, April 10, 2008
Marble Cake
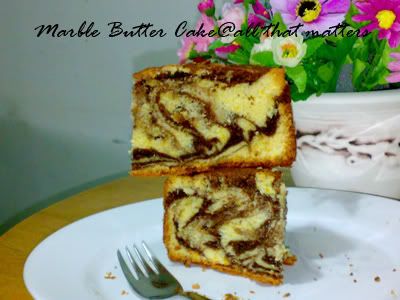
I have baked marble cake numerous times but have yet to eat a single slice myself. I used this recipe from Aunty Yochana's Blog (thanks Aunty for sharing!) with some tweaking to bake for Ah Boy's 1st month celebration instead of buying cake vouchers from Bengawan Solo. It was a marathon baking session as I can only bake 1 cake at a time. In 4 days, I baked 20 cakes for relatives and neighbours (*sshhh~~ don't tell my mom). It was very tiring, especially just after 1st month of confinement and had to stop in between Ah Boy's feeds. I wanted to leave 1 cake for myself then but had to give that away too as I left out 1 neighbour. Later on, I was too preoccupied to bake the cake for some taste test.
Well, if 20 families said that this cake was good, it must be good. I shared this recipe with a fellow blogger, which she succeeded in making. So when my long time girl friend chose Marble Cake as her birthday cake, I used this recipe again. Later on, she messaged me, raving about how good the cake was. Feeling elated, guilty and curious at the same time, I finally baked 1 for myself last night. Eheheh.. not bad (self brag). Happy Birthday, FY! Of all the 21 years we have known each other, you have been extremely patient and supportive. It is not easy to maintain our friendship especially when you have to put up with IH's crap. I am really grateful to have you by my side all these years. Glad you and your family love the cake. I'll bake for you somemore okay?
Here's the recipe.
Orange Chocolate Marble Cake
Ingredients :
200g Butter
100 g Sugar
1 tsp Vanilla Essence
3 Egg Yolk
2 tbsp Evaporated milk
a pinch of salt
200 g Cake flour
1 tsp Baking powder
* Sift together
3 Egg White
80 g Sugar
1 tbsp Cocoa Powder (sifted)
2 tbsp Evaporated Milk
*Mix thoroughly, warm up the milk if you find the cocoa powder difficult to dissolve.
Zest of 1 Orange
Method :
1) Beat butter, sugar, salt and vanilla essence until light and creamy.
2) Add in the egg yolk one at a time and beat until creamy. Add in evaporated milk.
3) Fold in sifted cake flour and baking powder.
4) Whisk egg white and sugar to a soft peak and fold gently into the creamed butter mixture.
5) Spoon about half of the mixture into a separate bowl. Add in the cocoa mixture and stir well.
6) Stir in the orange zest into the rest of the batter.
7) Drop alternate spoonfuls of mixtures into an 7" round pan. Use a chopstick to pull backwards and forward through the mixture.
8) Bake cake for 1 hour in oven at 180 deg.C or when the skewer comes clean. Turn the cake onto wire rack to cool.
*Note : I needed to use aluminium foil to cover the top of the cake as the convection oven browns very quickly.
Happy baking~ それじゃ~~
Monday, April 7, 2008
Bake Me If You Dare

Over at Kitchen Capers (KC), there is this new section, whereby someone will come up with a topic and those who are interested will join in the challenge. Like maybe trying to replicate a certain cake/bread/cookies, using certain ingredients, stuffs like that. Hmm.. something like Daring Bakers? Sugar High Friday? Is My Blog Burning?
There were 2 dares in the forum; 1 using bananas and 1 using olive oil and soy flour. I decided to roll them into 1. Although I do love baking cakes, I do have problem finishing them (Chiffon cake as an exception though). Unless I am willing to pile on more kilos, baking 2 cakes consecutively is not an option. Using bananas in bakes is easy. But using soy flour? Apart from using soy flour for flavours, I have not tried using it as a main. Maybe I '山龟' (please read in Hokkien). From my limited understanding, soy flour can replace wheat flour for baking and can be used to substitute eggs. As there is no gluten, how will the cake hold? Will it flop, end up like kueh? And after tasting the soy flour (yes, I do taste the ingredients before I use them; a habit picked up from previous training), I decided against using soy flour solely in the recipe. I was worried that it may not be well received by my testers at home.
Taking a step further (else it wouldn't be a challenge right?), I took the eggs off the recipe I came up with. This is my first attempt to bake a cake without any eggs. I figured if this is sucessful, I can bake more often for my parents who are controlling their cholesterol intake. I used mashed bananas to get the volume and texture I get from beaten eggs (yoghurt should do the trick too.. oh oh... good! I am getting more ideas from this... ) To entice my banana-hating Ah Girl to eat the cake, I added Oreo cookies. Oh, can someone enlighten me if Oreo cookies are considered vegan?
Thus, proudly presenting you this, Banana Oreo Cake.
Ingredient :
100g Plain flour
40g Soy flour
1/2 tbsp baking powder
1/8 tsp baking soda
160g mashed bananas + 2 tbsp Lemon juice
70g Sugar
40g Olive oil
40g Oreo cookies (remove cream and break up by hand)
Method :
1) In a bowl using a mixer, beat oil, sugar and mashed bananas till incorporated.
2) Sift the dry ingredients and add into the wet ingredients. Make sure the mixture is not lumpy.
3) Add in the Oreo cookies and pour the mixture in to a lined cake pan (I used 7" pan).
4) Bake at 170 deg.C for 35 mins or till skewer comes clean.
*Note : I am using a convection oven thus I did not preheat the oven.
Not knowing how the cake would turn out, the anticipation almost killed me. As I am doing a trial, I tested with a smaller portion. Fortunately, it turned out well. However, when I poured the batter into the lined pan, I realised the pan I used was too big for such a small cake. The batter looked rather pathetic. Ahahaha.. The cake rose and was spongy, not dense. It remained moist and soft this morning. I guessed it passed the taste test as IH ate 2 slices at one go and asked why the cake is so short, i.e.; not 'shiok' to eat I think. Ah Girl had a slice this morning. The sharp tongue/nose of hers detected bananas but finished the slice anyway. Wahahaha~~ Can I take it as 大成功だった? 
Going foward, I will try to find time to make another one for the not-so-health-concious. I'd probably add 2 to 3 eggs and increase the flour to 200g to get a full cake.
That's all for now~~ じゃね~
PS : There's another dare going on, I think the theme is 'Green'. Join in if you are interested.
Saturday, April 5, 2008
Dashi Stock
I usually make my own dashi stock and freeze into cubes. It is less hassle to use dashi powder to do the job. But I guess I am just old fashioned as in '龟毛'. First dashi stock to be used for clear soup (soup base for udon too). Second dashi stock for simmered dishes or miso soup.
Below recipes yields 4 bowls of soup each.
First Dashi stock
Ingredients
600ml water
10cm konbu
20g bonito flakes
50ml cold water
Method
1) In a pan, soak konbu with water for an hour.
2) Over medium heat, bring almost to a boil.
3) Remove the konbu and reserve for second dashi stock.
4) Bring water to boil.
5) Add cold water, add bonito flakes immediately.
6) Bring water to boil and remove from heat. (Do not stir)
7) After the flakes have settled at the bottom of pan, strain to get the first dashi stock. (Reserve the flakes)
Second Dashi stock
Ingredients
600ml water
15g bonito flakes
Reserved konbu and bonito flakes
Method
1) In a pan, put the reserved konbu and bonito flakes and water.
2) Bring to boil and then simmer for 15 mins.
3) Add in the bonito flakes and remove from heat immediately.
4) Skim off any scum and leave to stand for 10 minutes.
5) Strain.
Note : If you are making miso soup, it is important to know that you are not supposed to boil the miso. Add miso at the very last, else the active ingredients in the miso will be 'killed'.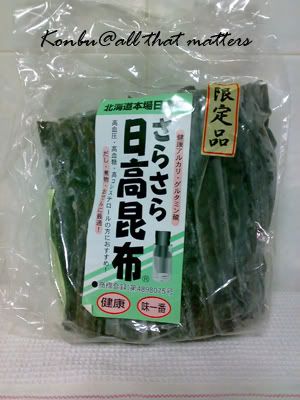
I bought this packet from Isetan at the Hokkaido fair recently. I usually get the Japanese stuffs from Isetan or Meidiya. Certain things like shoyu, sake and mirin, I get them at Daiso.
Happy cooking!~ それじゃ~~
Cold Sōmen
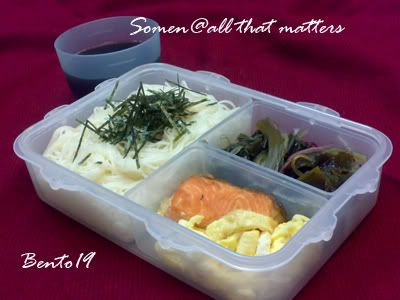
I usually eat Sōmen (そうめん) or Zaru Soba (ざるそば) when the weather is hot and have no appetite for hot food. My mom used to scream at me, saying that eating cold food is not good for the stomach and so on. I didn't want to rebuke her but erm.. what about cold drinks and ice cream? Ahah.. Anyhow, to me, eating cold noodles in a hot afternoon is the best, cools the whole body down.
Sōmen are noodles made of wheat flour I have only encountered it in dry, noodle stick form. They are usually eaten cold with a dipping sauce made out of dashi stock and shoyu. Serving it can be very simple, just some grated ginger and spring onions. Or you can choose to add some form of protein and fibre to the meal. In this case, I chose some shredded egg omelette, pan fried salmon and pickled seaweed.
There is another interesting way of eating sōmen. The noodles are cooked and placed in a long flume of bamboo, alleviated at an angle. They will run ice cold water in this flume and as the noodles flow along, you are supposed to catch them. By doing this, not only it is fun, the noodles are also cooled by the time you caught them. They called it 'Flowing Sōmen' or 'Nagashi Sōmen" (流しそうめん). To know more, please go to this site.
For Dipping Sauce (prepare beforehand)
300 ml Dashi stock
100ml Shoyu
60ml Mirin
1 tsp Sugar
Method
In a saucepan, mix and heat up the mixture. Leave aside to cool.
For the noodles, just boil in the water. When cooked, rinse with cold water and drain them with a colander. Rinse in cold water again, check if the water is murky. Once it is clear (usually 2 rinse will do the job), you can actually leave the noodles in the cold water. However, since I am bringing this to work, I drain the noodles dry (I added some oil when I boiled the noodles to avoid them sticking together).
An easy and simple meal to put together!
Happy cooking!~ それじゃ~~
Thursday, April 3, 2008
Rest In Peace
I just received a piece of sad news from my mom this morning. My gynae had passed away at age 68. Mom and I could not believe it. How could such a seemingly healthy and active person just pass away like that? This is a reminder of how fragile life is.
This sweet, old gentleman was my mom's gynae. I remember him as a soft spoken man with a big heart. He spent his free time doing volunteer work at the Old Age Home. With his experience and skills, he delivered Ah Girl. I am forever grateful to find that there were no marks or indentations on Ah Girl's head although he used vacuum assisted delivery. Especially so after seeing other babies' head in the nursery. When I was pregnant with Ah Boy, he felt that he might not be able to manage deliveries anymore due to his age. Hence, he co-managed my pre-natal care with his son, who joined his clinic.
When he was seated in his chair, he did not slouch. His back was always straight. He was very neat and professional in his appearance. He was always assuring, especially to new parents. You see his face lit up when he spoke of his grandchildren. He was still working on that very day, 1st April 2008, when his heart gave out. All the nurses at the clinic, like me, cannot believe/accept that he left just like that. The only comfort we have is that; it was quick and swift. He did not suffer.
He is a compassionate doctor. To me, he is more than a doctor. His passing is a great loss. Rest in peace, Doctor KM Seng. All of us, whom you have touched our lives, will remember you.
Wednesday, April 2, 2008
Emergency Fried Rice
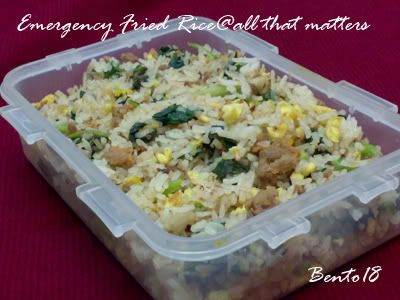
What do you do when you woke up too late to prepare lunch bento, have some slightly dried out rice, tired looking spinach and leftover hamburg from the previous pig-out? You make fried rice! 
Came home from work last night about 11 p.m. Found out that no one remembered to switch off the rice cooker. Leaving the teeny bit of rice, turning into 锅巴 inside the rice cooker. Top of my pet peeves include these; wasting food and electricity. Anyhow, no use getting angry over it. What's done cannot be undone. Kept the rice in the fridge and decide what to do with it later.
Time seems to fly by especially when one is tired and deprived of a decent sleep. I actually woke up at 7.10 a.m.!  I have to get out of the house by 7.50 a.m. so how? Rats, my helper forgot to cook rice for me. Damn, I forgot to wash and cut the vegetables the night before. Fortunately, there was still some hamburg left in the chiller. Very quickly, cut up the spinach with scissors and soak them.
 Take shower and change. Heat up the frying pan, fry an egg, add garlic, dump in the dried out rice, spinach and hamburg. It was all over in 10 minutes.
I'm eating this emergency fried rice as I'm blogging this. Surprisingly, the rice was not that hard. Must be the moisture from the vegetables. After some soaking, the spinach got back its crispness. I did not have to add any seasonings as the hamburg patty was already seasoned. Plus, previously, I have added Rosemary and Sage to it. I forgot if Oregano participated in the party patty though. All in all, I ended up with a satisfying lunch, without wasting any food.
One might say; why make life so difficult, just buy lunch lah! But then, I will have nothing to blog about right? Ahahahah.. At times like these, with all prices going against Newton's Law of Gravity, I try to save on whatever I can (salary remained stagnant). Packing your own lunch box makes economic sense and is environmental friendly. I do not use styrofoam/polypropylene boxes or disposable cutleries. In our tropical climate, I am guilty of enjoying air-conditioned environment. I can only play a very small small small part to help save Mother Earth that I reduce, recycle and reuse. I am also trying to educate my helper and Ah Girl to sort out the rubbish instead of dumping them all in 1 bag. This is not easy; as they say, old habits die hard. I do think that our awareness is still not enough. On and off, I still hear my neighbours throwing glass bottles down the chute. The recylce bins are almost non existent in my neighbourhood. First world country? Hah.. We still have a long way to go. 
それじゃ~~


